


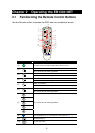


15
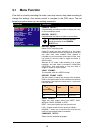
3.1 Menu Function
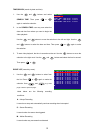
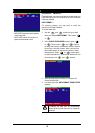
If the unit is currently recording the video, user may have to stop video recording to
change the settings. Use remote control to navigate in the OSD menu. The red
frame turns yellow when you are making a selection.
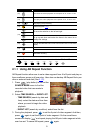
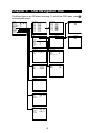
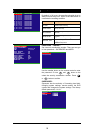
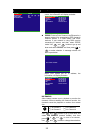
OSD MENU Description
123 4
123 4
D1
MPEG4
60
GOOD
ENGLISH
MAIN MENU
CAMERA SELECT
RECORD SELECT
RECORD MODE
VIDEO FORMAT
RECORD FRAMERATE
VIDEO QUALITY
RECORD SCHEDULE
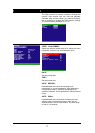
SUBMENU
HARD DRIVE SETUP
SENSOR SETUP
MOTION SETUP
NETWORK SETUP
USB BACKUP
LANGUAGE SETUP
CAMERA SELECT :
Enable/disable the channel number to display the video
on the surveillance screen
RECORD SELECT :
Enable/disable the channel number to record video
i
The channels which could be recorded
should be enabled in the CAMERA
SELECT first.
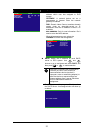
RECORD MODE :
Select D1/CIF recording mode
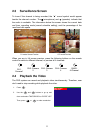
Under D1 mode, the video recording is in full screen
resolution and takes turns from one channel to the next
one when Auto Scan enables. Each channel is
recorded only at a maximum frame rate of 15fps. User
can switch to view the video in single full screen or
QUAD screen
Whereas in CIF mode, video recording is at a lower
resolution, but each video is recorded in 30fps/25fps
(NTSC/PAL). User can switch to view the video in
single full screen or QUAD screen
VIDEO FORMAT :
The recorded video is in MPEG4 format
RECORD FRAME RATE :
Set the number of frames per second to be recorded.
Refer to the table below for the available record frame
rate settings. The higher the frame rate is, it uses more
hard disk space
Video Standard
Record Mode
NTSC PAL
D1 60, 20, 4 48, 20, 4
CIF 120, 60, 40, 20, 4 100, 48, 20, 4
VIDEO QUALITY :
Select the video quality setting from BEST, HIGH,
MEDIUM, GOOD, NORMAL or LOW.
BEST – best record quality but less record hours
LOW – longest record hour but quality is ordinary
NORMAL – allows you to record more hours but the
quality of the recorded video is moderate.
LANGUAGE SETUP :
Select from the available languages