


34
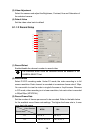
Name Function
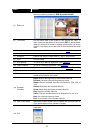
(11) Undo Delete the last action.
(12) Noise Reduce Adjust the softness and repair the damaged colours.
(13) Sharpness Improve the overall image by enhancing edges. This gives the
image more depth.
(14) Effects Gray Scale: convert the image into black and white (monochrome).
Normalize: adjust the brightness intensity.
Equalize: automatically adjust the images that are too dark.
De-interlace: smooth out the overlying frames.
Static: de-interlace for motionless scene.
Dynamic: de-interlace for moving scene.
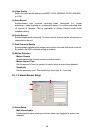
(15) Picture
Adjustment
Adjust the Brightness, Contrast, Saturation, Hue and Gamma.
(16) Original Screen Display the original state of the image.
(17) Temporary
Setting Block
Display the sample settings. Click the sample to apply the setting
on the current video.
(18) Status Bar Display the date, and time of the video.
(19) Progress Bar Show the progress of the file being played. You may move the bar
to seek at any location of the track.
(20) i-Stable To reduce the jolt in the recorded video.(also see Chapter 7.1)
(21) Add Setting Include the new setting to the temporary setting block.
(22) Rename Change the name of the selected setting in the temporary setting
block.
(23) Delete Permanently remove the selected setting in the temporary setting
block.
(24) Load Setting Call the saved settings.
(25) Save Setting Store the settings in the temporary setting block.
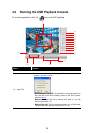
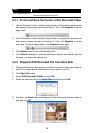
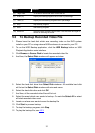
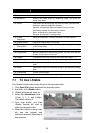
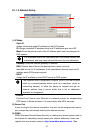
7.1 To Use i-Stable
The i-Stable function can reduce the jolt in the recorded video.
1. Click Open File button and select the recorded video.
2. And then, click i-Stable button.
3. i-Stable windows will show up.
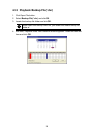
4. Select the smoothness level –
1(Low), 2, 3, 4, and 5(High).
The default value is 3.
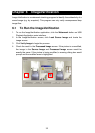
5. Click Play button, and then
i-Stable function will start to
initial the recorded video.
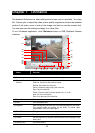
6. When the initialize is done, user
will see the original and
stabilized recorded video play in
two windows.