


4
Installing the stand or wall-mount bracketDX-32L221A12/DX-40L260A12
Installing the stand or
wall-mount bracket
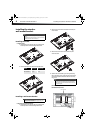
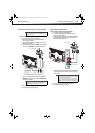
Installing the stand
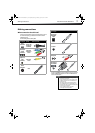
To install the stand:
1 Carefully place your TV screen face-down on a cushioned, clean
surface to protect the screen from damages and scratches.
2 Secure the stand to the screen with the four provided screws.
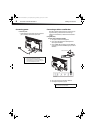
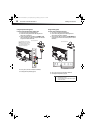
Installing a wall-mount bracket
To attach your TV to a wall-mount bracket:
1 Carefully place your TV screen face-down on a cushioned, clean
surface to protect the screen from damages and scratches.
2 Remove the four screws that secure the base to the stand, then
remove the base.
3 Remove the four screws that secure the stand column, then
remove the column.
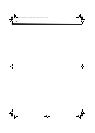
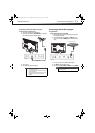
4 Attach the wall-mount bracket to your TV using the mounting
holes on the back of your TV. See the instructions that came with
the wall-mount bracket for information about how to correctly
hang your TV.
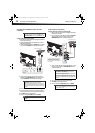
DX-32L221A12 (32-inch)
DX-40L260A12 (40-inch)
Notes
If you plan to wall-mount your TV, do not install the
stand.
Store the stand and stand screws in case you want to
decide to use the stand in the future.
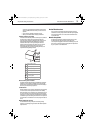
Model Screw type Screw length
DX-32L221A12 Q4 type 25 mm
DX-40L260A12 Q4 type 25 mm
Warning
This apparatus is intended to be supported by a UL
Listed wall mount bracket.
Note
The length of the wall-mount screws vary depending
on the wall-mount bracket you purchased. See the
instructions that came with the wall-mount bracket
for screw lengths.
7.84 in. (200 mm)
7.84 in. (200) mm)
Wall mount brackets
DX-32L221A12-DX-40L260A12_11-0101_MAN.book Page 4 Monday, April 18, 2011 1:22 PM