Using your T
2 Connect one end of a mini-plug audio cable to the
AUDIO LINE OUT jack on the computer, then connect the other
end of the cable to the VGA AUDIO IN jack on the back of your
TV.
3 Press INPUT. The Input Source menu opens.
4 Select VGA, then press ENTER to confirm.
Notes:
The on-screen displays will have a different appearance in PC mode than
in TV mode.
If there is no video signal from the computer when the unit is in PC mode,
“No signal” will appear on the TV screen.
Using your TV
To use your TV:
1 Plug in your TV (see “Connecting to AC power” on page 8).
2 Press POWER.
Warning: When you press POWER to turn off your TV, your TV goes
into Standby mode. It is still receiving electrical power. To completely
disconnect power, unplug the power cord.
Note: When your TV does not receive a signal and you do not press any
buttons for several minutes, your TV goes into Standby mode.
3 Adjust the volume by pressing VOL+ or VOL-. You can also press
MUTE to switch off the sound. The TV’s sound will be turned off
and “Mute” will appear on the screen. The sound can be turned
back on by pressing this button again.
4 Set the signal type to the appropriate position (see “To select the
signal type:” on page 12).
5 Select a channel by pressing and releasing CH + or –. The
channel automatically stops at the next channel set into
memory. See “Memorizing channels” on page 12.
- OR -
Select a channel by pressing the number buttons (0-9, •).
To select analog channels:
•1-9: Press 1-9 as needed. For example, to select channel 2,
press 2.
• 10-99: Press the two digits, in order. For example, to select
channel 12, press 1, 2.
• 100-125: Press the three digits, in order. For example, to
select channel 120, press 1, 2, 0.
To select digital channels:
• Press the major channel number, then press the • button,
followed by the remaining number. For example, to select
channel 15.1, press 1, 5, •, 1.
- OR -
Press CH.LIST (for a list of all memorized channels) or FAVORITE
(for a list of your favorite channels), then press or to select
the channel you want to watch and press ENTER to go to that
channel. If either list has more than one page, you can scroll
through the pages by pressing or .
- OR -
Press RECALL to go back to the last channel you were watching.
Press RECALL again to return to the original channel.
6 Select the video input source by pressing INPUT, then press or
to select the input, then press ENTER. You can select TV, AV,
S-Video, Component, HDMI, or VGA, depending on which
input jacks you used to connect your devices and which devices
are connected.
You can also select the input source directly by pressing TV,
VIDEO, COMP, or HDMI.
7
Press DISPLAY to display information about the program on the
screen.
• Digital information includes channel number, station name,
channel label (if preset), broadcast program name, TV rating,
signal type, audio information, resolution, CC mode, current
time, current program start, and end play times.
• Analog information includes channel number, channel label
(if preset), signal type, audio information (Stereo or SAP or
Mono), and resolution.
Note:
The information contents may vary depending on the broadcaster and
your setting.
Press DISPLAY again to clear the display, or wait a few seconds
and the TV returns to normal operation automatically. You can
also press GUIDE to show the program guide information.
8 Press SLEEP on the remote control to set the TV to turn off after a
specified interval. To cancel the sleep timer, press SLEEP
repeatedly until the display turns to Off.
Setting up for the first time
The first time you turn on your TV, you need to select a language for the
on-screen menus and scan for available channels.
Setting the on-screen language
To set the on-screen language:
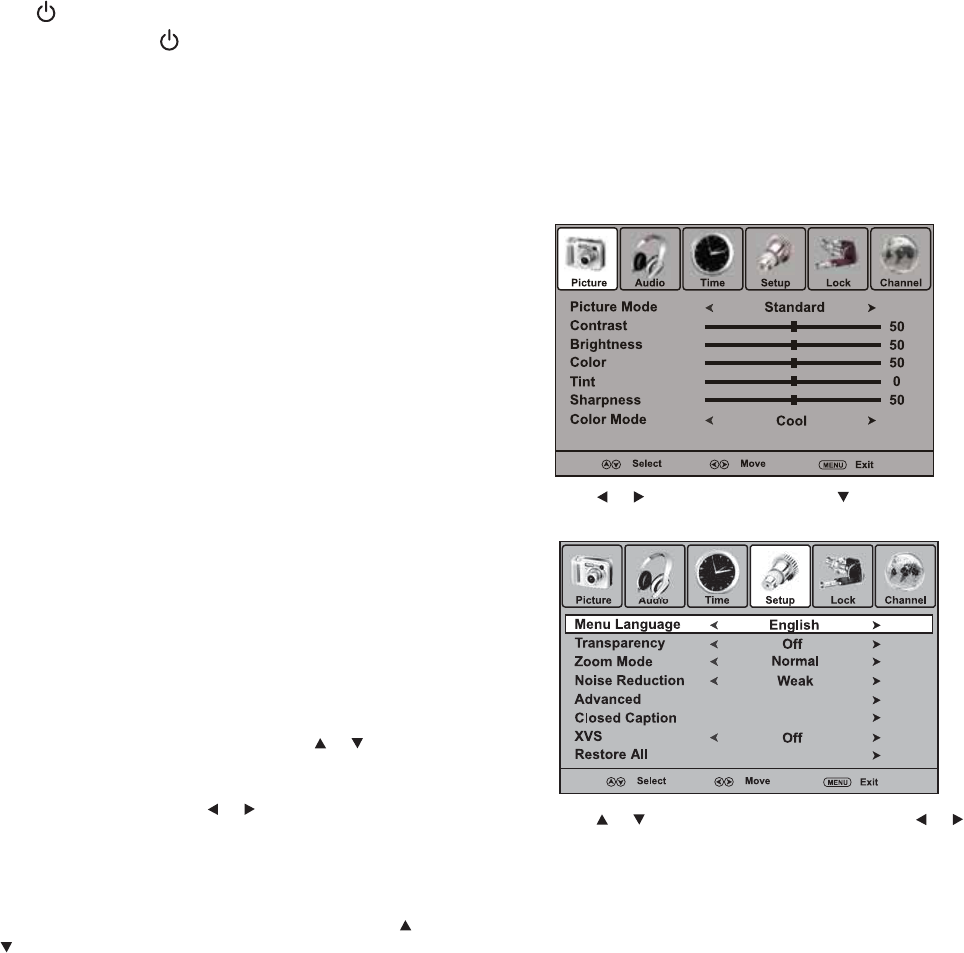
1 Press MENU. The Picture menu opens.
2 Press or to select Setup, then press . The Setup menu
opens.
3 Press or to select Menu Language, then press or to
select English, Spanish (Español), or French (Français).
4 Press EXIT to return to normal viewing.
