


14
Using the TV
Adjusting the computer image
To adjust the computer image:
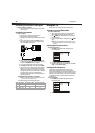
1 While in VGA mode, press MENU, then press CH+ or CH–
repeatedly until the Video menu appears.
2 Press VOL+ or ENTER to open the Video menu.
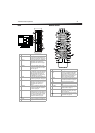
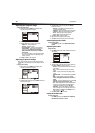
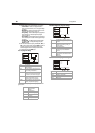
3 Press CH+ or CH– to select an option. You can select:
• Brightness—Adjusts the brightness.
• Contrast—Adjusts the contrast.
• Color Temperature—Adjusts the color temperature.
• Advanced Video—Opens the Advanced Video menu
where you can adjust DNR, Black Level Extender,
White Peak Limiter, CTI, Flesh Tone, and Adaptive
Luma Control.
• PC—Opens a menu where you can adjust advanced video
options. For more information, see “Adjusting PC picture
settings” on page 14.
4 Press VOL+ or VOL– to adjust the option.
Adjusting PC picture settings
When you are using a PC with your TV, a special PC option becomes
available that lets you optimize your TV’s picture settings for use with
the PC.
To adjust PC picture settings:
1 While in VGA mode, press MENU, then press CH+ or CH–
repeatedly until the Video menu appears.
2 Press VOL+ or ENTER to open the Video menu.
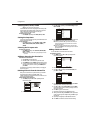
3 Press CH+ or CH– to select PC, then press ENTER to confirm. The
PC Video sub-menu opens.
4 Press CH+ or CH– to select an option, then press ENTER to
confirm. You can select:
• Auto Sync—Press VOL+ to automatically adjust the
settings for optimum PC viewing.
• H Position—Adjusts the horizontal position of the picture.
• V Position—Adjusts the vertical position of the picture.
• Phase—Adjusts the phase setting of the picture.
• Clock—Adjusts the clock setting of the picture.
5 Press VOL+ or VOL– to adjust the setting.
6 Repeat Steps 4 and 5 to adjust the other settings.
7 Press EXIT to close the menu and return to normal viewing.
Selecting the picture mode
To select the picture mode:
• Press PICTURE repeatedly to select Mild, Standard, Vivid, or
Custom.
Adjusting the audio
To adjust the audio:
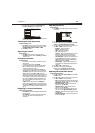
1 Press MENU, then press CH+ or CH– repeatedly until the Audio
menu appears.
2 Press VOL+ or ENTER to open the Audio menu.
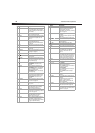
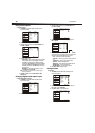
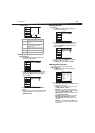
3 Press CH+ or CH– to select the option you want to adjust, then
press VOL+ or ENTER to confirm. You can select:
• Balance—Adjusts the balance between the left and right
audio channels.
• Bass—Increases or decreases the level of low-pitched
sounds.
• Treble—Increase or decreases the level of high-pitched
sounds.
• Sound Surround—Turns simulated surround sound On or
Off.
• Mode—Selects the audio mode. You can select Off,
Concert, Living Room, Hall, Bathroom, Cave, Arena, or
Church.
• Equalizer—Selects the equalizer mode. You can select Off,
Rock, Pop, Live, Dance, Techno, Classic, or Soft.
• AVL—Automatically adjusts the volume between different
broadcasters, or example, adjusts the volume between a
program and commercials. You can select On or Off.
• Audio Only—Turns the video off. When you select this
option, a message asks you to confirm your selection. Press
VOL+ or VOL– to select OK, then press ENTER. To see the
video again, press POWER.
4 Press VOL+ or VOL– to adjust the option.
Select the audio mode
To select the audio mode:
• Press AUDIO repeatedly to select Off, Concert, Living Room,
Hall, Bathroom, Cave, Arena, or Church.
Video
Mode Custom
Brightness
Contrast
Color Temperature
Advanced Video
PC
50
50
Select
BackAdjust
EXIT
CH+/-
VOL+/-
Video
Audio
Lock
Function
ENTER
Audio
Balance
Bass
Treble
Sound Surround On
Mode O
Equalizer O
AVL O
Audio Only
0
50
50
Video
Audio
Channel
Lock
Function
Select
BackAdjust
EXIT
CH+/-
VOL+/-
ENTER