RCP 2000 with ISS 506 Support • Ethernet Control
Ethernet Control
RCP 2000 with ISS 506 Support • Ethernet Control
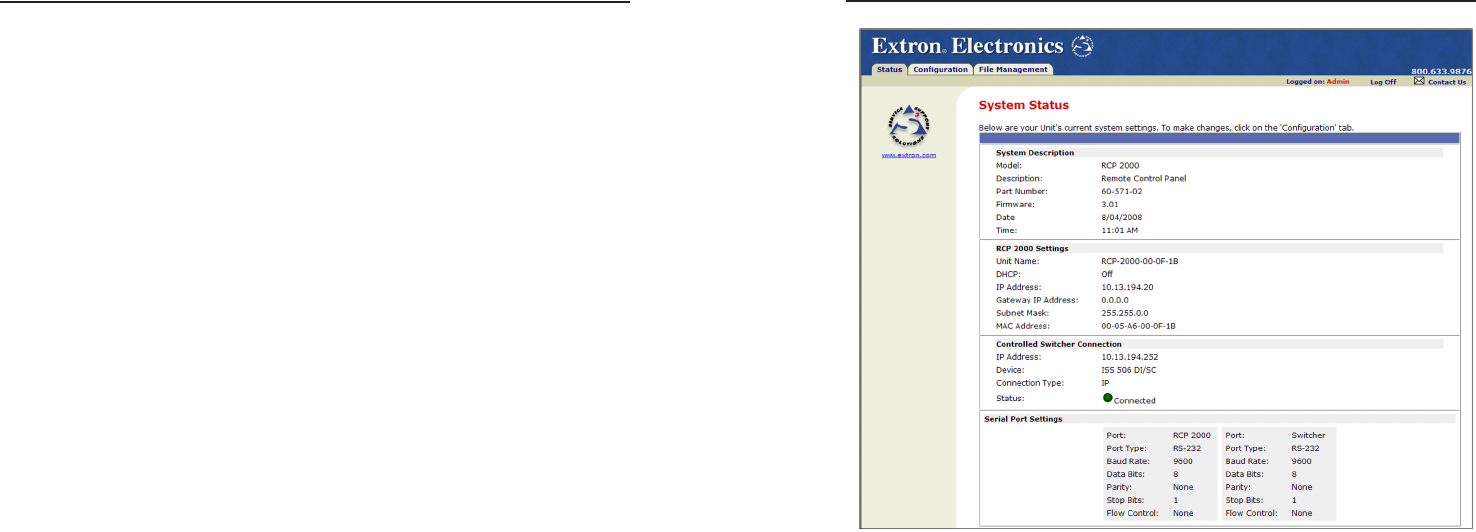
RCP 2000 System Status screen
4. When nished viewing, click Log Off in the upper-right
corner of the screen to exit the system.
Using the Configuration Screens
When the Conguration tab is selected, two Conguration
Web pages are listed in the sidebar menu at the left of the
Conguration tab. The following sections describe the changes
you can make from these screens.
System Settings screen
The System Settings screen lets you review the conguration
of the RCP unit, change the IP settings and adjust the date and
time. It also enables you to access the Web pages for the ISS 506
switcher. (See the illustration on the next page.)
The RCP 2000 Web pages allow you to control the RCP via
Ethernet. They also enable the RCP to control a networked
ISS 506 switcher.
Establishing a Connection
The resident Web pages are an alternative means of
communication with, and control through, the RCP unit. The
Web pages are accessed via a Web browser, such as Internet
Explorer (version 5.5 or higher).
The computer that is used to access the Web server must have
a connection in common with the RCP unit. For example, if the
unit is connected to your local intranet, the computer that is used
to access the unit must also be connected to your local intranet.
Similarly, if the unit is connected only to the Internet, the
computer that is used to access the unit must have an Internet
connection.
If you have established passwords for the unit, you are shown
a Password window when your browser accesses the RCP unit.
Your level of control over the unit depends on the password you
enter on this password screen. If you enter the administrator
password, you are permitted to congure or change all settings.
If you enter a user password, you are permitted only to control
A/V devices and to view status.
Logging On and Viewing System Status
The RCP 2000 Web page has three tabs that you can select to
display different screens. When you rst log on and access the
RCP Web site, the Status tab is selected. The Status tab contains
the System Status screen, which provides information on your
RCP’s current settings. Changes to these settings can be made
via the Conguration tab or the RCP 2000 front panel.
1. Double-click the Web browser icon on your Windows
desktop to launch your Web browser.
2. Enter the IP address of the unit (see “Setting Up IP
Communication,” in chapter 2, “Installation”) in the
address eld at the top of the screen, and press the Enter
key. The Password window opens if a password has been
set. (This does not happen the rst time you access the
interface, because no password is set at the factory).
3. Enter the appropriate password (if required). The System
Status page opens, showing the current RCP IP address, the
switcher IP address, and other settings of the unit.


