


Notes:
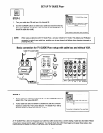
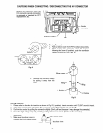
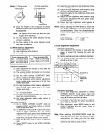
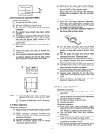
(1) Fixing screw (2) Color aberration
FIXING SCREW COLOR ABERRATION
CROSS-HATCH
(3) Since the G light is very important for picture
quality and performance, pay special attention in
its adjustment.
Note:
Be careful not to touch the lens with your
fingers when adjusting.
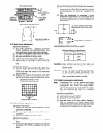
(4) For red, setting to the center between red and
crimson is optimum.
(5) For blue, setting to the center between purple
and green is optimum.
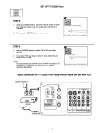
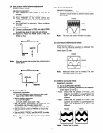
2.2 White balance adjustment
(1) Screen adjustment
(2) High brightness white balance.
(3) Low brightness balance.
Adjustment preparation
(1) Start adjustment 20 minutes or more after the
power is turned on.
(2) The vertical incident illumination on the screen
should be 20 lux or less.
(3) Set the video settings (CONTRAST: MAX,
others: center) to standard condition
(4) For low brightness white balance adjustment,
input a white raster signal level of 0.145 Vp-p
(Video input level).
(5) For high brightness white balance adjustment,
input a white raster signal level of 0.715Vp-p
(Video input level).
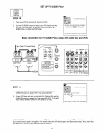
(6) Set the drive adjustment VRs (red and green) to
12 - 2 o’clock position.
(7) Turn the screen adjustment VRs (red, green and
blue) fully counterclockwise.
(8) Set video advanced setting white control to
COOL position.
Adjustment procedure
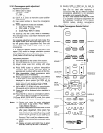
(1) Go to VIDEO CHROMA ADJUST mode by
pressing INPUT and Power button on Control
Panel at the same time.
(2) In “SERVICE” mode push b button and screen
turns to black. Gradually turn the screen
adjustment VRs (red, green, blue) clockwise and
set them where the red, green and blue slightly
bright lines just appear evenly on the screen.
(3) Push the b button again to return to “Normal”
side.
(4) Press “MENU” button to exit VIDEO CHROMA
ADJUST.
(5) Select the input signal for high brightness (Video
level = 0.715Vpp).
(6) Adjust the high brightness white balance using
the drive adjustment VRs (red, green).
(7) Select the signal for low brightness (Video level
= 0.145Vpp)
(8) Adjust the low brightness white balance using
the screen adjustment VRs (red, green, blue).
(Visually adjust).
(9) Check that high brightness white balance is
obtained. If it does not, return to step (7).
NOTE:
Before adjusting the White Balance, check that
the screen adjustment VRs are turned fully
counterclockwise. Since the phosphorescent
surface of the CRT is likely to be burned, be
careful.
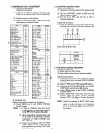
White balance = 9300” K f OMPCD
Color coordinate = x . . . . . . 0.285
Y
. . . . . . 0.295
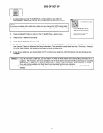
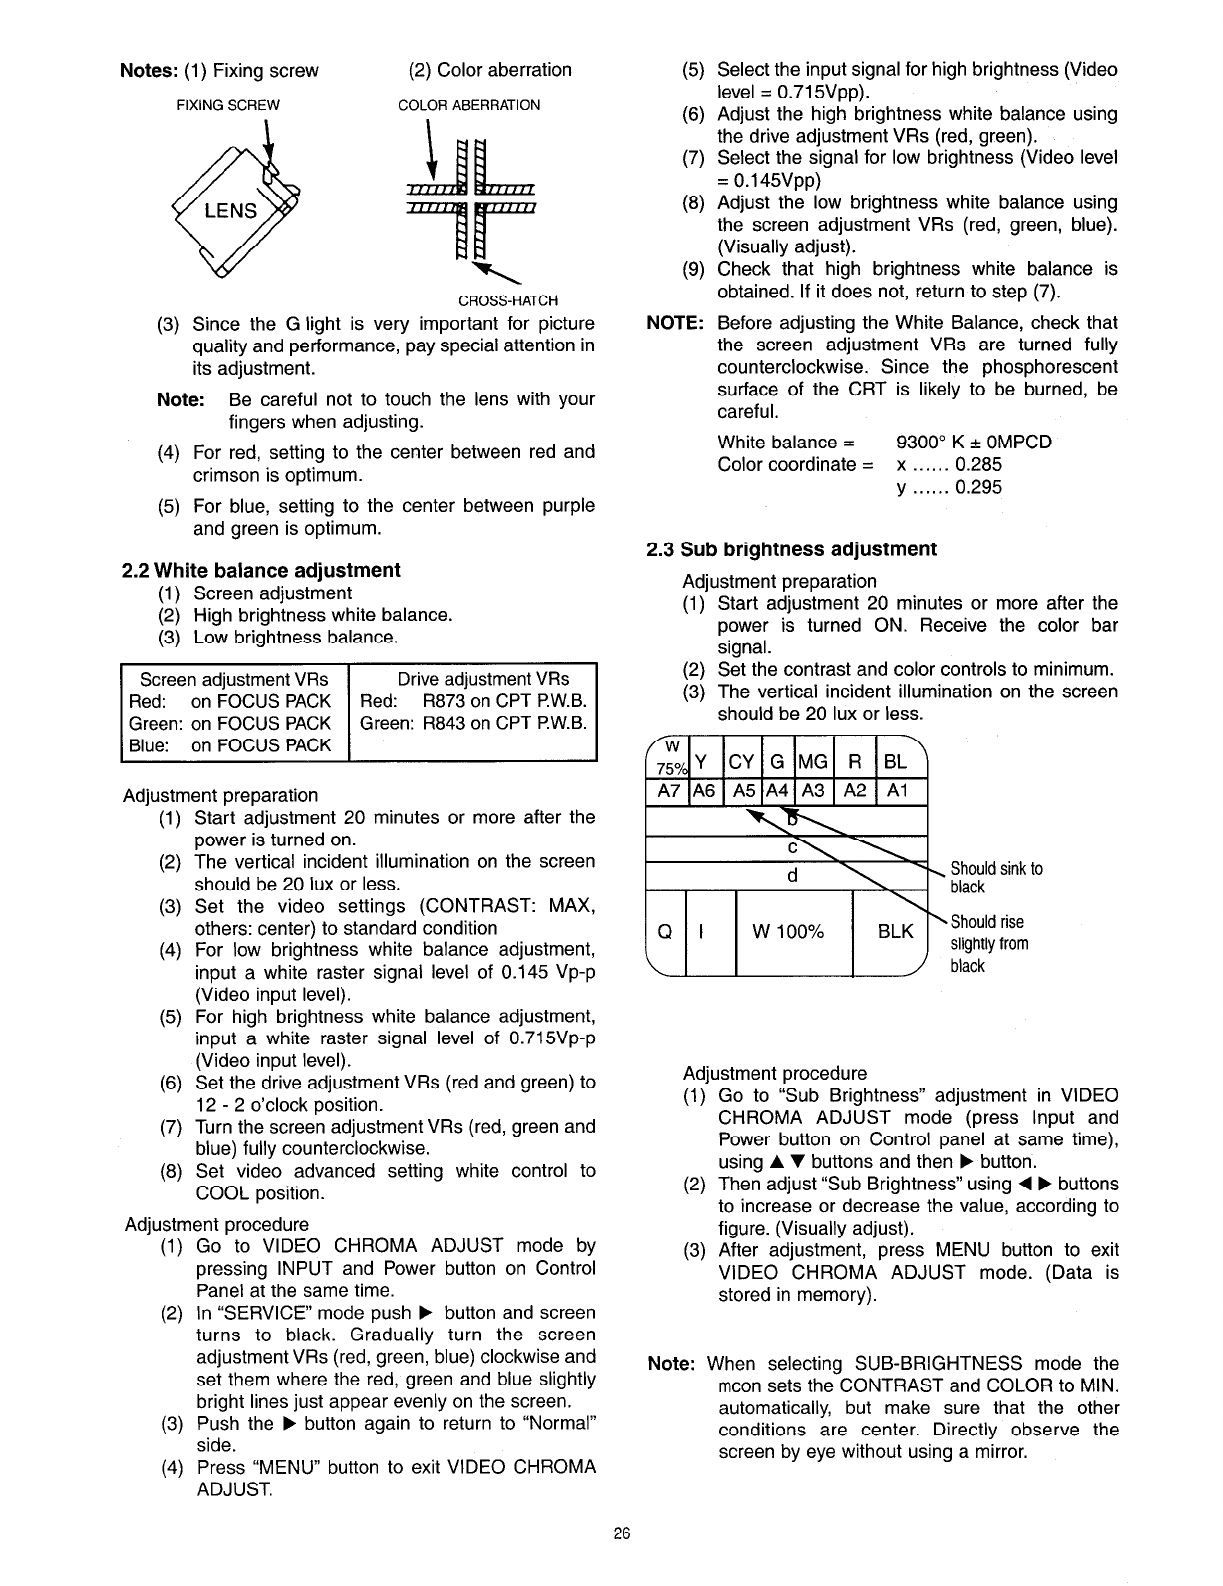
2.3 Sub brightness adjustment
Adjustment preparation
(1) Start adjustment 20 minutes or more after the
power is turned ON. Receive the color bar
signal.
(2) Set the contrast and color controls to minimum.
(3) The vertical incident illumination on the screen
should be 20 Iux or less.
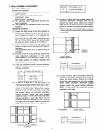
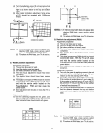
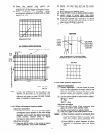
\ 1 1 1 / black
Adjustment procedure
(1) Go to “Sub Brightness” adjustment in VIDEO
CHROMA ADJUST mode (press Input and
Power button on Control panel at same time),
using A v buttons and then b button.
(2) Then adjust “Sub Brightness” using 4 b buttons
to increase or decrease the value, according to
figure. (Visually adjust).
(3) After adjustment, press MENU button to exit
VIDEO CHROMA ADJUST mode. (Data is
stored in memory).
Note:
When selecting SUB-BRIGHTNESS mode the
mcon sets the CONTRAST and COLOR to MIN.
automatically, but make sure that the other
conditions are center. Directly observe the
screen by eye without using a mirror.