


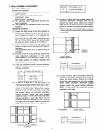
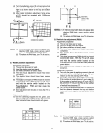
2.14.3 Convergence point adjustment
Adjustment preparation
(1) Select color to adjust.
“RECALL’ - Green
“0” - Red
“INPUT” - Blue
(2) Use 4, 6, 2, and 5 to move the cursor position
(dotted lines).
(3) Use cursor buttons to move the convergence
point.
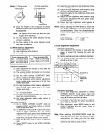
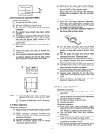
(4) Three adjustment modes are available:
1. (3x3) Press “RECALL’ 5 times
2. (7x5) Press “0” 5 times
3. (13x9) Press “INPUT” 5 times
For touch-up, only the (13x9) mode is necessary.
This will adjust every cross-hatch intersection point
on the screen.
For complete adjustment, start with (3x3) mode. This
will adjust center point and eight edge points only,
but will greatly reduce adjustment time. Then use
(7x5) mode, and finally (13x9) mode to finish
convergence.
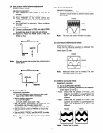
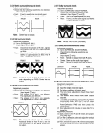
If “S” distortion appears between cross-hatch lines
repeat (7x5) mode to change calculation process
while adjusting to remove distortion, then return to
(13x9) mode to finish touch-up convergence.
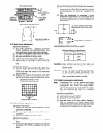
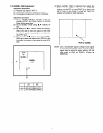
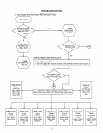
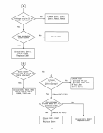
Adjustment procedure
(1) Start adjustment at the center of the screen.
(2) Continue adjustment at next closest position.
(3) Adjust center area first, ending with edge
sections.
(4) Press INFO button to perform interpolation
operation. This process will take about 15
seconds and no picture will be seen at this time.
(5) After interpolation, check convergence again
and repeat (l)-(5) if necessary.
(6) When convergence is acceptable, press MOVE
to write data to ROM memory. ROM WRITE? is
displayed to alarm system that ROM will be
overwritten with new data. Press the MOVE
button again to write displayed data to ROM.
(7) DATA WRITE TO ROM will take approximately
20 seconds and no picture will be displayed.
(8) Green dots will be displayed when operation is
complete.
(9) Press MUTE to return to convergence pattern,
then confirm again convergence is acceptable.
(lO)Press MOVE (ROM WRITE) mode, then press
PIP CH to initialize sensor data positions.
Notes:
(1) Display only green for easier adjustment
and match to jig screen. Press “MENU”,
THEN PRESS “RECALL’.
(2) Perform interpolation and data write to ROM
after green adjustment. Once green has
been confirmed to match jig screen, the jig
screen can be removed. Do not readjust the
green color after jig screen has been
removed. This is now your reference color.
(3) Display green and red only and match red to
green.
(4) Display all colors and match blue to green
and red. Touch-up red color if necessary.
33
(5) Existing DATA in ROM can be read by
pressing the SWAP button 2 times. This
data can be used after replacing a
component (CRT, DY, etc.) Where complete
convergence adjustment is not necessary
be careful not to overwrite this data.
DO NOT write cleared RAM data into ROM
or a complete convergence adjustment will
be necessary. Remember to try MAGIC
FOCUS before starting convergence
adjustment to minimize adjustment time.
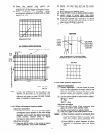
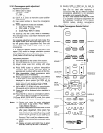
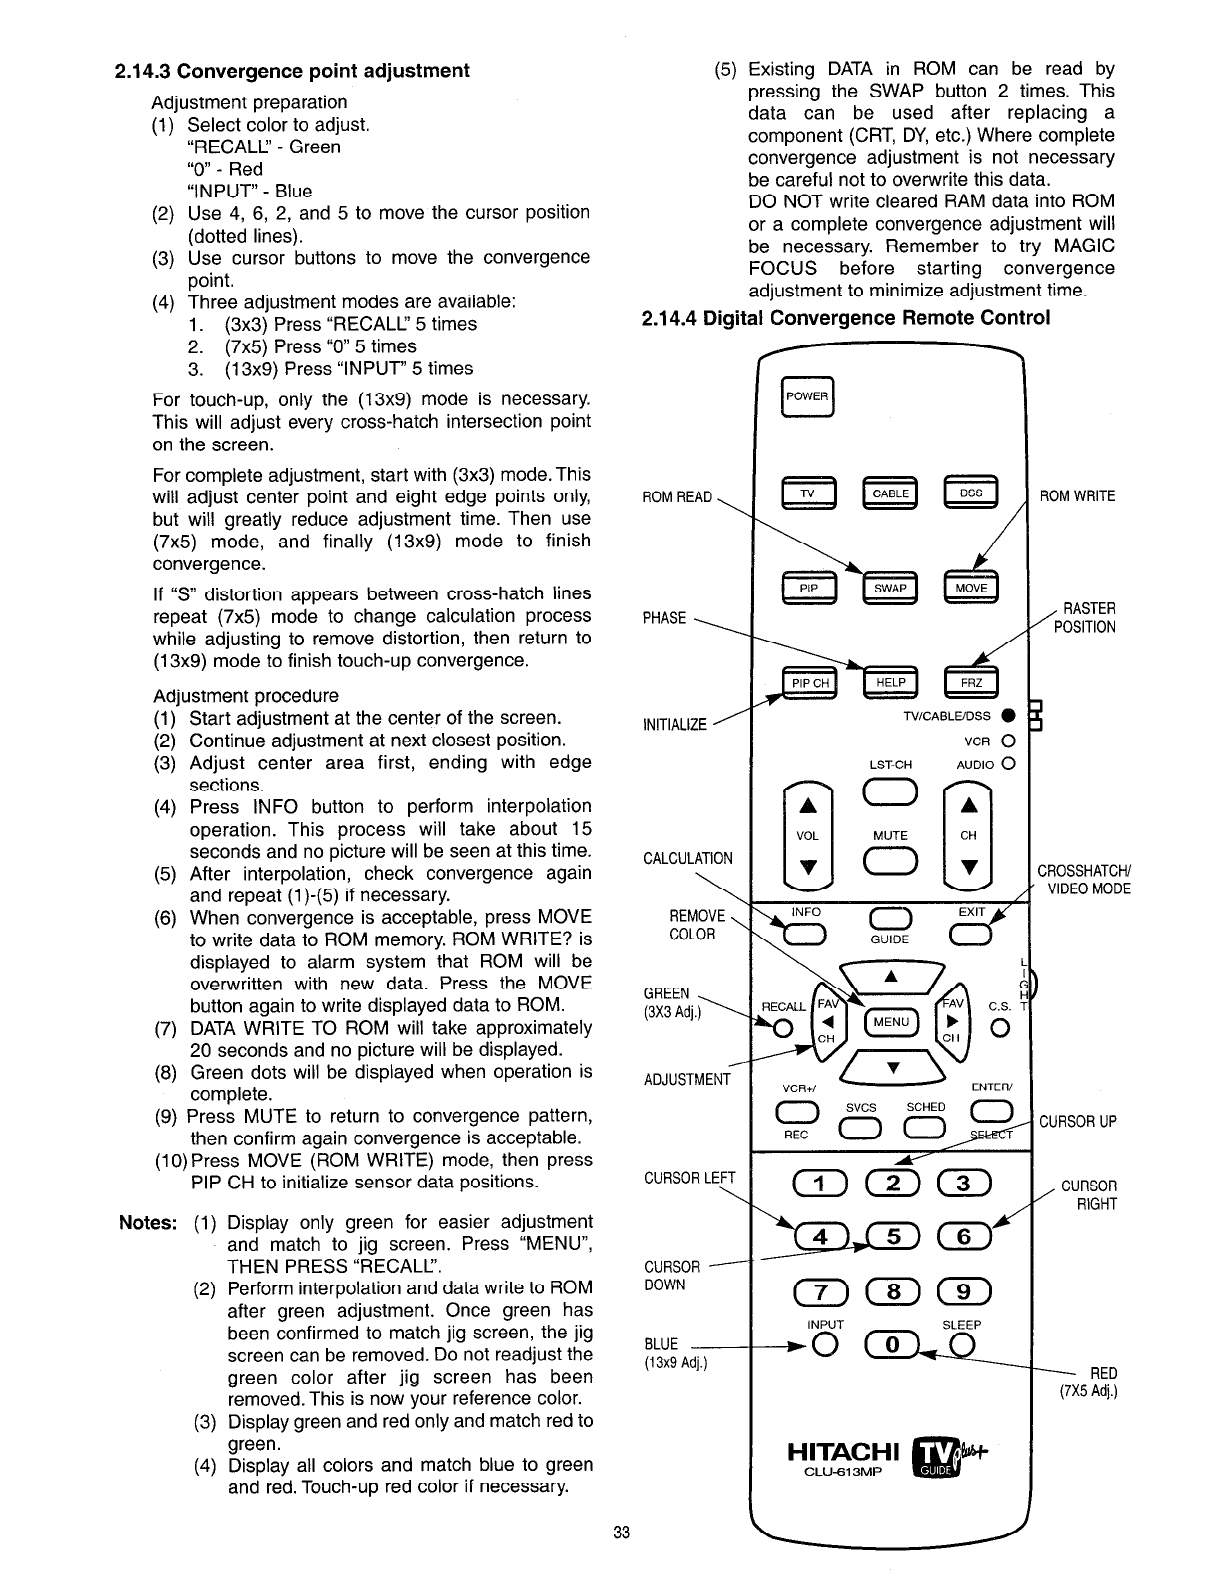
2.14.4 Digital Convergence Remote Control
ROM READ \
PHASE ,
INITIALIZE ’
CALCULATION
\
REMOVE \
COLOR
ADJUSTMENT
CURSOR LEFT
\
CURSOR -
DOWN
BLUE -
(13x9 Adj.)
0
POWER
TV/CASLUDSS @
VCR 0
AUDIO 0 LST-CH
I
0
MUTE
0
A
Cl
CH
v
VCR+/ -
ENTER/
INPUT
SLEEP
-+o (0
HITACHI
m
?oL”Qt
CLUSl3MP
.
ROM WRITE
, RASTER
POSITION
CROSSHATCH/
VIDEO MODE
CURSOR UP
, CURSOR
RIGHT
- RED
(7X5 Adj.)