


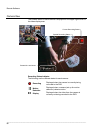

Remote Software
______________________________________________________________________________________________
76
Configuring the DVR
1. Press the SETUP key on the front of the DVR or remote control to log in.
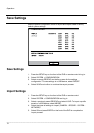
2. Select NETWORK > NETWORK CONFIGURATION (see the Network
Configuration section of this manual for more details).
3. Change port settings or write down current port settings.
4. Select DHCP or STATIC IP depending on your network (Ask your
network administrator for assistance).
5. If STATIC IP is selected - define the IP address and additional network
information.
6. If DHCP is selected - write down the IP address supplied by the DVR
system.
Note If the DVR does not display the IP Address after setting DHCP to
ON, Select Save to change the network and open Network
Configuration again.
7. Select SAVE to save current settings.
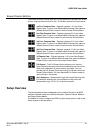
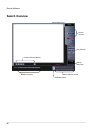
Creating a DVR Connection with Remote Software
1. Install the Remote Software on a PC using the disc provided with your
DVR.
2. Open the Remote Software. The Local Setup window will open
automatically.
3. Click New.
4. Select HRDP H.264 or HRDPX H.264 as the Site Type.
5. Enter a name for the system in the Site Name box.
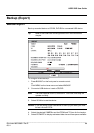
6. Enter the IP address of the DVR - found in NETWORK > NETWORK
CONFIGURATION on the DVR.
7. Enter the Port number found in NETWORK > NETWORK
CONFIGURATION on the DVR (default is 4000).
8. Click OK.
9. Enter the user name and password of an authorized user as defined in
SYSTEM > USER CONFIGURATION on the DVR.
Note User Name and Password are both case sensitive.
10. Click Connect.