


6
NS-19E450A11/NS-19E450WA11/NS-22E450A11/NS-22E455C11 Insignia 19"/22" LED-LCD HD TV
www.insigniaproducts.com
Back
Note
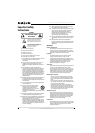
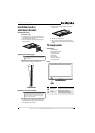
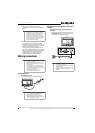
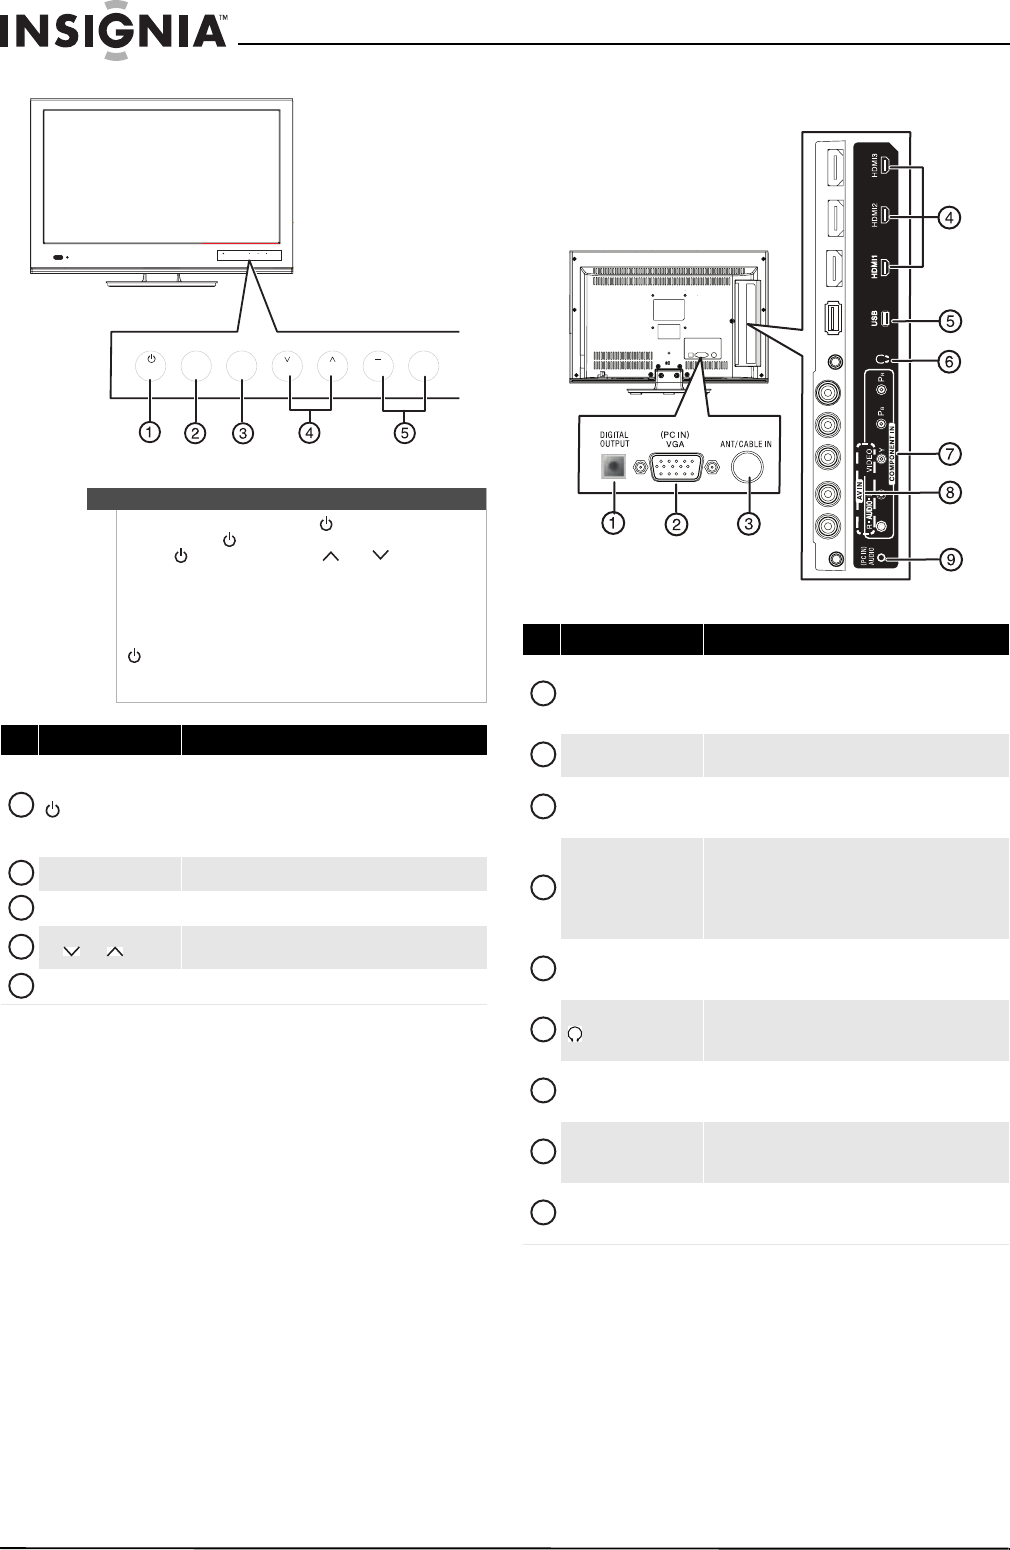
To turn on your TV using the (power) button on
your TV, press . Your TV turns on and the button
labels ( , INPUT, MENU, CH /CH , and
VOL+/VOL–) light on the front of your TV. A “Please
Wait” message appears for a few seconds, then your
TV displays the normal TV broadcast.
If your TV is turned on and the button labels on the
front of your TV are not lit, press any button except
to light the button labels. Then press the button
you want. Button presses must be within 10 seconds
of each other.
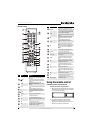
# Item Description
(power)
Press to turn on your TV. Press again to put your TV in
standby mode.
When your TV is in standby mode, power still flows
through it. To completely disconnect power, unplug
the power cord.
INPUT Press to select the video input source.
MENU Press to open the on-screen menu.
CH /CH
Press to go to the next or previous channel in the
channel list.
VOL–/VOL + Press to decrease or increase the volume.
INPUTMENU
CH VOL
+
INP UT
MEN U
CH VO L
+
1
2
3
4
5
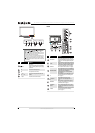
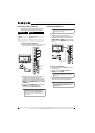
# Item Description
DIGITAL OUTPUT
Connect a digital optical sound system to this jack to
send the TV audio through the sound system. For more
information, see “Connecting a digital sound system”
on page 13.
PC IN VGA
Connect the video for a computer to this jack. For more
information, see “Connecting a computer” on page 12.
ANT/CABLE IN
Connect an antenna, cable TV, or satellite TV box to
this jack. For more information, see “Connecting an
antenna or cable TV without a cable box” on page 9.
HDMI1/HDMI2/HDMI3
Connect an HDMI devices to this jacks. An HDMI cable
carries both video and sound. You do not need to make
an audio connection for an HDMI device.
For more information, see “Connecting an HDMI
device” on page 10.
USB
Connect a USB device, such as USB flash drive, to this
jack. For more information, see “Connecting a USB
device” on page 12.
(headphone)
Connect headphones to this jack. For more
information, see “Connecting headphones” on
page 13.
COMPONENT IN
Connect the video for a component video device to
these jacks. For more information, see “Connecting a
component video device” on page 11.
AV IN VIDEO and
L/R AUDIO
Connect a composite video device, such as a VCR, to
these jacks. For more information, see “Connecting a
VCR” on page 11.
PC IN AUDIO
Connect the audio for a computer or DVI device to this
jack. For more information, see “Connecting a
computer” on page 12.
1
2
3
4
5
6
7
8
9