27
Using the Menus
NOTE: The on-screen menu may not be displayed correctly while interlaced
motion video image is projected.
1. Press the "Menu" button on the remote control or projector cabi-
net to display the Advanced Menu or Basic/Custom Menu.
NOTE: When using a USB mouse, click the mouse button to display the
menu. For other operations, do the same way as you use your PC mouse.
2. Press the ▲ or ▼ button on the remote control or the projector
cabinet to highlight the menu for the item you want to adjust or
set.
3. Press the ᮣ button or the "Enter" button on the remote control or
the projector cabinet to select a submenu or item.
4. Adjust the level or turn the selected item on or off by using ᮤ or ᮣ
button on the remote control or the projector cabinet. The on-screen
slide bar will show you the amount of increase or decrease.
5. Changes are stored until you adjust it again.
ENTER ...... Stores the setting or adjustments.
CANCEL ... Return to the previous screen without storing settings
or adjustments.
6. Repeat steps 2-5 to adjust an additional item, or press "Cancel" on
the projector cabinet or the remote control to quit the menu dis-
play.
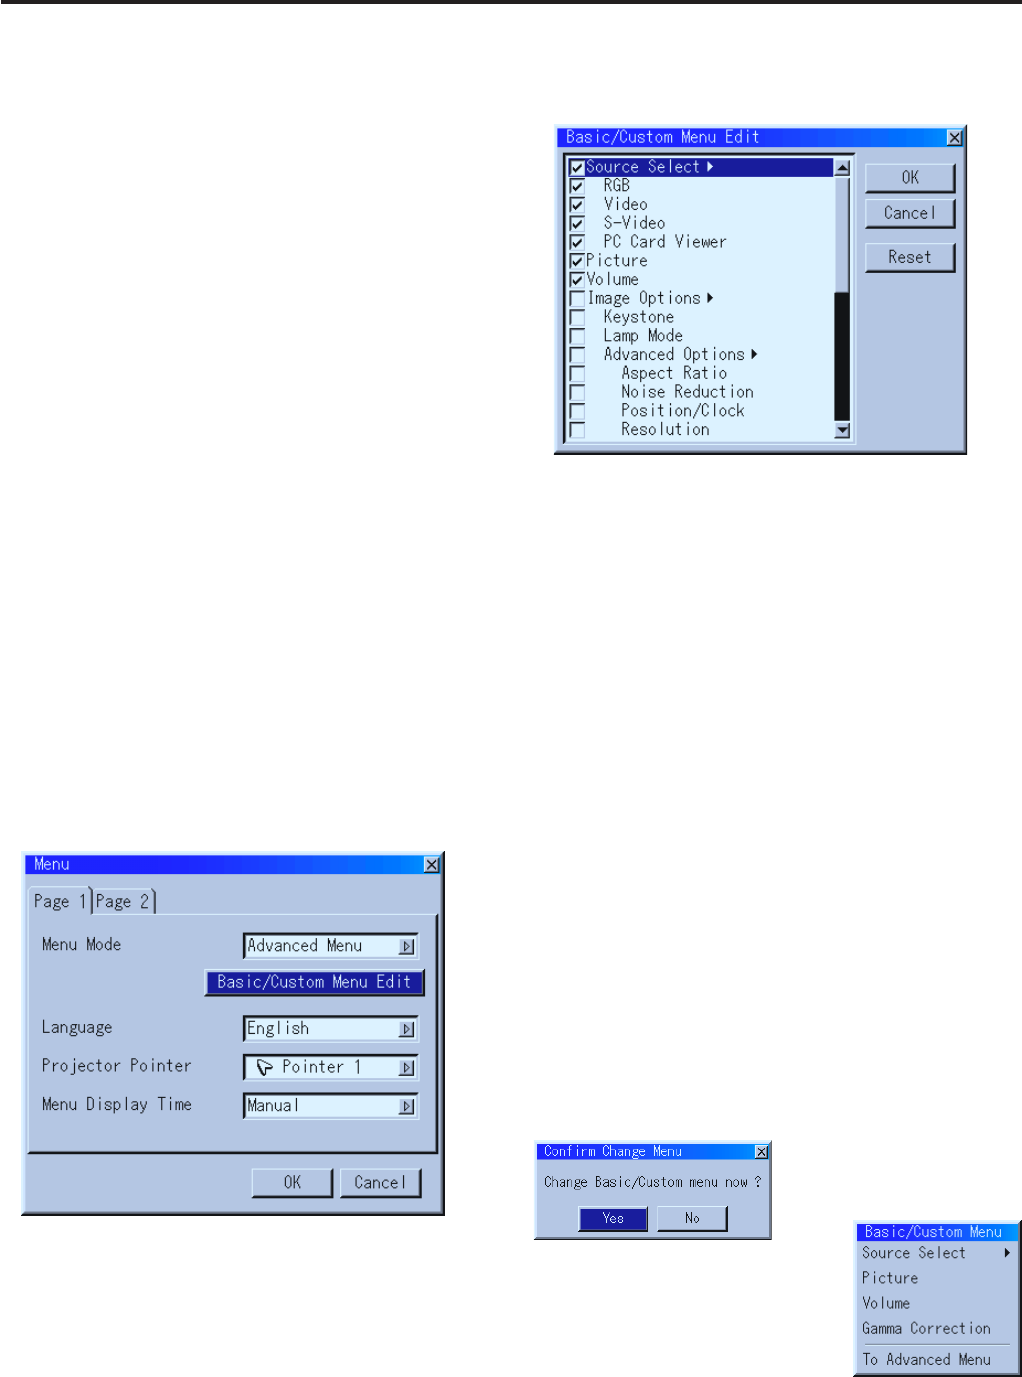
Customizing Basic/Custom Menu
The Basic/Custom menu can be customized to meet your require-
ments. Selecting a menu item from the “Basic/Custom Menu Edit”
list, allows you to custom tailor the menu items to your needs.
1. Select “Basic/Custom Menu Edit” to display the “Basic/Custom
Menu Edit” screen.
2. Use the ▲ or ▼ button to highlight your selection and press the
Enter button to place a check mark next to an option. This action
enables that feature.
Press the Enter button again to clear the check box.
If you select an item with a solid triangle ᮣ and press the Enter
button on the remote control or the projector cabinet, you can en-
able all the items within that submenu.
Also you can turn on an item within the submenu without placing
a check mark on the main menu item.
NOTE: Up to 12 main menu items (within Basic/Custom Menu Edit, not
including submenu items) can be selected.
3. In order for the changes to take effect, use the ᮤ or ᮣ button on
the remote control or the projector cabinet to highlight “OK”, then
press the Enter button. To cancel the changes, use the ▲ or ▼
button to highlight “Cancel” and press the “Enter” button. To re-
turn to the factory default, select “Reset” then press the “Enter”
button.
The default Basic/Custom Menu items are:
Source Select (RGB, Video, S-Video and PC Card Viewer), Picture, Volume, Image
Options (Keystone), Projector Options (Menu and Setup) and Tools (Capture, PC Card
Files and ChalkBoard).
NOTE: Once you have selected OK on the Basic/Custom Menu Edit screen,
you cannot cancel the changes on the Menu screen. However, you can re-edit
the menu items over again as described in the steps above.
NOTE: If the “Advanced Menu” item has been selected on the Menu mode, you get
the “Confirmation Change Menu” upon completion of “Basic/Custom Menu” ed-
iting. In this case, selecting “Yes” then “Enter” will close all the menus and apply
the changes from the Advanced menu to the Basic/Custom Menu.
If you select “No” then “Enter” functions, then all menu items will return to the
Advanced menu, but your changes will still be available within the “Basic/
Custom Menu” selection. To display the previously tailored Basic/Custom
Menu, select “Basic/Custom Menu” from the “Menu Mode”.
An item “To Advanced Menu” will be
added to the bottom of the Basic/Custom
Menu.
Selecting this item and pressing the “En-
ter” button will display the “Advanced
Menu” features.


