


12
4 PREPARATION
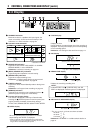
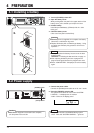
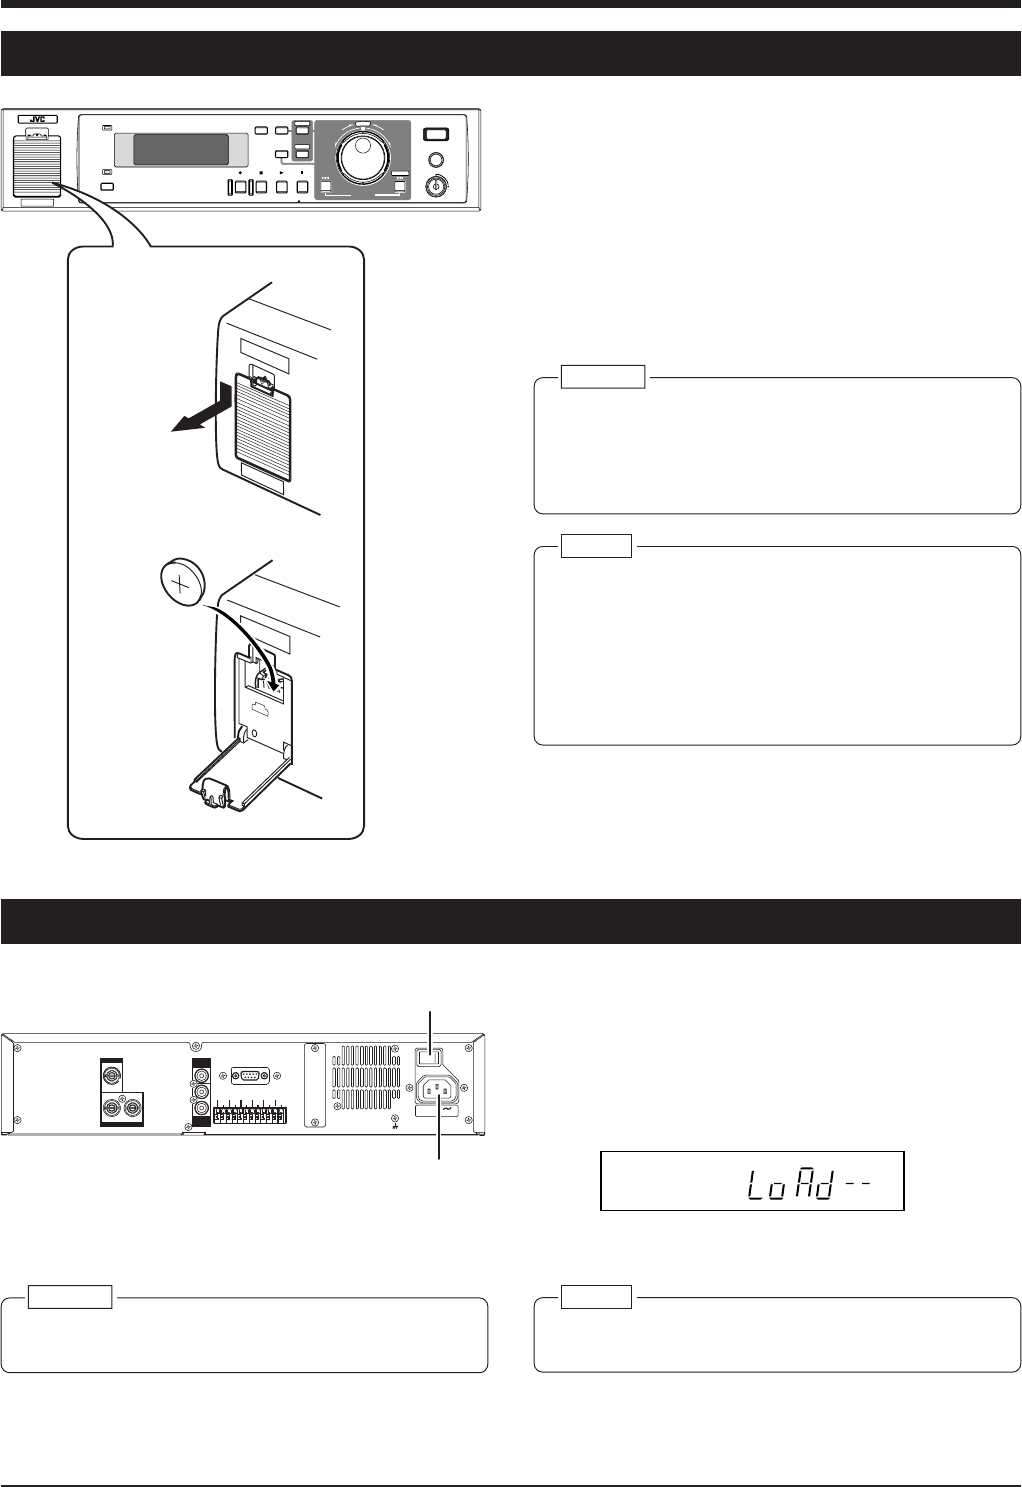
4-1 Installing a battery
1. Turn the [POWER] switch OFF.
2. Open the battery cover.
While pushing down the pawl in the upper section of the
battery cover, pull it towards you to open the cover.
3. Install a battery.
Install the provided battery (CR2032) with the + side
facing you.
4. Close the battery cover.
Close it until the pawl is locked firmly.
Caution:
● When the power is supplied, do not replace the battery.
Otherwise, a malfunction may occur.
● Replace the battery with a CR2032 type battery. Using
any other type of battery may present a risk of fire or
explosion.
Memo:
● When you replace the battery, be sure to set the date
and time again.
Reference: “4-3 Setting the date and time” on page 13.
● After replacing the battery, be sure to program the
program timer again because the programs are reset.
● When “LOW BATTERY” is displayed, check the battery
again.
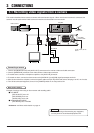
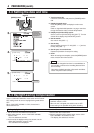
4-2 Power supply
[AC IN] socket
1. Connect the power cable.
Connect the provided power cable to an AC 120 V outlet.
2. Press the [POWER] switch to ON.
The system check starts for this unit and “SYSTEM
LOADING ...” is displayed on the monitor.
“LoAd--” blinks on the display panel.
Caution:
● After all other equipment connections are complete,
turn the power of this unit ON.
Memo:
● All operation functions are disabled during system
check. Wait until “SYSTEM LOADING ...” goes out.
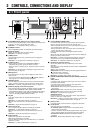
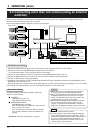
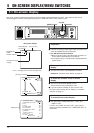
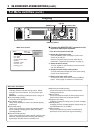
POWER
WARNING
SLEEP
REC STOP PLAY STILL
TIMER CANCEL
DISPLAY
MENU
SEARCH
S
E
L
E
C
T
REV FWD
EXECUTE
SKIP/ALARM
SEARCH
REC
CLOCK RESET/ CLEAR
OPE. LOCK
ON
DIGITALVIDEO RECORDERVR-510U
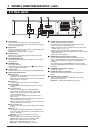
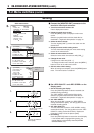
2.
3.
CAMERA IN
MONITOR OUT
1
1
2
12
AUDIO
IN
AUDIO
OUT
RS-232C
POWER
SIGNAL GND
CAM SW
OUT
ALARM
IN1
SPARESPARE
SPARE
HDD
FULL OUT
ALARM
RESET
CLOCK
RESET IN
CLOCK
RESET OUT
EXT
REC IN
COM COM
ON OFF
I
O
AC IN 120 V
50 Hz / 60 Hz
[POWER] switch
VN
S