


82
<Recorder Part> Reference
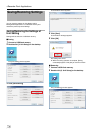
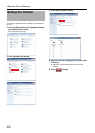
NAS Setting (A Page 75) For configuring settings for NAS connection.
User name ^ For specifying the user name for NAS connection.
Password ^ For specifying password for NAS connection.
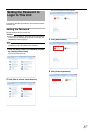
IP Lease Setting For configuring settings to assign IP addresses to each network camera from
this unit.
Note:
● In order to assign the IP address of the network camera using the IP
Lease feature, you need to enable the DHCP of the network camera. For
procedures to enable the DHCP of the network camera, refer to the
instructions of the network camera.
●
If the network uses more than one of this unit, enable the IP lease function
only for one unit. Also, do not enable the IP lease function when any DHCP
server is running on the same network. Enabling the IP lease function for
more than one unit may cause IPs to be fixed, leading to malfunction of
cameras.
IP Lease feature
Enable IP Lease ⅷ Select check box
Do not select check
box
Set whether to assign IP addresses to each network camera from this unit.
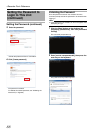
Delete past IP
information
Select check box
ⅷ Do not select
check box
Select this check box to delete past IP information of each network camera
and to assign the new IP address.
Lease period ⅷ Unlimited
Limited (24H)
For specifying the valid period of the IP address assigned to the cameras.
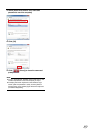
Parameters
Head IP address ⅷ 192.168.0.100 For specifying the first IP address to be assigned to the network cameras.
Number 1 to 99 units
ⅷ 20Units
For selecting the number of IP addresses to be assigned to the cameras.
The selected number of IP addresses will be assigned starting from the first
IP address.
Subnet mask ⅷ 255.255.255.0 For specifying the subnet mask for the cameras.
Gateway ⅷ 192.168.0.254 For specifying the gateway for the cameras.
Primary DNS ⅷ 192.168.0.253 For specifying the primary DNS for the cameras.
Secondary DNS ⅷ 192.168.0.252 For specifying the secondary DNS for the cameras.
Domain name ^ For specifying the domain name for the cameras.
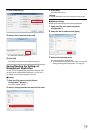
SNMP Setting (A Page 126) You can monitor the status of this unit from the SNMP manager on the
surveillance computer.
Enable SNMP Select check box
ⅷ Do not select
check box
Select this check box to enable the SNMP function.
Enable TRAP Select check box
ⅷ Do not select
check box
Select this check box to enable the TRAP function.
SNMP Manager IP
address
^ Specify the IP address of the SNMP manager.
Community name ^ Specify the SNMP community name.
(1 to 32 characters. Alphanumeric characters only.)
Monitoring interval
CPU Load 10 to 9999 seconds
ⅷ 10 sec
Specify the interval to monitor CPU usage.
D drive writing
rate
30 to 9999 seconds
ⅷ 60 sec
Specify the interval to monitor the writing rate to the D drive.
Smart Client 10 to 9999 seconds
ⅷ 10 sec
Specify the interval to monitor the startup status of the Smart Client.
Camera status 60 to 9999 seconds
ⅷ 60 sec
Specify the interval to monitor the connection status of the camera.
Copy extended MIB file to flash memory Copy the MIB extension information into a USB flash memory.
● For details on SNMP settings, refer to "Setting SNMP" (A Page 126).
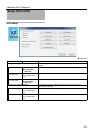
Item Preset Values Description