


16
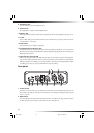
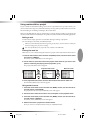
6. Recording
When you record on the MR-1000, date and time information is automatically added to the file
so that you can manage your projects more easily.
If you set the MR-1000's date and time (→p.28), the correct date and time data will be added.
However, if the batteries do not have enough power to turn the MR-1000 on and you let it sit for a
few days (or if the AC adaptor is not connected), the date and time will be reset. After changing the
batteries or connecting the MR-1000 to the AC adaptor, please make these settings once again.
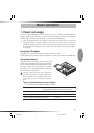
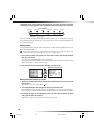
Selecting your recording device
You can record into the MR-1000 not only from devices with a high output level such as a
keyboard or audio device, but also from low output level devices such as microphones.
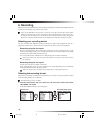
Recording using the line inputs
If you're recording from a device whose line output level is low (consumer level), set the
GAIN switch to high (H). If you're recording from a device whose line output level is high
(professional), set the GAIN switch to low (L).
You can use balanced or unbalanced 1/4" TRS phone jacks to make connections.
If the level is too low even when the input level L/R knob is turned up, set the GAIN switch to
the H position.
Recording using the mic inputs
Use the XLR connectors to make connections.
If you need phantom power for your condenser mic, set the phantom power switch (48V)
located on the back panel to the ON position.
Make sure that your mic is already connected before you turn the phantom power on.
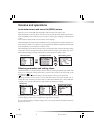
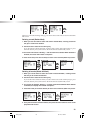
Selecting the recording format
Here's how to select the recording format. Each time you record, a new project will be created
in the recording format you've selected.
The default setting is DFF, 5.6 MHz.
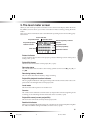
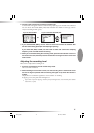
1. Press the menu button, and in the menu list, use the P-dial to select and confirm
"REC MODE." The record
mode (REC MODE) setting screen will appear.
Push
Turn
Selection icon
Recording mode screen
Text1_E.p65 06.11.22, 1:22 PM16