10. Type in the elevation that you obtained in Step 6.
-Type
EL,xxx<CR>
(e.g., Elevation of 30.2° = EL,302<CR>)
11. Using a compass, take a bearing on an object that
is approximately on the azimuth obtained in
Step 6.
12. Type in an azimuth that points the antenna in the
direction of the object selected in Step 11.
-Type
AZ,xxxx<CR>
(e.g., azimuth of 233° = AZ,2330<CR>)
-Valid azimuth range is 0-360° (0000-3600)
13. Check to see if there is signal strength on the
Signal Meter Screen.
14. Move antenna counter-clockwise in 5° increments
until signal strength is acquired. If you do not find
the satellite, point the antenna at the object
selected in Step 11 and move the antenna
clockwise in 5° increments until signal strength is
acquired.
15. Once the satellite is found, fine tune azimuth in 1°
increments for maximum signal strength.
16. Fine tune elevation in 1° increments for maximum
signal strength.
17. Once the satellite is found, turn the EchoStar IRD
off, using the power button on the infrared remote.
Do not turn off the IRD using the front panel. Leave
IRD in standby mode for approximately 5 minutes.
The IRD will now download new software from
the satellite.
-To verify that the IRD has been updated, put the
IRD into the Signal Strength Screen mode, and
three satellite options will appear on the left side
of the screen: 61.5° West, 119° West, 148° West.
Your EchoStar IRD is now updated.
D-2
A Guide to TracVision S2
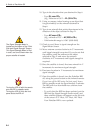
The Signal Strength Meter is
located on the bottom of the “Point
Dish and Signal Strength” Screen.
This Signal Strength Meter is Red
in color, and turns Green when the
proper satellite is located.
Tur ning the IRD off with the remote
puts the IRD in standby mode.
Turning the IRD off from the front
panel shuts the IRD off.


