Hookups (cont’d) 11
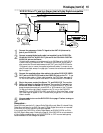
COAXIAL
S-VIDEO
OUT
DIGITAL
AUDIO OUT
AUDIO
OUT
COMPONENT
VIDEO OUT
L
Y
R
CB
CR
DVD
AUDIO OUT
VIDEO OUT
AUDIO IN
VIDEO IN
L
R
L
R
DVD/VCR VCR
ANT-IN
ANT-OUT
Antenna or Cable TV
Signal to ANT-IN Jack
Video Cable
Audio Cables
Audio and
Video IN Jacks
on TV
1
3
2
1
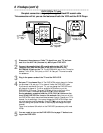
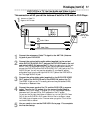
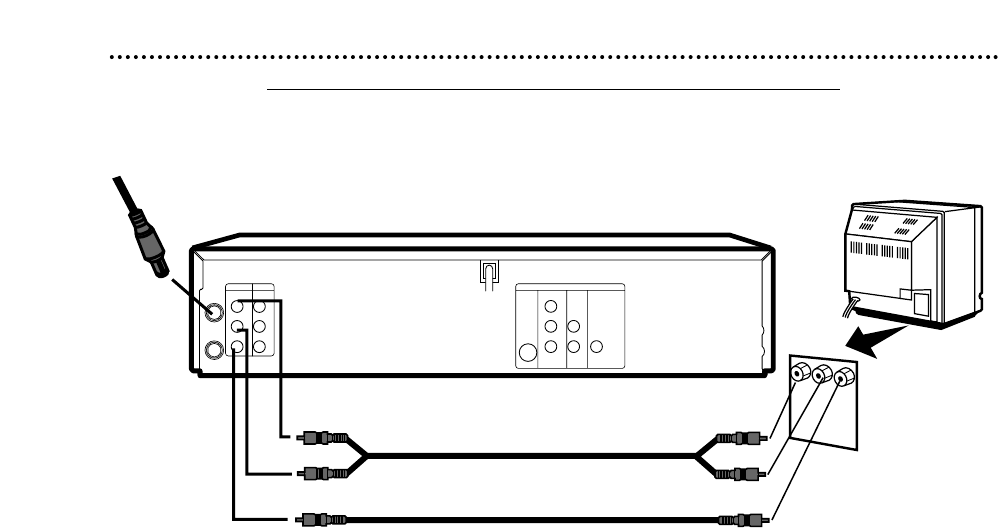
Connect the antenna or Cable TV signal to the ANT-IN (Antenna
In) jack of your DVD/VCR.
2
Connect the red and white audio cables (supplied) to the red and
white DVD/VCR AUDIO OUT jacks on the DVD/VCR and to the red
and white AUDIO IN jacks on the TV. Match the cable colors to the jack
colors. If the TV has a single AUDIO IN jack, use the white audio cable to
connect the DVD/VCR’s white DVD/VCR AUDIO OUT (left) jack to the TV’s
AUDIO IN jack. You will not use the red cable. Or, purchase a “splitter”
audio cable to go from the left/right AUDIO OUT jacks of the DVD/VCR to
the TV’s single AUDIO IN jack.
3
Connect the yellow video cable (supplied) to the DVD/VCR VIDEO
OUT jack on the DVD/VCR and to the VIDEO IN jack on the TV.
The VIDEO IN jack on the TV is usually yellow and may be labelled CVBS,
Composite, or Baseband video.
4
Connect the power cords of the TV and the DVD/VCR to a power
outlet. Turn on the TV and set it to the correct Audio/Video In
channel. Go to your lowest TV channel (01 or 02), then change channels
downward until you see VCR or DVD playback on the TV screen.
To help you find the right Audio/Video In channel, turn on the DVD/VCR. Press
DVD to put the DVD/VCR in DVD mode. With no Disc in the Player, a large
DVD Video logo will appear on the TV screen when you get the TV on the cor-
rect Audio/Video In channel.
5
You are ready to turn on the DVD/VCR. Go to page 17 to complete
the first-time setup.
DVD/VCR to a TV that has Audio and Video In jacks
Using the supplied red, white, and yellow cables
This connection will let you use the features of both the VCR and the DVD Player.


