


User’s Manual
44
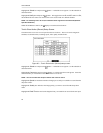
Highlight the Sched box and press the button. A schedule screen appears. Set the schedule as
described earlier.
Highlight the Notify box and press the
button. This toggles between On and Off. When it is On,
the DVR notifies the remote site when it loses video input from a camera based on a defined
schedule.
NOTE: For the Notify action to work, the DVR should be registered in the DX-PC4U (Remote
Operation Software).
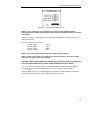
When the DVR detects video loss, the
displays on each associated camera.
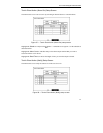
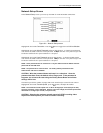
Display Setup
Highlight the OSD, Main Monitoring in the Main menu, and press the
button to set up the
on-screen display or camera display on the main monitor.
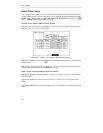
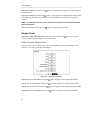
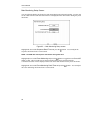
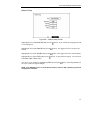
OSD (On-Screen Display) Setup
The DVR can be set up to display Date, Time, Title and Status on screen. Each feature can be
turned on or off, and you can adjust the margins.
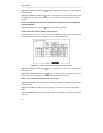
Figure 62 — OSD Setup screen.
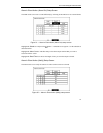
Highlight the box beside Date and press the
button to toggle the date display On and Off.
Highlight the box beside Time and press the button to toggle the time display On and Off.
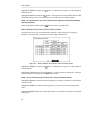
Highlight the box beside Title and press the
button to toggle the camera title display On and Off.
Highlight the box beside Status and press the button to toggle status display On and Off.