


42 Chapter 4. TV Menu Operations
Setup Menu
ing CH or . Select the Channel Menu to access
further channel-editing features, such as channel add or
delete, channel name, and SQV custom favorite channel
memories.
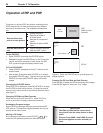
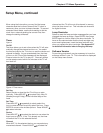
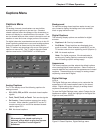
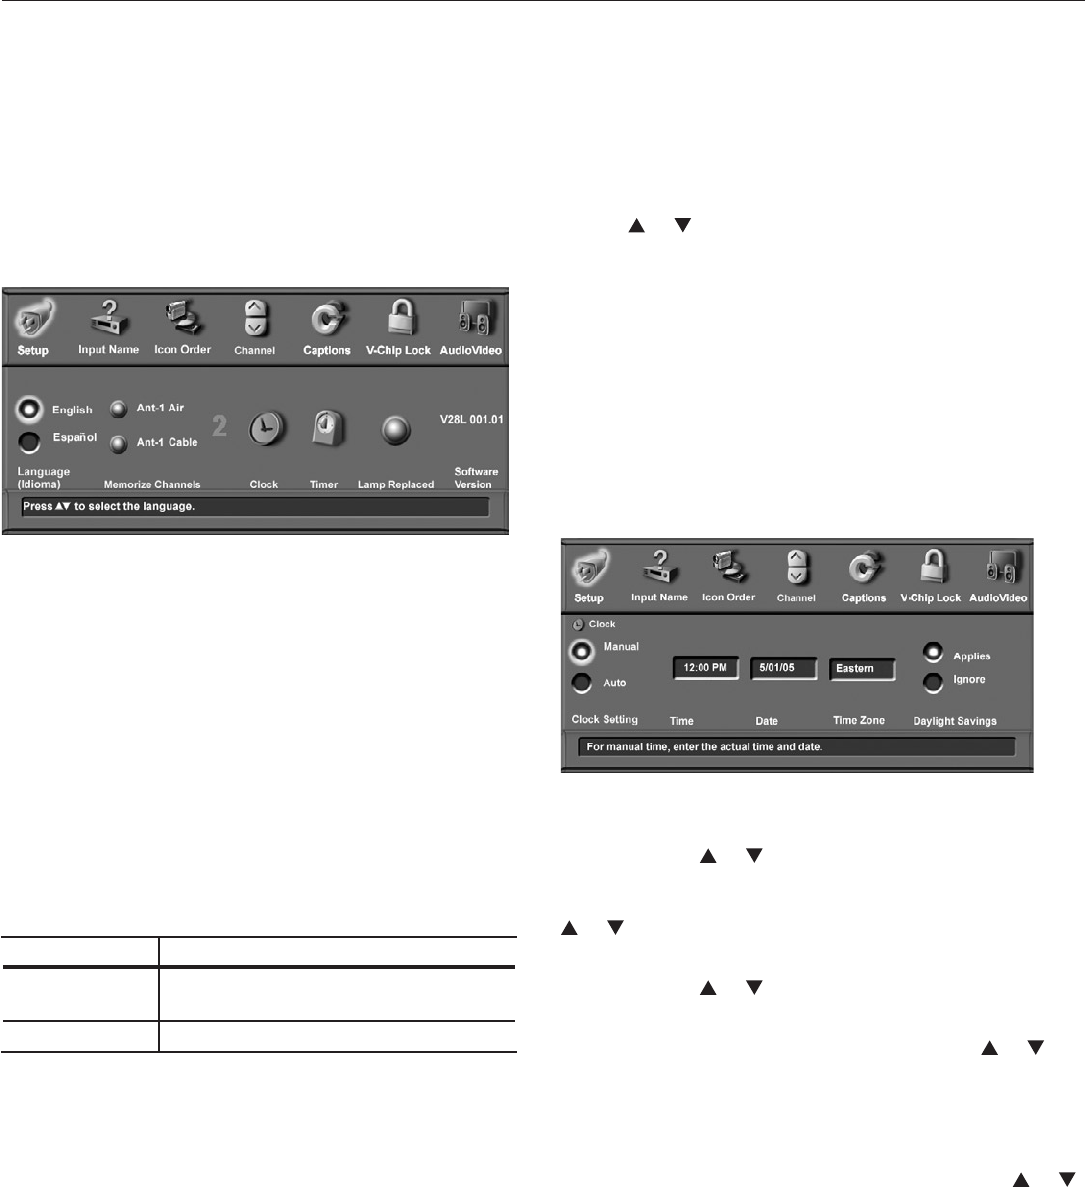
Clock
Figure 3
You may choose to set the clock either manually or auto-
matically. The TV uses the clock time for timer functions.
Manual
To set the clock manually, select the current time, current
date, and time zone for your area.
Figure 3. Clock menu. Setting the clock manually.
Time
Press ADJUST or repeatedly to slowly select the
hour or press and hold to quickly select the hour. Press
ENTER to move to the minutes options. Press ADJUST
or to select minutes.
Date
Press ADJUST or to select the correct date.
Time Zone
Select your correct time zone. Press ADJUST or to
select the time zone (Atlantic, Eastern, Central, Mountain,
Pacific, Alaska or Hawaii) for your area.
Auto
Select the Time Zone and the Daylight Savings time
(DST) option that your state uses. Press ADJUST or
to select Applies if your state or area uses DST, or Ignore
if DST does not apply. You may then tune to a channel
(on ANT 1) that uses Extended Data Service (XDS) time
data, typically a PBS channel.
The Auto selection automatically retrieves the correct
time and date information from this channel. Be aware
that if a channel displays incorrect time information, it is
because of information sent from the broadcaster and is
not a defect of the TV.
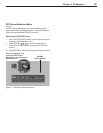
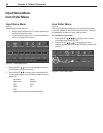
Setup Menu
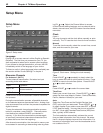
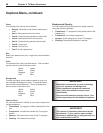
Figure 2
Figure 2. Setup menu
Language
Display the on-screen menus in either English or Spanish
(Español). The first time you powered on your TV, you
were requested to select an on-screen-menu language.
If you choose to change the selection, all menu text will
immediately switch to the language of your choice.
To listen to audio in other languages (when available), see
the section entitled “Audio Settings” in chapter 4.
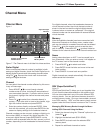
Memorize Channels
For Antenna 1 (ANT 1)
To start channel memorization, first select an input
according to the table below.
Input Condition
ANT 1 Air
When connected to an indoor/
outdoor antenna
ANT 1 Cable When connected to direct cable
Press ENTER to start the automatic channel-memoriza-
tion process.
During the memorization process, all possible channels
on the selected antenna are scanned twice. Analog chan-
nels are scanned first and then the process is repeated for
digital channels.
To stop the automatic channel-memorization process
before it completes, press CANCEL. Channels memo-
rized before you pressed CANCEL are retained in
memory. If you start the memorization process again,
all previously memorized channels are erased and the
process starts over from the beginning.
After channel memorization, the channels in memory can
be accessed in ascending or descending order by press-