44
Using the DIRECT NAVIGATOR (continued)
Erasing parts of a programme
[RAM]
The specified parts of the programme are erased completely
when you use this procedure and cannot be retrieved. Check
the programme carefully to ensure it isn’t one you want to keep.
Preparation
≥Switch [DVD, TV] (15) to “DVD”.
≥Insert a disc you have recorded on.
After performing steps 1 to 3 of “Erasing programmes”,
perform the following steps:
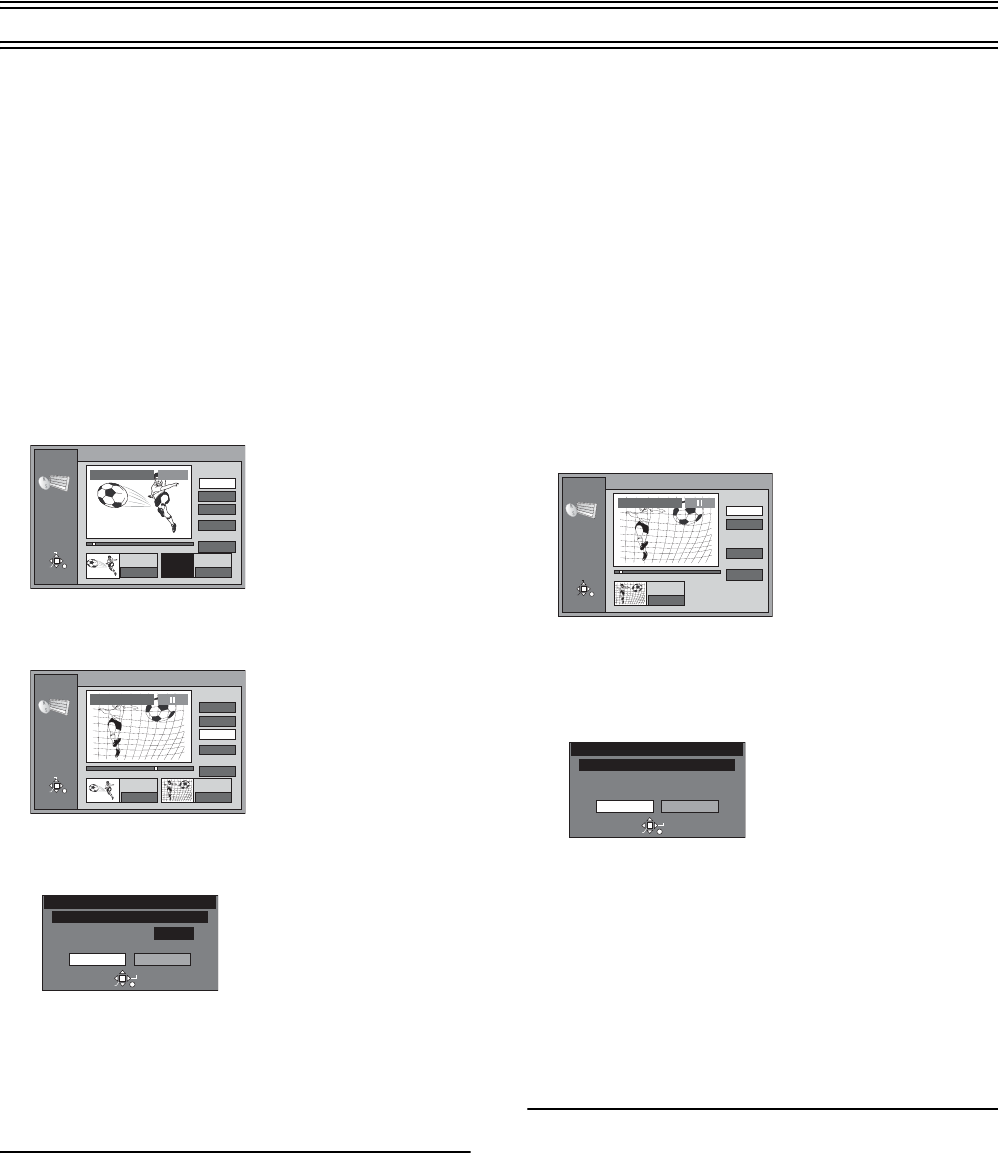
4 Use [3, 4] (10) to select “Partial Erase” and press
[ENTER] (10).
5 Use search functions such as fast-forward and
slow-motion to find the start point of the part you
want to erase and press [ENTER] (10).
6 Use search functions such as fast-forward and
slow-motion to find the end point of the part you
want to erase and press [ENTER] (10).
7
Use [
3
,
4
]
(10)
to select “Exit” and press [ENTER]
(10)
.
8
Use [
2
]
(10)
to select “Erase” and press [ENTER]
(10)
.
≥Play lists created with the erased part are also erased.
ªTo stop partway through
Select “Cancel” in step 8 and press [ENTER] (10).
Or
Press [RETURN] (23).
ªTo erase another part of the same programme
Select “Next” in step 7 and perform step 8, then repeat steps 5-8.
For your reference
≥Use search and slow-motion to find the points.
≥You cannot specify an end point before a start point or a start
point after an end point.
≥You may not be able to specify start and end points within
3 seconds of each other.
≥You cannot specify start and end points if the picture recorded is
stilled.
≥The unit pauses play when the end of the programme is reached
during this procedure.
≥The disc’s available recording time may not increase after
erasing short parts of programmes.
≥Play lists created with the erased part are also erased.
Dividing programmes
[RAM]
You can divide a selected programme into two.
You must be sure you wish to divide a programme because
once a programme has been divided it cannot be returned to
its original form.
Preparation
≥Switch [DVD, TV] (15) to “DVD”.
≥Insert a disc you have recorded on.
After performing steps 1 to 3 of “Erasing programmes”,
perform the following steps:
4 Use [3, 4] (10) to select “Divide” and press
[ENTER] (10).
5 Use search functions such as fast-forward and
slow-motion to find the point you want to divide and
press [ENTER] (10).
6 Use [3, 4] (10) to select “Exit” and press [ENTER]
(10).
7 Use [2] (10) to select “Divide” and press [ENTER]
(10).
≥The programme is divided at the point.
ªTo stop partway through
Select “Cancel” in step 7 and press [ENTER] (10).
Or
Press [RETURN] (23).
ªTo change the point to divide
Select “Divide” in step 6, then repeat steps 5-7.
ªTo check the division point
By selecting “Preview” in step 6 and pressing [ENTER] (10), play
will begin from a point 10 seconds prior to the division point. You
may wish to make sure that the division point is at an appropriate
location.
Note
≥
The divided programmes retain the title of the original programme.
≥A minute portion of the recording directly preceding the division
point may be lost.
For your reference
≥Use search and slow-motion to find the points.
≥It is not possible to carry out “Divide” in the following cases:
-When the resulting part(s) are extremely short.
-When the total number of programme is more than 99.
Partial
Erase
Start
– : – – . – –
End
3
Start
End
Next
Exit
PLAY
03
RETURN
ENTER
SELECT
0 : 00 . 05
0 : 00 . 05
0 : 00 . 05
Start End
3
Start
End
Next
Exit
0 : 10 . 15
RETURN
ENTER
SELECT
0 : 10 . 15
03
3
Partial
Erase
0:19 SP
Remaining Time
Partial erase
Corresponding PLAY LIST will also be erased.
Erase Cancel
RETURN
ENTER
SELECT
Divide
3
Preview
Divide
Exit
RETURN
ENTER
SELECT
Divide
Programme
03
0 : 00 . 05
0 : 00 . 05
Divide Programme
Once divided, this programme cannot be
re-combined.
Divide Cancel
RETURN
ENTER
SELECT
