30 Pelco Manual C1927M (5/99)
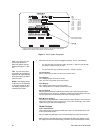
PROGRAMMING THE 4-CAMERA DISPLAYS ( BUTTON)
You can program four groups of four cameras each. Each of the four groups can be
programmed to include any four cameras. is not available in RECORD mode.
To program the four-camera displays:
1. Press the button to call up a four-camera display. If necessary, press the
button again to advance to the four-camera group that you wish to configure.
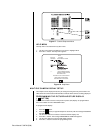
2. Press the button for approximately three seconds. A bar will appear in the first
camera location of the four-camera display, indicating that you are in the programming
mode.
3. Use the arrow buttons to move to each camera location in the four-camera display.
4. When the camera location that you desire is highlighted, choose the new camera by
pressing the camera button for the desired camera.
5. To exit the programming mode, press any arrow button as many times as necessary
until the bar moves off the screen.
6. If necessary, repeat steps 1-5 to program another group.
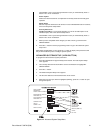
PROGRAMMING THE 9-CAMERA DISPLAYS ( BUTTON)
You can program two groups of nine cameras each. Both groups can be programmed to
include any nine cameras. is not available in RECORD mode.
To program the nine-camera displays:
1. Press the button to call up a nine-camera display. If necessary, press the
button again to advance to the other nine-camera group.
2. Press the button for approximately three seconds. A bar will appear in the first
camera location of the nine-camera display, indicating that you are in the programming
mode.
3. Use the arrow buttons to move to each camera location in the nine-camera display.
4. When the camera location that you desire is highlighted, choose the new camera by
pressing the camera button for the desired camera.
5. To exit the programming mode, press any arrow button as many times as necessary
until the bar moves off the screen.
6. If necessary, repeat steps 1-5 to program the second group.
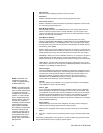
PROGRAMMING THE 16-CAMERA DISPLAY ( BUTTON)
is not available in RECORD mode.
To program the 16-camera display:
1. Press the button to call up the 16-camera display.
2. Press the button for approximately three seconds. A bar will appear in the first
camera location of the 16-camera display, indicating that you are in the programming
mode.
3. Use the arrow buttons to move to each camera location in the 16-camera display.
4. When the camera location that you desire is highlighted, choose the new camera by
pressing the camera button for the desired camera.
5. To exit the programming mode, press any arrow button as many times as necessary
until the bar moves off the screen.
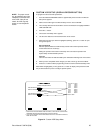
NOTE:
All active cameras
may be sequenced in one
location of a 4-, 9-, or 16-
camera display mode. While
in a multiple-camera display
mode, use the arrow buttons
to move the on-screen bar
to the camera location for
sequencing. Press the se-
quence button to initiate
sequencing of all active
cameras. Refer to the
Op-
eration Guide
table also.


