Pelco Manual C1927M (5/99) 9
INSTALLATION
Unpack and inspect all parts carefully.
The following parts are supplied:
1 MX4000 Series multiplexer
1 Rack ear kit
2 Rack ears
4 4-40 x .375-inch pan head screws
4 10-32 x .750-inch pan head screws
1 Power cord
1 6-foot (1.8 m) data cable with RJ-45 connectors
Installation of the multiplexer varies according to the type of installation.
The
Basic Installation
section covers the basic installation procedures for all applications.
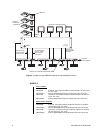
This section also covers the complete installation instructions of a stand-alone multiplexer
(refer to Figure 1 in the
Applications
section).
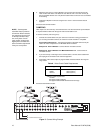
The
Multiplexer with KBD4000 Keyboard
section, provides additional procedures beyond
the basic instructions for installing up to 16 multiplexers that are controlled by a single
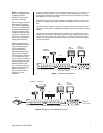
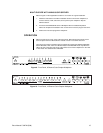
KBD4000 keyboard (refer to Figure 2).
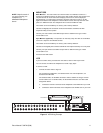
The
Multiplexer with MX4000SVR Server
section, gives additional steps beyond the basic
instructions for installing up to eight multiplexers that are controlled from as many as four
KBD4000 keyboards. The multiplexers and keyboards are linked together through a server
(refer to Figure 3). A KBDKIT(-X) is required for each keyboard connected to the remote port.
Rear panel views shown in the installation procedures are for 16-channel color models. The
9-channel models have fewer video inputs and outputs. Monochrome models have no
SVHS connections.
BASIC INSTALLATION
MOUNTING
The multiplexer can be placed on a flat surface, such as a desk or shelf, or it can be
installed in a 19-inch (48.26 cm) equipment rack.
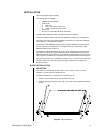
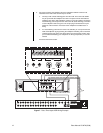
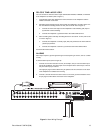
To install the multiplexer in an equipment rack (refer to Figure 4):
1. Remove the four rubber feet (A) from the bottom of the unit.
2. Remove the front two flat-head screws (B) on each side of the multiplexer. Discard the
screws.
Figure 4. Rack Installation
A
C
B
D


