The DX3000 Series DVR has an unmarked lock
button to restrict unauthorized use of the re-
corder. The lock button will work only as long as
no one discovers its function. Since you may
need to make the manual accessible to others,
the lock button’s location and operation are NOT
documented in the manual – this is the only place
it is shown.
If you want to keep this page in the manual, just
staple it inside the cover.
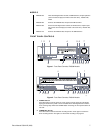
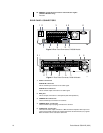
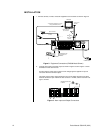
The lock button is located on the front panel
below the PRE ALARM REC light.
SIMPLE LOCK
When the LOCK button is pressed (with a ball-
point pen, for example), the front panel controls
are disabled except for the CAMERA, SPLIT/
SEQUENCE, and ZOOM buttons. The LOCK
indicator light illuminates when the unit is in the
Lock mode. Press the LOCK button again to exit
the Lock mode.
The simple lock function does not work if a pass-
word has been entered into the recorder (refer
to Password Lock).
PASSWORD LOCK
Pressing the LOCK button on the front of the
unit lets you record a password. Once the pass-
word has been entered and the unit has been
locked, the front panel controls are disabled
except for the CAMERA, SPLIT/SEQUENCE,
and ZOOM buttons.
Entering Initial Password
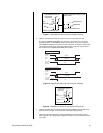
1. Press the LOCK button for five seconds.
The Password Setting
menu appears.
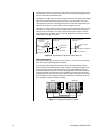
2. Enter a four-digit password. The password
may consist of the numbers 0-9. 1-9 are as-
signed to the camera buttons on the front of
the unit. 0 is assigned to the ZOOM key.
3. Turn the SHUTTLE ring to the right to enter
the password.
4. Re-enter the password, and then turn the
SHUTTLE ring to the right. The password is
now set, and the normal operating screen
appears.
If the wrong password is entered, “PASS-
WORD ERROR” appears on the screen, and
the password is cleared. Turn the SHUTTLE
ring to the left to exit the menu. Press the
LOCK button to turn off the indicator light.
Return to step 1.
Caution
Remove
this page
and keep
it in a
secure
place.
C681M-A-LB (9/01)
3500 Pelco Way
Clovis, CA 93612 USA
North America and Canada
Tel 800/289-9100
FAX 800/289-9150
DataFAX 800/289-9108
International
Tel +1 559/292-1981
FAX +1 559/348-1120
DataFAX +1 559/292-0435
PelcoEurope BV
Tel +31 40/251-9870
FAX +31 40/251-9835
www.pelco.com
®
Changing Password
1. Turn the Password Lock feature OFF (refer to
Turning Password Lock On and Off).
2. Press the LOCK button for five seconds.
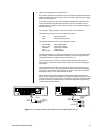
The Password Lock menu appears.
3. Enter the current password, and then turn the
SHUTTLE ring to the right. The Password
Setting menu appears.
4. Using the same procedure for setting the
original password, enter and set the new
password.
Password Error
If you are asked to enter a password and you
enter the wrong one, press the WARNING RE-
SET button to clear the incorrect password.
Turning Password Lock On and Off
OFF: To disable the Password Lock feature,
press the LOCK button, enter the password, and
turn the SHUTTLE ring to the right.
ON: To return to locked status, press the LOCK
button again.
Erasing the Password
If you no longer need a password, or if you for-
get your password, the current password can be
erased.
1. Press and hold the INFO and SET UP but-
tons on the front of the recorder. Press the
RESET button on the back of the unit, and
then release the INFO and SET UP buttons.
The unit begins a self-test.
2. When the self-test is complete, press the
RESET button again. The unit turns itself off.
3. Turn on the power.
4. Reset the time and date.


