


Pelco Manual C681M-D (2/02) 45
4. Turn the JOG dial to select the option, and then turn the SHUTTLE ring to the right.
The flashing stops.
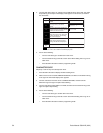
Turning the JOG dial changes the image quality setting as follows:
BASIC, STANDARD, MEDIUM, HIGH, SUPERIOR
5. Do one of the following:
•Turn the JOG dial to go to another item in this menu.
•Turn the SHUTTLE ring to the left to return to the Menu Setting menu to go to an-
other menu.
• Press the SET UP button to exit the programming mode.
MAXIMUM RECORDING FIELDS
Skip steps 1 and 2 if they have already been done.
1. Press the SET UP button to display the Menu Setting menu.
2. Turn the JOG dial to move the cursor to NORMAL REC SETTING, and then turn the
SHUTTLE ring to the right. The Normal Rec Setting menu appears.
3. Turn the JOG dial and move the cursor to MAX REC FIELDS, and then turn the
SHUTTLE ring to the right. The option starts flashing.
NOTE:
If the PRE A-REC field in the A-Rec/M-Det Setting menu has been set to
SHORT, MEDIUM, or LONG, this field cannot be changed.
4. Turn the JOG dial to select the option, and then turn the SHUTTLE ring to the right.
The option stops flashing.
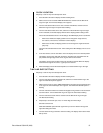
Turning the JOG dial changes the maximum recording fields as follows:
DX3009 Models – 1F, 3F, 5F, 7.5F, 15F, 30F
DX3016 Models – 1F, 3F, 5F, 6F, 7.5F, 10F, 15F, 30F
NOTE:
If the motion detection setting in the Initial Set Up menu is turned ON,
option 30F is not available on the DX3009 models, and options 6F, 10F, and 30F
are not available on the DX3016 models.
Changing the recording setting changes the estimated recording time at the bottom of
the screen. (The alarm recording setting does not affect the estimated recording time).
The available recording time changes depending on the settings of the image quality
and maximum recording fields. The estimated recording time display will include all
hard disk drives. The estimated time may not show the exact time if the recording
interval was set too long. For available recording times, refer to the
Recording Time
Table
section.
5. Do one of the following:
•Turn the JOG dial to go to another item in this menu.
•Turn the SHUTTLE ring to the left to return to the Menu Setting menu to go to an-
other menu.
• Press the SET UP button to exit the programming mode.