


25
RQT8203
[HDD] [RAM]
Press [1] (PLAY) during recording.
≥There is no sound output while searching forward or backward.
To stop play
Press [∫].
To stop recording
2 seconds after play stops
Press [∫].
To stop timer recording
Press [F TIMER].
≥You can also press and hold [∫] on the main unit for more than 3
seconds to stop recording.
≥You can also change the drive and play while recording. Press
[HDD] or [DVD].
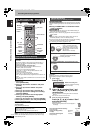
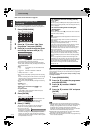
1 Press [DIRECT NAVIGATOR] during
recording.
2 Press [3, 4, 2, 1] to select a title
and press [ENTER].
≥There is no sound output while searching forward or backward.
To stop play
Press [∫].
To exit the Direct Navigator screen
Press [DIRECT NAVIGATOR].
To stop recording
After play stops
1 Press [DIRECT NAVIGATOR] to exit screen.
2 If the recording is on the other drive
Press [HDD] or [DVD] to select the recording drive.
3 Press [∫].
To stop timer recording
Press [F TIMER].
≥You can also press and hold [∫] on the main unit for more than 3
seconds to stop recording.
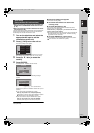
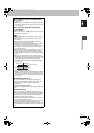
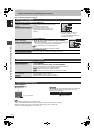
While recording, you can play a scene in the title being recorded or a
previously recorded title. Both the images being played and recorded
are shown.
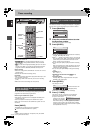
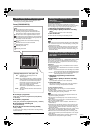
1 Press [TIME SLIP] during recording.
≥You will hear the playback audio.
2 Press [3, 4] to select the time and
press [ENTER].
≥Each time you press [3, 4], the time increases [3] or
decreases [4] by 1 minute.
(Press and hold for 10-minute intervals.)
≥Press [TIME SLIP] to show the play images in full. Press
again to show the play and recording images.
To stop play
Press [∫].
To stop recording
2 seconds after play stops
Press [∫].
To stop timer recording
Press [F TIMER].
≥You can also press and hold [∫] on the main unit for more than 3
seconds to stop recording.
[Note]
Chasing play can only be used with programmes of the same
encoding system (PAL/NTSC).
When connected to a television that has the Q Link
function using a fully wired 21-pin Scart cable.
This function allows you to immediately start recording the
programme that you are viewing on the TV.
1 Press [HDD] or [DVD] to select the
recording drive.
The HDD or DVD indicator lights up on the unit.
2 If you selected the DVD drive
Insert a disc. (➡ 22)
3 Press and hold [¥ DIRECT TV REC]
for 1 second.
Recording starts.
To stop recording
Press [∫].
Preparation
≥Connect a satellite/digital receiver or decoder to this unit’s input
terminals (➡ 17).
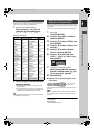
≥When recording bilingual programmes
[HDD] [RAM]
When both M 1 and M 2 is selected on the connected equipment,
you can select the audio type in playback.
[-R] [-RW‹V›] [+R]
Select either M 1 or M 2 on the connected equipment. (Only either
one type of M 1 or M 2 can be recorded.)
≥When the output signal from the external equipment is NTSC,
change the “TV System” to “NTSC” in the SETUP menu (➡ 61).
This unit cannot record to discs containing both PAL and NTSC
signals. (However, both types of programmes can be recorded
onto the HDD.)
≥Press [HDD] or [DVD] to select the recording drive.
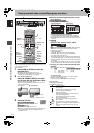
1 While stopped
Press [INPUT SELECT] to select the
input channel for the equipment you
have connected.
e.g.,If you have connected to AV2 input terminals, select “AV2”.
2 Press [REC MODE] to select the
recording mode.
3 Select the channel on the other
equipment.
4 Press [¥ REC].
Recording starts.
To skip unwanted parts
Press [;] to pause recording. (Press again to restart recording.)
To stop recording
Press [∫].
Playing while you are recording
Playing from the beginning of the title you are
recording—Chasing playback
Playing a title previously recorded while recording—
Simultaneous rec and play
Reviewing the recorded images while recording—
Time Slip
0 min
PLAY
REC
Play starts from 30
seconds previous.
The image currently being
recorded
Direct TV Recording
Recording from digital/satellite receiver
or decoder
Recording television programmes
25
EH60.book Page 25 Monday, June 27, 2005 8:46 PM