English
55
Karaoke Options
Playing a Karaoke disc
A Turn on the TV power. Select the
correct Video In channel at the TV (See
page 23 “Finding the correct viewing
channel”).
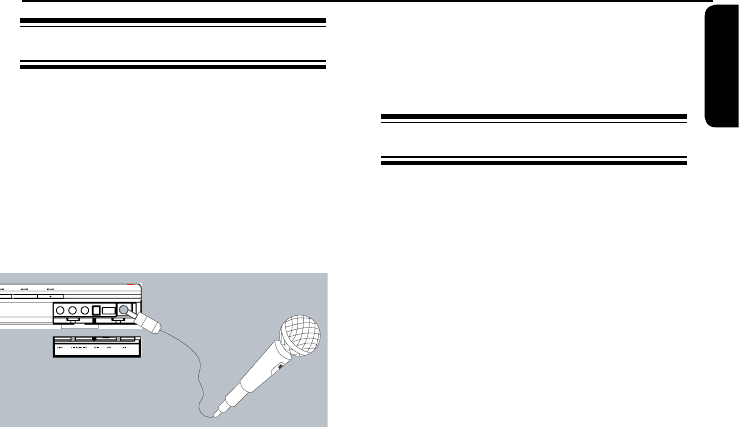
B Connect a microphone(not supplied) to
the MIC jack on the front panel of the
DVD recorder or your additional
amplier.
C Insert a karaoke disc and press PLAY
button on the remote control.
l If the disc menu appears, use
UP/DOWN buttons to make your
selection and press OK to start playback.
D Press MIC VOL + button on the remote
control to turn on the Karaoke mode.
Whilst enjoying your karaoke session,
l To adjust the echo volume, press
ECHO +/- button.
l To adjust the microphone volume, press
MIC VOL +/- button.
Helpful Hint:
– Press any source input key to turn off the
karaoke mode.
– For digital microphone output, connect the
mircophone to the MIC IN jack on the
amplier.
– Press AUDIO button on the remote control
to switch between left/right stereo output.
(For VCD discs only).
– Set the microphone volume its minimum
level to prevent howling when you connect
the microphone.
– If mic volume is still too soft when
compared to the disc playback volume, Press
VOL+/- to lower the playback volume to
balance the mic volume
Recording a Karaoke session
Before you start:
Make sure you have connected a DVD
player to the DVD recorder. See Page 14 “
Optional connections - connecting to a DVD
player or similar device”.
A Turn on the TV power. Select the
correct Video In channel at the TV.
B Turn on the DVD player.
C Insert a Karaoke disc into the DVD
player and press PLAY to start
playback.
l If the disc menu appears, use UP/DOWN
keys to make your selection and press
OK to start playback.
D Connect a microphone(not supplied) to
the MIC jack on the front panel of the
DVD recorder or your additional
amplier.
E Press MIC VOL + button on the remote
control to turn on the Karaoke mode.
F Insert a DVD+R/RW disc into the DVD
recorder.
G To start recording, press RECORD on
the front panel of the DVD recorder.
Start your karaoke session and adjust the
ECHO or MIC VOL to enhance your
singing.
H To stop recording, press STOP on the
front panel of the DVD recorder.
3
Helpful Hint:
– You can connect to other external devices
connected to the S-video and AUDIO L/R
input jacks on the DVD recorder.
– When connecting the audio input jacks on
the amplier to the DIGITAL AUDIO
COAXIAL jack on the DVD recorder may
result in a MIC delay.
– The DVD recorder works best with a
microphone of 60 ohm resistance.


