


English
45
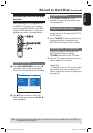
Recording from camcorder
When you connect the camcorder to the
VIDEO or S-VIDEO socket at the front
panel of this recorder or the EXT1 or
EXT2 socket at the back panel, follow the
steps below to make the camcorder
recording.
Before you start...
Mark the contents in the temporary
HDD storage (time shift buffer) for which
you wish to record to the HDD, see page
33. Otherwise, all the contents will be
cleared when you start camcorder
recording.
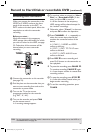
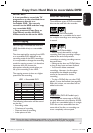
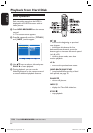
TUNER
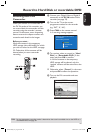
A Connect the camcorder to this recorder
(see page 23).
B Find the place on the camcorder that you
want to start recording from and set the
camcorder to pause mode.
C Turn on the TV to the correct
programme number for the recorder
(e.g. ‘EXT’, ‘0’, ‘AV’).
D Turn on the recorder and press CAM
on the remote control.
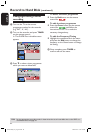
A warning message appears.
TIPS: Set the appropriate recording mode. It determines the actual recordable time to the HDD or a
recordable DVD, see page 35.
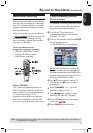
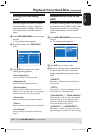
Record to Hard Disk or recordable DVD (continued)
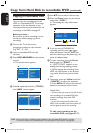
E To continue, select to record to { Hard
Disk } or { Recordable DVD } in the
menu and press OK to confirm.
All the contents in the temporary
HDD storage will be cleared except for
the ‘marked’ recordings.
Otherwise, select { Cancel } in the menu
and press OK to abort the operation.
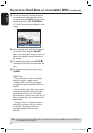
F Press CHANNEL +- repeatedly to
select the correct input channel that
matches the connected socket of the
device.
{ CAM 1 } : S-VIDEO or VIDEO
socket at the front.
{ EXT 1 } : EXT1 TO TV-I/O scart
socket at the back.
{ EXT 2 } : EXT2 AUX-I/O scart
socket at the back.
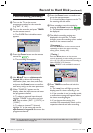
G Press REC
to start recording and
press PLAY button on the camcorder to
start playback.
To pause the recording, press PAUSE
Å
.
To continue recording, PAUSE
Å
again.
A new chapter marker is created after
recording restarts.
H To stop the recording, press STOP
.
A new title will be created when you
begin another recording.
I To end the recording operation, press
TUNER.
dvdr5350H_EU_Eng537.indd 45 2005-09-16 2:26:25 PM