


8
English
3139 246 14134
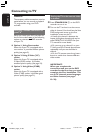
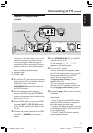
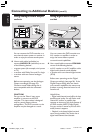
Connecting to TV
General
The necessary cable connections must be
made before you can record or playback
TV programmes using your DVD
recorder.
Selecting a suitable connection to
your TV
When you install your DVD recorder for
the first time, select
one of the following
options to connect the DVD recorder
and your TV.
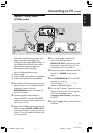
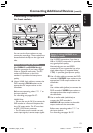
● Option 1: Using Scart socket
Select this if your TV is equipped with a
scart socket. It provides the best picture
quality (see pages 9).
● Option 2: Using S-Video (Y/C)
socket
Select this if your TV is equipped with a
S-Video (SVHS) socket. It provides
excellent picture quality (see page 10).
● Option 3: Using Video (CVBS)
socket
Select this if your TV is equipped with a
Video (CVBS) socket. It provides good
picture quality (see page 11).
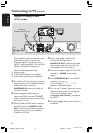
Setting the TV to the correct video
in channel
1 Press STANDBY-ON 2 on the DVD
recorder to turn it on.
2 Turn on the TV and set it to the correct
video-in channel. You should see the blue
DVD background screen or the first
installation screen on the TV.
➜Usually this channel is between the
lowest and highest channels and may be
called FRONT, A/V IN, VIDEO. See your
TV’s manual for more details.
➜Or, you may go to channel 1 on your
TV, then press the Channel down button
repeatedly until you see the Video In
channel.
➜Or, the TV remote control may have a
button or switch that chooses different
video modes.
IMPORTANT!
When you complete the
connections and turn on the DVD
recorder for the first time, you must
complete the First Installation. This
set up TV channels, menu languages
and other features (see pages
19~20).
1DVDR6xx_Eng05_14134c 9/28/04, 11:19 AM8