


PRV-LX1 DVD Menu Maker
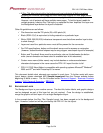
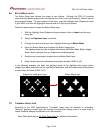
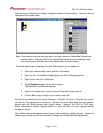
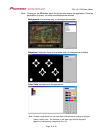
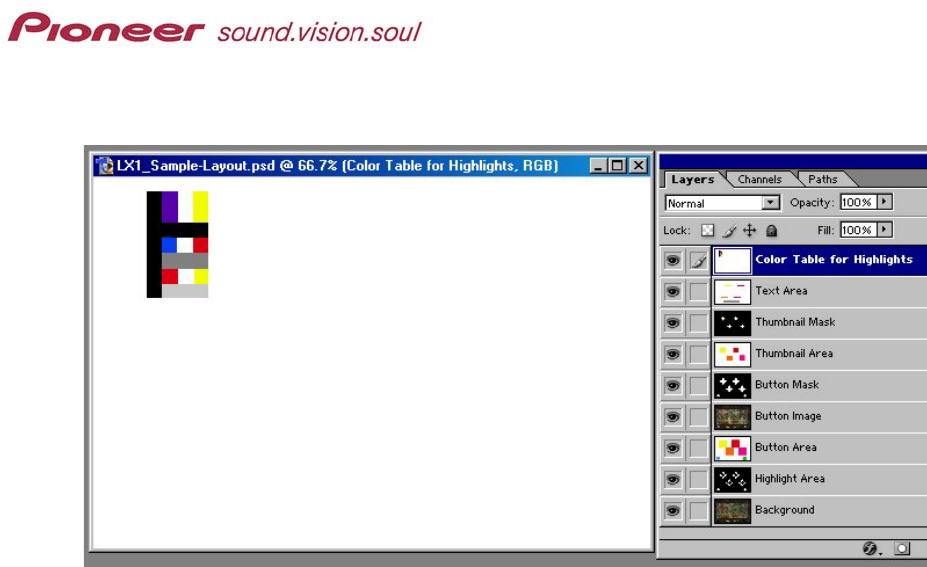
Once the layer is added to your design, change the colors in 20-pixel blocks. However, the first
vertical bar must remain black.
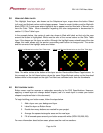
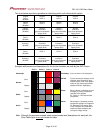
Note: Avoid using the final vertical color bar on the right, shown as Yellow/Red/Yellow in the
example above. Although DVD Forum Specifications allow up to four highlight colors,
menus using more than two colors on a single menu can be confusing.
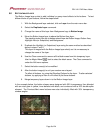
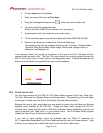
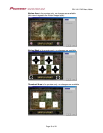
Follow the steps below to duplicate the Color Table layer in to your design file.
1. Open your custom design menu .psd file in Photoshop.
2. Open the LX1_CustomMenuSample.psd or the ColorTableLayer.psd file.
3. Right-click on the Color Table layer.
4. Select Duplicate Layer from the list of options.
The Duplicate Layer window appears.
5. Select your custom menu .psd file from the Destination drop-down list.
6. Click on OK to copy the layer to your custom menu file.
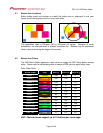
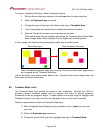
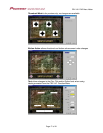
Although some cells seem to be larger (40 pixels x 20 pixels, 20 pixels x 80 pixels, etc.) than a
normal cell, this appearance is deceiving. Because the color table does not have borders
around each cell, similar-colored cells visually merge. However, the PRV-LX1 DVD Menu
Maker references a specific mapped location for each cell/color and each opacity/contrast/
transparency level.
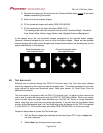
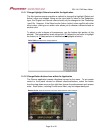
Note: When working with opacity/contrast levels, black translates to hiding the color. Lighter the
shade of gray means more of the color shows through as the Select/Activate highlighting.
Page 11 of 24