


PRV-LX1 DVD Menu Maker
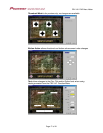
11.3 Import Your Custom Menu
Follow the steps below to import your custom menu in to the PRV-LX1 using a disc. You
may also import the folder from a connected PC using FTP to your PRV-LX1. Refer to
the PRV-LX1 operating instructions (
Importing Image Data) to import the menu via FTP.
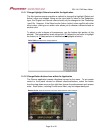
1) Insert the CD containing the custom menu folder in to the recorder’s drive.
If the unit has two drives, either drive may be used.
2) Press the Function button on the front of the PRV-LX1.
3) Access the Cpy/Impt/Bkup option from the App menu section.
4) Select Menu Import from the menu options.
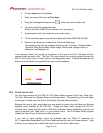
5) Set the following options:
•
Type is Layout
•
Source is the drive with the disc (DVD1 or DVD2)
•
Source File is the folder name
6) Activate the Add To Library button.
7) Select Back to return to the main function menu.
11.4 Select Your Custom Menu
Follow the steps below to select your custom menu.
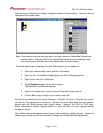
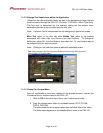
1) Access the DVD Menu option under the Edit menu section.
2) Set Target to default.
3) Select the Menu Type for this layout and project (title or chapter).
4) Set the Menu Design.
Your customer menu folder name appears as a design option.
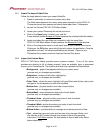
5) Set the following Menu Modifications:
•
Background is Default
•
Image is Default
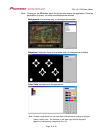
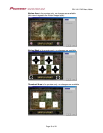
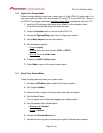
6) Activate the Preview Menu button.
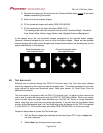
7) Review the menu layout and correct your original Photoshop file if needed.
Page 20 of 24