


PRV-LX1 DVD Menu Maker
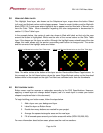
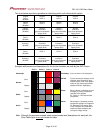
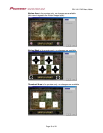
The chart below provides a guideline for identifying which cell reflects which option.
Original
Color 1
(BLACK)
Original
Color 2
Original
Color 3
Original
Color 4
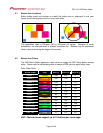
Normal
Color 1
(BLACK)
Normal
Color 2
Normal
Color 3
Normal
Color 4
Normal
Contrast 1
(BLACK)
Normal
Contrast 2
(gray tone represents
opacity level)
Normal
Contrast 3
(gray tone represents
opacity level)
Normal
Contrast 4
(gray tone represents
opacity level)
Select
Color 1
(BLACK)
Select
Color 2
Select
Color 3
Select
Color 4
Select
Contrast 1
(BLACK)
Select
Contrast 2
(gray tone represents
opacity level)
Select
Contrast 3
(gray tone represents
opacity level)
Select
Contrast 4
(gray tone represents
opacity level)
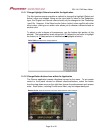
Action
Color 1
(BLACK)
Action
Color 2
Action
Color 3
Action
Color 4
Action
Contrast 1
(BLACK)
Action
Contrast 2
(gray tone represents
opacity level)
Action
Contrast 3
(gray tone represents
opacity level)
Action
Contrast 4
(gray tone represents
opacity level)
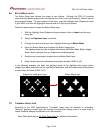
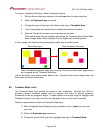
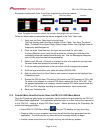
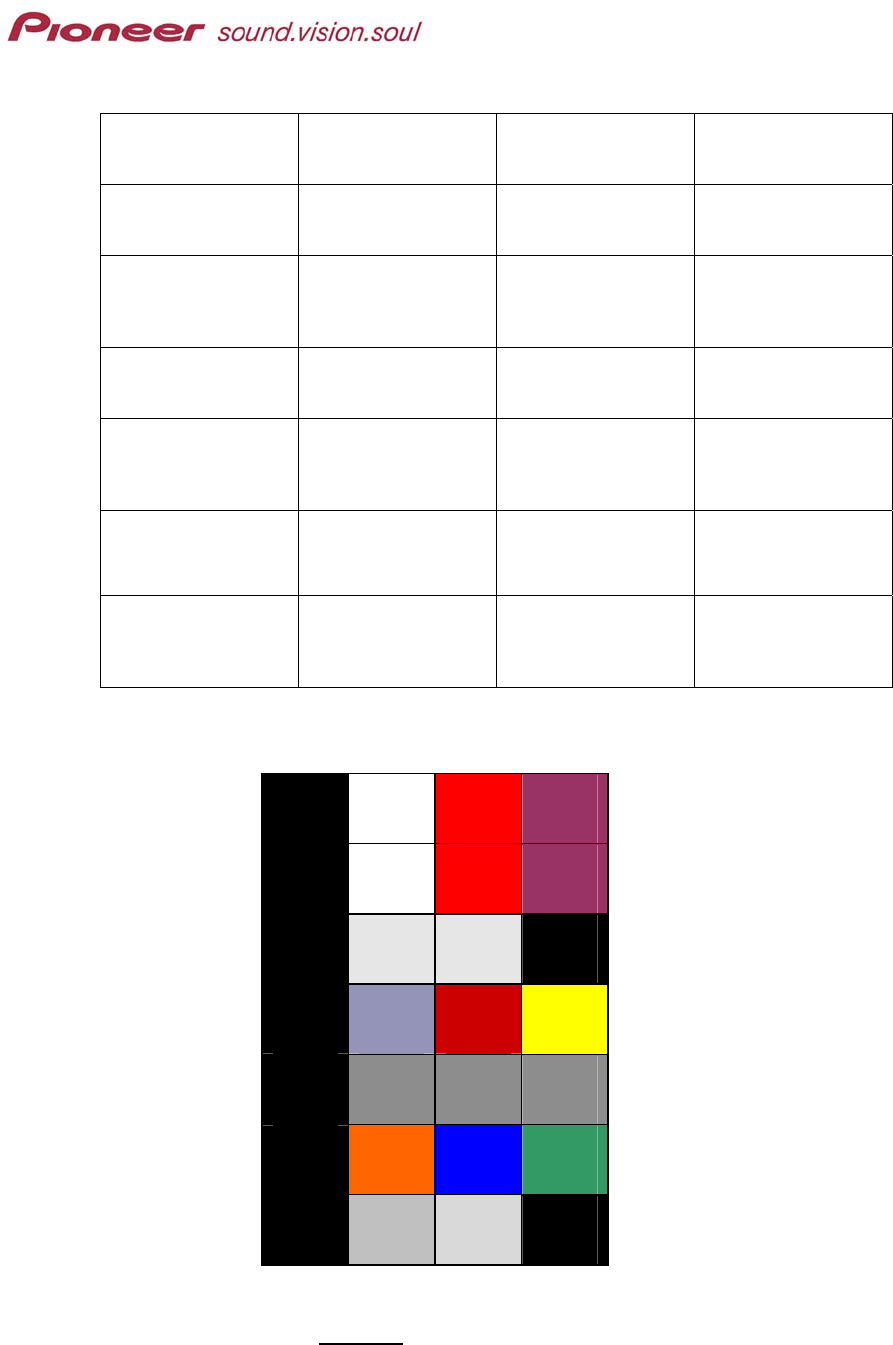
Example with borders and descriptions for the 4-color limitation set forth by the DVD Forum:
Color 1 Color 2 Color 3 Color 4
Photoshop
Color
Normal
Opacity
Color
Select
Opacity
Color
Active
Opacity
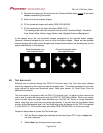
Photoshop: Color as shown in Photoshop file
Normal: Color that matches shape(s) on the
Highlight Area (Subpicture) layer
and the opacity level is the lightest
shade or gray meaning that white
appears as button highlighting
Select: When a button is selected (roll-over
highlight), a partially transparent
(opaque) color appears
Ex: Colors 2, 3 & 4 become 50%
transparent.
Active: When button is activated, partially
transparent highlight color appears
Ex: Because of the opacity level,
Color 2 button(s) are tinted with a
shade of orange instead of just
having an orange overlay.
Note: Although the previous example chart shows borders and descriptions for each cell, the
Color Table layer
must not include this data.
Page 12 of 24