


PRV-LX1 DVD Menu Maker
5.0 BUTTON IMAGE LAYER
The Button Image layer exists to add individual or group visual effects to the buttons. To test
different looks to your buttons, follow the steps below.
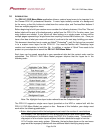
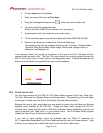
1. With the Background layer selected, click on Layer from the main menu bar.
2. Select the Duplicate Layer command.
3. Change the name of this layer from Background copy to Button Image.
4. Move the Button Image layer to above the Button Area layer.
The stacking order from top to bottom should now be Button Image, Button Area,
Highlight Area (or Subpicture) and Background.
5. Duplicate the Highlight (or Subpicture) layer using the same method as described
above in steps 1 and 2.
This layer is merged with the Button Image layer shortly so it is unnecessary to
change the name of the layer.
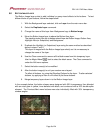
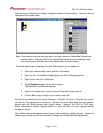
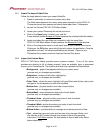
6. Use the Clear command to remove all the black areas from this temporary layer.
Use the Magic Wand
( ) tool to select the black areas. The Clear command is
under the Edit menu options.
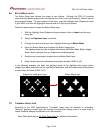
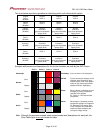
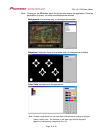
7. Select the button area(s) to be modified.
8. Alter the button image(s) to suit your custom menu layout.
To affect all buttons, try using the Blending Options for the layer. To alter selected
buttons, try applying a filter or a fill affect to just those buttons.
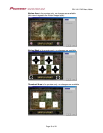
9. Merge temporary layers down in to the Button Image layer.
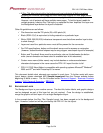
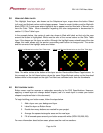
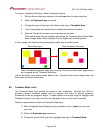
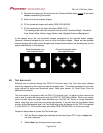
In the example below, the button shapes were designed with 50% transparency then blended
with an outer glow in yellow, inner-beveled with black, and contoured with a 20% double-spike
element. The Previous/Next menu buttons were also individually filled with 30% transparency
rainbow angles.
Page 6 of 24