


PRV-LX1 DVD Menu Maker
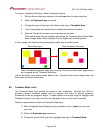
4) Remove all shapes and fill colors from the Thumbnail Mask layer except for the black
shapes representing thumbnails.
5) Select all of the thumbnail shapes.
6) Fill the thumbnail shapes with white (RGB: 255,255,255).
7) Fill the remainder of the layer with black (RGB: 0,0,0).
The stacking order from top to bottom should now be Thumbnail Mask, Thumbnail
Area, Button Mask, Button Image, Button Area, Highlight Area and Background.
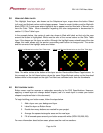
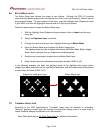
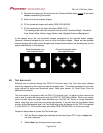
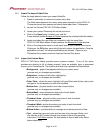
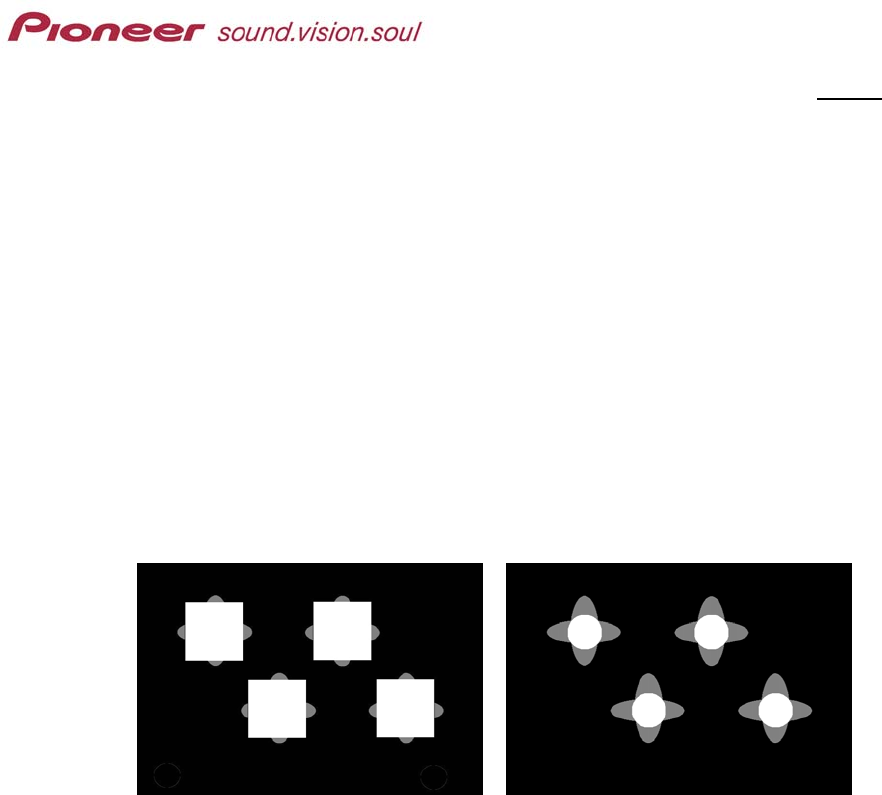
In the sample menu file, the thumbnail shapes correspond to the star-like button shapes.
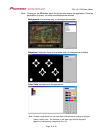
However, thumbnail shapes do not have to mirror the button shapes. Below are two possible
custom designs with similar button shapes (star-shaped buttons below are shaded gray only for
easier differentiation in this manual).
Block thumbnails over
star-shaped buttons
Circular thumbnails within
star-shaped buttons
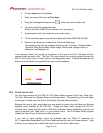
9.0 TEXT AREA LAYER
Although text is entered through the PRV-LX1 Function menu, the Text Area layer dictates
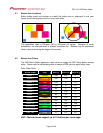
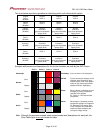
where text appears on the menu and sets the access order. The colors correspond to the color
order defined for button and thumbnail areas. Refer back section 4.2 Color Order Chart for
additional information.
This layer works in conjunction with the PRV-LX1’s pre-set fonts. To adjust the font sizes and/or
colors, wait to make the changes through the PRV-LX1 DVD Menu Maker. When your custom
menu includes using the larger fonts available from the PRV-LX1 library or longer title/button
labels, verify that your text boxes are sized appropriately. If the disc title text and button labels
are part of the Background layer, the Text Area layer must still be part of the .PSD file imported
in to the PRV-LX1. Fill the entire layer with white (RGB: 255,255,255) if it is not to be used.
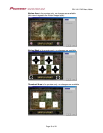
Follow the steps below to create the Text Area layer.
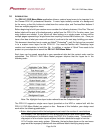
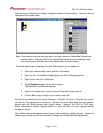
1. With the Button Image layer selected and all other layers OFF, click on Layer from
the main menu bar.
2. Select New from the drop-down Layer menu.
Page 9 of 24