Connections & Setup
26 Chapter 1
Tip
Channel Search takes several minutes because
the TV is searching for all possible analog and
digital channels. You may want to leave and
come back later.
Tip
To access the setup menus, press MENU and
choose Assisted Setup.
Complete the Assisted Setup
Your TV’s menu system allows you to adjust your TV’s features to be
configured to work properly. On-screen information helps you choose settings
to match your setup. The first time you turn on your TV, the Assisted Setup
screens appear automatically. Select Begin Setup to start or select Cancel Setup
to exit.
Set the Menu Language
1. Use arrow buttons to highlight your preferred language for the
menu system.
2. Press OK to select that language.
3. Select Continue Setup.
Complete Channel Search
Even though this initial channel search can take several minutes, it is important
to complete in order for your TV to display channels and programming.
1. Highlight Full Search with arrow button and press OK to tell the TV to
begin searching for channels. A progress report appears on the screen.
2. When search is complete, press OK.
3. Select Continue Setup.
Notes: If you skip Channel Search now, you can access it later through
the Connections menu. See Chapter 4 for more details.
If cable box is connected to ANTENNA A, Channel Search cannot work.
The GUIDE Plus+ System Setup
Important Notes: If you have a VCR and/or cable box connected to the
TV, you need to connect the G-LINK cable to use the GUIDE Plus+ system.
If you didn’t connect the G-LINK cable, go to page 23. Disregard the
screen that tells you to refer to the Quick Setup sheet—all of the
instructions are included in this User’s Guide.
The TV must be off to download information. Leave your TV off
overnight, for at least 10 hours to receive the initial download for your
area.
The GUIDE Plus+ system is a no-fee, on-screen interactive program guide that
lists what shows are on TV in your area. In order to receive program listings,
you need to complete the following steps after you read the introductory
screens.
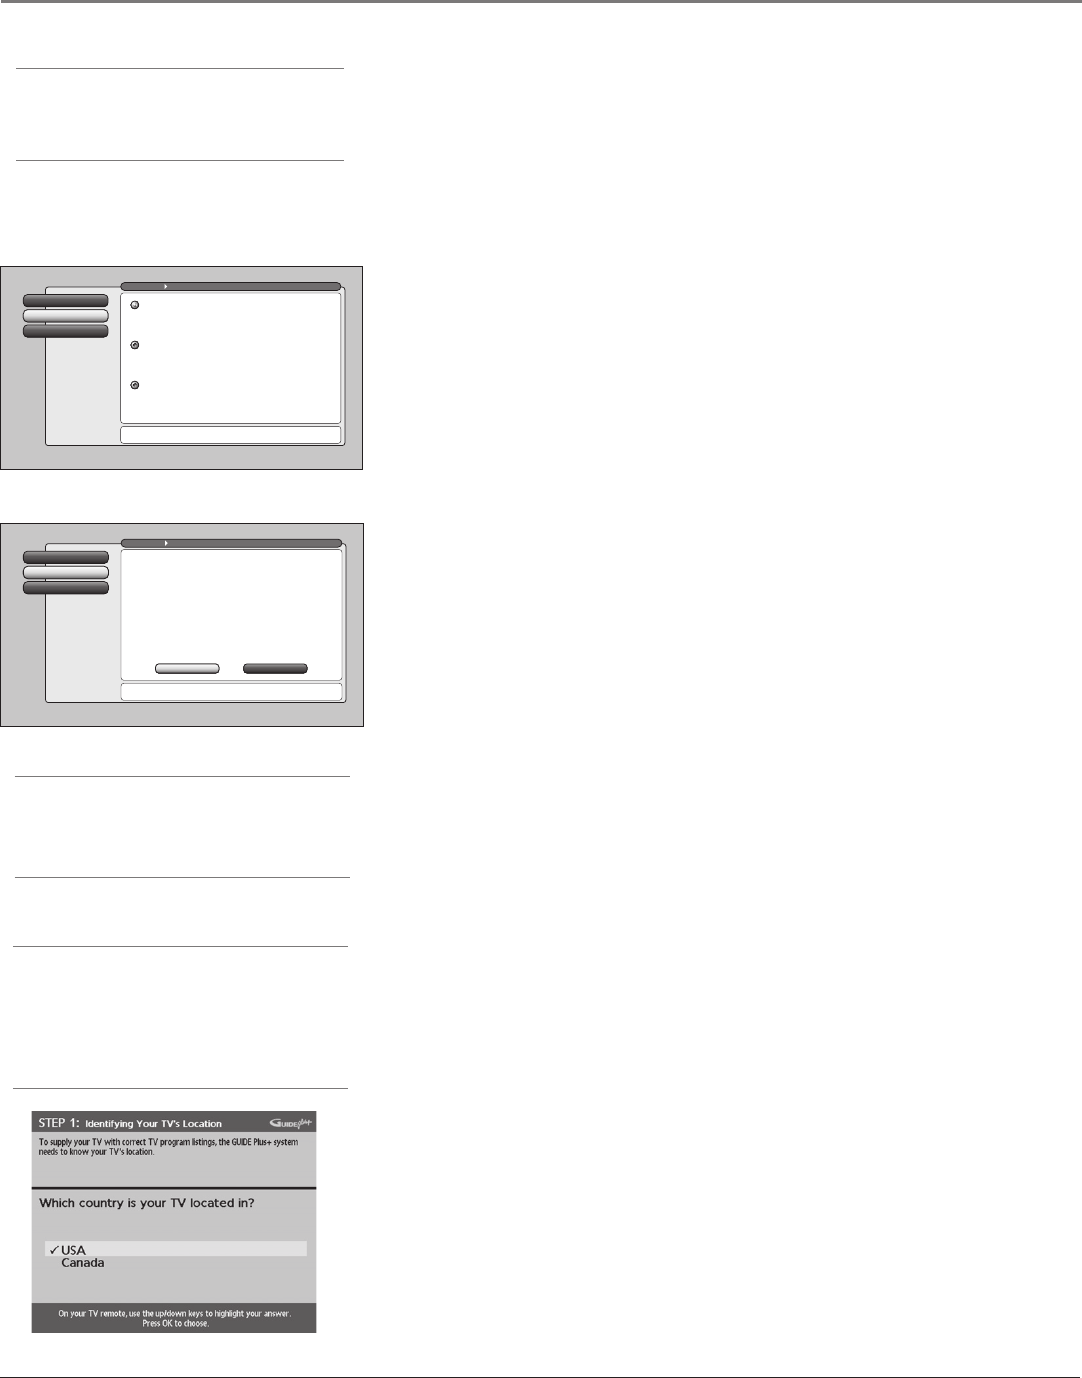
Step 1: Identifying Your TV’s Location
1. If your country is highlighted, press OK on the remote control.
If your country isn’t highlighted, press the up or down arrow button on the
remote control to highlight your country and press OK.
Cancel Setup
2
Closed CaptioningContinue Setup
1
Go Back
0
Main Menu Preferences
Press or to point to an option, then press OK to
select it. Press to return to the menu.
Highlight with the and arrows. Select with the OK button.
Note: Menu Language only affects the menus, not the GUIDE.
Resalte con las flechas y . Seleccione con el botón OK.
Nota: Idioma de los Menús afecta sólo los menús, no la GUÍA.
Mise en surbrillance avec et . Sélection avec OK.
Nota : Menu des langues pour les menus, non pour le GUIDE.
Français
Español
English
Cancel Setup
2
Antenna InfoContinue Setup
1
Go Back
0
Main Menu Connections
Press OK to startt a Full Channel Search of both antennas
including automatic detection of Cable or Air antenna.
Use Full Search the first time that your TV is setup to
search for channels on Antenna A and B. Full Search will also
automatically detect the proper Air or Cable setting.
A Full Channel Search requires several minutes to complete.
Thereafter, use Quick Search. It only searches the currently-
tuned antenna, keeps the Air or Cable setting the same, and
is faster. Quick Search is useful when adjusting an
over-the-air antenna to receive the channels for your area.
Tip: If you have Cable and Air, connect Cable to Antenna A.
If you have only Air, connect it to Antenna A.
Status: Antenna A (Cable), Antenna B (Air).
Quick SearchFull SearchFull Search
Tip
If you move to a new ZIP or postal code, or if
any of your information changes and you need
to access the setup screens from the TV’s main
menu— press MENU, choose GUIDE Plus+
Menu, and choose GUIDE Plus+ Setup, then
choose “No, repeat setup process.”
1614682A.03_cx_8.22 9/18/03, 5:28 PM26


