


19
Connecting
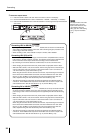
DVI or VGA output from a computer can be converted to HDV, and the high resolution images can be
recorded to a video. Because the computer screen can be recorded in HD, small text and graphics do
maintain clarity.
* To input VGA output to the VC-300HD/VC-200HD, please use an RGB-DVI conversion connector
and cable to convert to the DVI connector.
* See “DVI” (p. 38) for explanation on DVI.
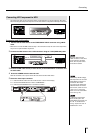
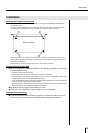
Connection and Configuration
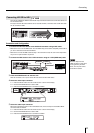
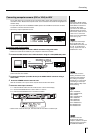
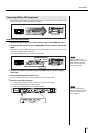
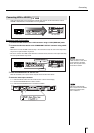
1 Connect the computer to the DVI-I INPUT connector using a DVI cable.
* Please use a cable that is suitable for your computer to make the connection.
2 Connect the HDV device to the i.LINK connector using an i.LINK (IEEE1394) cable.
* When the output from the i.LINK connector on this unit is not recognized by the HDV device, turn off
power to this unit, then restart it.
3 Connect the computer (or audio device) to the AUDIO INPUT connector using a
audio cable.
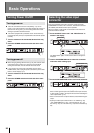
4 Press the POWER switch to start the unit.
After the unit starts, turn on power to the computer device and the HDV device.
5 Select the video input connector.
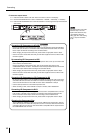
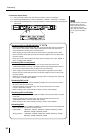
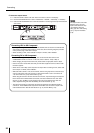
5-1. Press the INPUT button until "100: Video Source" is shown in the display.
5-2. Use the VALUE/ENTER knob to select "DVI-D" or "DVI-A."
5-3. Press the VALUE/ENTER knob to confirm the selection.
* Select “DVI-D” when DVI-D is input, and select “DVI-A” when DVI-A or VGA is input.
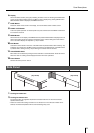
Converting computer screens (DVI or VGA) to HDV
Computer
HDV device
Please select one of the
following resolutions for the
computer screen resolution.
Also, setting the computer
“refresh rate” to a value close
to the setting for the output
format selected in Step 5 can
reduce flickering.
Digital:
1600 x 1200/60 Hz,
1400 x 1050/60/75 Hz,
1366 x 768/60,
1280 x 1024/60/75 Hz,
1280 x 768/60 Hz,
1280 x 960/60 Hz,
1152 x 864/75 Hz,
1024 x 768/60/75 Hz,
800 x 600/60/75 Hz,
640 x 480/60/75 Hz
At the factory default settings,
audio input to the Ch1 and Ch2
AUDIO INPUT connectors is
converted to HDV audio.
If you want to use audio input
to AUDIO INPUT connectors
Ch3 and Ch4, select "CH1-2:3-
4 CH3-4:1-2" or "CH1-2:3-4
CH3-4:3-4" in the "160:AUDIO
In Ch" menu (p. 32).
To adjust the nominal input
level of audio input to the
AUDIO INPUT connectors, use
the "161: In Ch1&2 NomLv"
menu (p. 33) and the "162: In
Ch3&4 NomLv" menu.
Computer
HDV device
DVI-I INPUT iLink
DVI IEEE1394
If the device does not
recognize input from the
computer, restart the computer
while leaving the power to the
VC-300HD/VC-200HD on.