Basic Operations
27
This unit has several sound input connectors: AUDIO INPUT
connectors, i.LINK connector, and HD-SDI connector (VC-300HD
only). At the factory settings, the audio input connector appropriate for
the video selected under "Selecting the video input connector" (p. 26)
is selected.
Use the following procedure to manually select the sound input
connector.
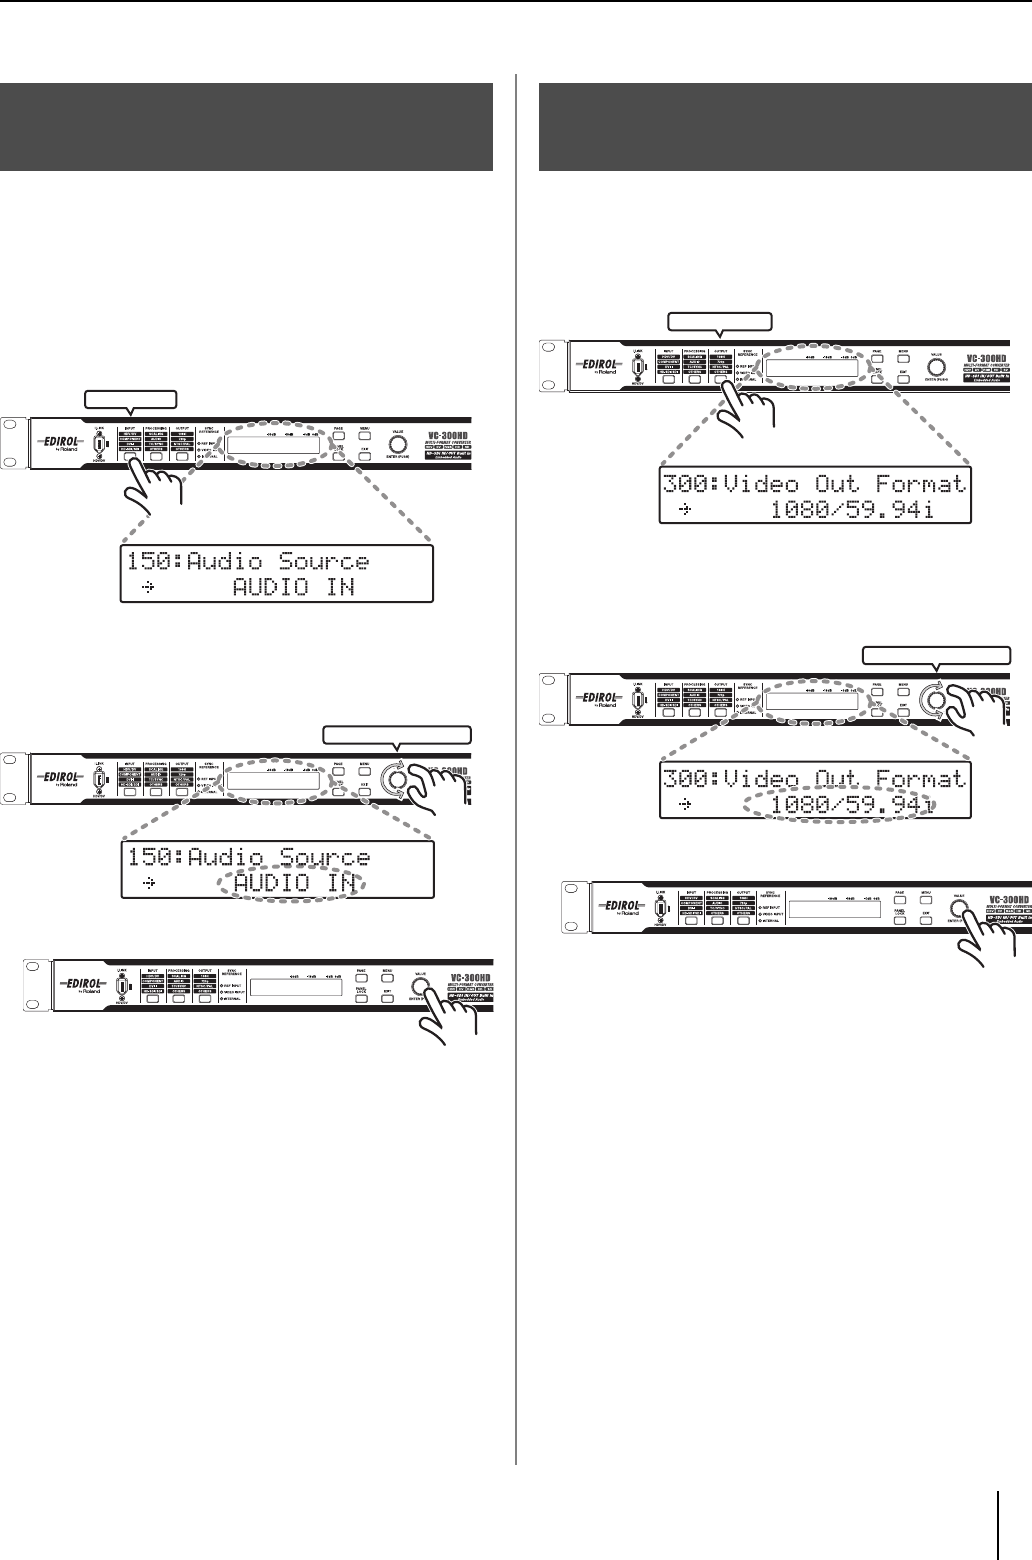
1 Press the INPUT button until "200: Audio Source" is
shown in the display.
The INPUT button lights, and the screen shown in the figure is
displayed.
2 Use the VALUE/ENTER knob to select the connector
where the audio is being input.
3 Press the VALUE/ENTER knob to confirm the selection.
When sound is input to the selected connector, sound is output from
the AUDIO OUTPUT connectors, i.LINK connector, or HD-SDI OUT
connector (VC-300HD only).
* The same HDV or DV recording is output from CH1/CH2 and CH3/CH4 of
the AUDIO OUTPUT connectors. The embedded audio output from the HD-
SDI OUT connector at this time is output to the channel selected with "450:
SDI OUT Audio Ch" (p. 37) from the Menu (p. 30).
* When inputting a DV signal (32 kHz, 12 bit, 4-channel) from the i.LINK
connector, select the channel to use in conversion with "170: DV In Audio
Ch" (p. 33) from the Menu (p. 30).
* When sound output from the i.LINK connector is to be output in the 32 kHz,
12 bit, 4-channel format, set "32kHz" with "320: Audio Out Fs" (p. 35) from
the Menu (p. 30). At this time, sound is not output from the HD-SDI OUT
connector.
* Specify the nominal level of the AUDIO INPUT connectors with "161: In
Ch1&2 NomLv" (p. 33) and "162: In Ch3&4 NomLv" (p. 33) from the Menu
(p. 30).
* Specify the nominal level of the AUDIO OUTPUT connectors with "360: Out
Ch1&2 NomLv" (p. 35) and "361: Out Ch3&4 NomLv" (p. 35) from the Menu
(p. 30).
The video signal selected with “Selecting the video input connector” on
the page to the left can be converted and output in any video format.
Follow the procedure below to select a video format to output.
1 Press the OUTPUT button until "300: Video Output
Format" is shown in the display
The OUTPUT button lights, and the screen shown in the figure is
displayed.
2 Use the VALUE/ENTER knob to select the output
format.
3 Press the VALUE/ENTER knob to confirm the selection.
The Status screen returns to the display (p. 29).
Each output connector outputs video in the selected video format.
* See the “Output Format Table” (p. 13) for combinations of formats
and the connectors that can be output to. Selected video formats
for some combinations do not have connectors where they can be
output.
* If the aspect ratio of the video selected under “Selecting the video
input connector” (p. 26) and that of the output format are different,
select the scaling type with "200: Scaling Type" (p. 33) from the
Menu (p. 30).
Selecting the audio input
connector
INPUT button
VALUE/ENTER knob
Selecting the video output
format
OUTPUT button
VALUE/ENTER knob


