


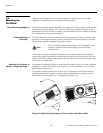

Installation
VX-3000d Series Installation/Operation Manual 37
PRE
L
IMINAR
Y
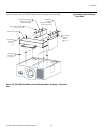
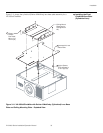
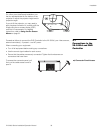
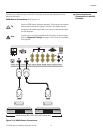
1. Place the projector upside down on a blanket or other soft surface.
2. Install a nylon spacer (item #3) at each mounting hole location.
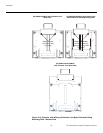
3. Place the CineWide base plate (item #2) on the bottom of the projector. For a
standard VX-3000d/CineWide, position the plate as shown in
Figure 3-11; for a
VX-3000d Ultra/CineWide, position the plate as shown in Figure 3-12.
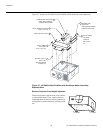
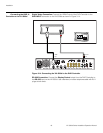
4. If you are mounting the projector on a ceiling: Line up the four holes on the
projector ceiling mounting plate (included with the projector ceiling mount kit) with
those on the bottom of the projector and CineWide base plate.
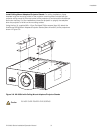
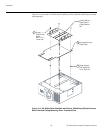
5. Secure the CineWide base plate (and ceiling mounting plate, if needed) to the
projector with the M6x12mm screws (item #1) and nylon spacers provided with the
CineWide lens base plate.
1. Do not use the mounting screws provided with the ceiling
mounting plate. Use only the hardware provided with the
CineWide lens base plate.
2. DO NOT OVER-TIGHTEN THE SCREWS.
Caution