


Installation
VX-3000d Series Installation/Operation Manual 55
PRE
L
IMINAR
Y
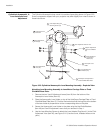
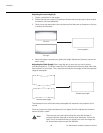
When the height is properly set, tighten the Height Adjustment T-Screws to secure the
lens in place.
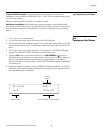
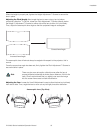
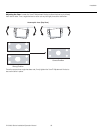
Adjusting the Pitch (Angle): Next, angle the lens to even out any top-to-bottom
pincushion distortion. To do this, loosen the Pitch Adjustment T-Screws (directly below
the Height/Y Adjustment T-Screws) on either side of the lens to allow it to pivot freely.
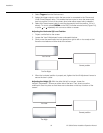
Then, adjust the anamorphic lens angle so that the projected image is rectangular:
The anamorphic lens will almost always be angled with respect to the projector; this is
normal.
Once the proper lens angle has been set, firmly tighten the Pitch Adjustment T-Screws to
secure the lens in place.
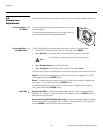
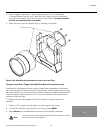
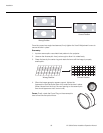
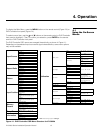
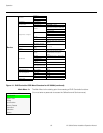
Adjusting the Yaw: Loosen the Yaw/X-Adjustment Levers to allow the lens to pivot freely
from side to side. Then, angle the lens to even out any left-right pincushion distortion:
There may be some pincushion distortion even after the lens is
properly adjusted, especially at shorter throw distances. If this is the
case, Runco recommends that you slightly over-scan the image
into the screen frame area to mask the distortion.
Correct Lens Angle
Incorrect Lens Angle
Note
Anamorphic Lens (Top View)