


8
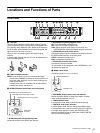
Preparations
Preparations
Area Settings
Before using the unit
There is no default area setting. Set the area where you intend
to use this unit first.
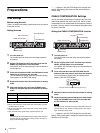
Setting the area
1 Turn the power on.
The camera does not need to be connected to perform
this setting.
2 Set the LOCK switch to OFF and make sure that the
PANEL ACTIVE button is not illuminated.
If the PANEL ACTIVE button lights up, press the button to
turn the light off.
3 Press and hold down the SW1 and SW2 buttons at the
same time for more than two seconds.
The unit switches to setting mode and selectable setting
values appear in the SHUTTER display.
4 Release the buttons after the unit switches to setting
mode.
5 Select the desired area, using the UP/DOWN lever,
within five seconds after the unit switches to setting
mode.
a)NTSC composite video signal output with a black setup (7.5 IRE).
System frequency: 59.94i
b)NTSC composite video signal output with no black setup. System
frequency: 59.94i
c) PAL composite video signal output. System frequency: 50i
The setting mode is deactivated unless setting starts within five
seconds after the unit switches to setting mode. Follow step 3
again to activate setting mode.
“- - - - ” appears in the SHUTTER display five seconds after
setting. Area settings are stored and the units switches to
normal mode.
CABLE COMPENSATION Settings
You can set cable compensation according to the multi-core
cable length between the camera and CCU. A built-in cable
compensation circuit compensates for the frequency losses in
the cable. This way, losses in return video and prompter video
inputs are minimized.
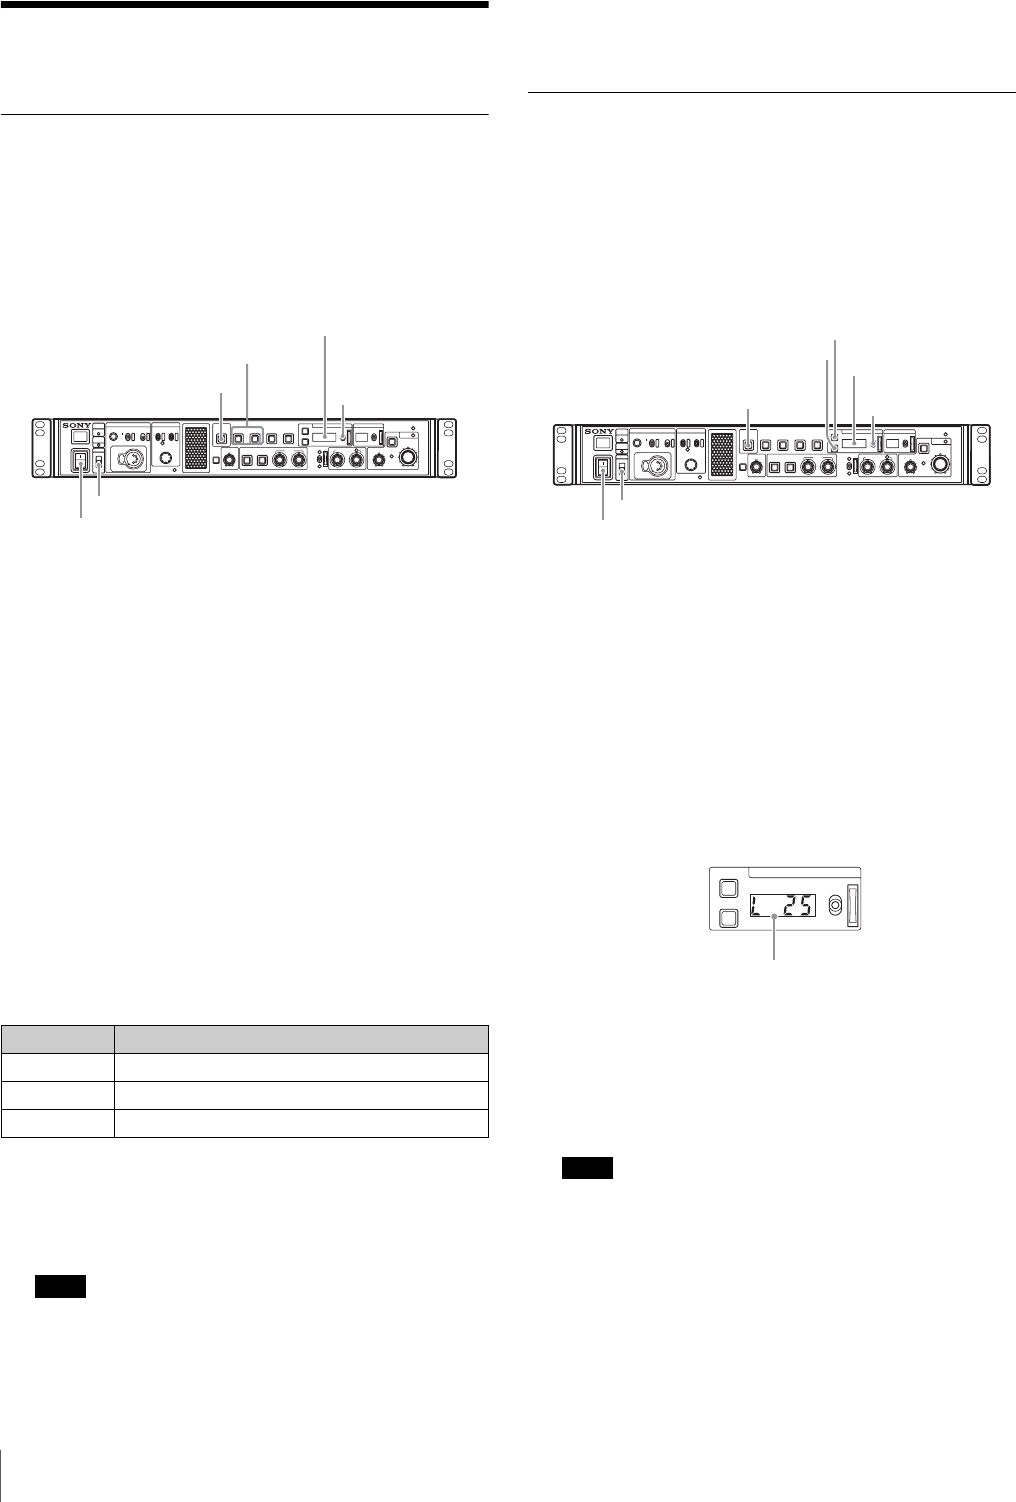
Setting the CABLE COMPENSATION function
1 Turn the power on.
The camera does not need to be connected to perform
this setting.
2 Set the LOCK switch to OFF and make sure that the
PANEL ACTIVE button is not illuminated.
If the PANEL ACTIVE button lights up, press the button to
turn the light off.
3 Press and hold down the SHUTTER ECS and ON
buttons at the same time for more than two seconds.
The unit switches to setting mode and setting values
appear in the SHUTTER display.
4 Release the buttons after the unit switches to setting
mode.
5 Adjust the setting value according to the cable length,
using the UP/DOWN lever, within five seconds after
the unit switches to setting mode.
The setting mode is deactivated unless setting starts within five
seconds after the unit switches to setting mode. Follow step 3
again to activate setting mode.
“- - - - ” appears in the SHUTTER display five seconds after
setting. Cable compensation settings are stored and the units
switches to normal mode.
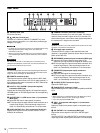
Settings Areas
60i5 NTSC (except Japan)
a)
60i NTSC (Japan)
b)
50i PAL
c)
Note
PGM
PROD
MENU ENTER
CONTROL
NETWORK
DISP
CALL
CANCEL
CUSTOM
ECS
ON
DOWN
UP
DOWN
IRIS/MB
ACTIVE
ALARM
EXT
IRIS
AUTO
UP
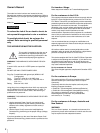
SW1 SW2
WHITE
BLACK/FLARE
HD CAMERA CONTROL UNIT HXCU-D70
MASTER BLACK
WHITE
AUTO
BLACK
ATW PRESET
BARS STANDARD
PAN EL
ACTIVE
ENG
MIC-ON
OFF
MENU
MASTER GAINSHUTTER
POWER
INTERCOM
CABLE
ALARM
CAM
POWER
OPEN
LOCK
ON
OFF
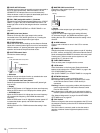
PANEL ACTIVE button
SW1, SW2 button
SHUTTER display
UP/DOWN lever
LOCK switch
POWER switch
Note
PGM
PROD
MENU ENTER
CONTROL
NETWORK
DISP
CALL
CANCEL
CUSTOM
ECS
ON
DOWN
UP
DOWN
IRIS/MB
ACTIVE
ALARM
EXT
IRIS
AUTO
UP
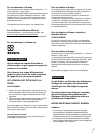
SW1 SW2
WHITE
BLACK/FLARE
HD CAMERA CONTROL UNIT HXCU-D70
MASTER BLACK
WHITE
AUTO
BLACK
ATW PRESET
BARSSTANDARD
PANEL
ACTIVE
ENG
MIC-ON
OFF
MENU
MASTER GAINSHUTTER
POWER
INTERCOM
CABLE
ALARM
CAM
POWER
OPEN
LOCK
ON
OFF
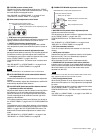
PANEL ACTIVE button
SHUTTER display
UP/DOWN lever
LOCK switch
POWER switch
ECS button
ON button
ECS
ON
DOWN
UP
SHUTTER
Displayed numbers indicate cable length (unit: m).