20
Using the Further Programme Preset function
Using the menu Further Programme Preset you can
a) individually adjust the volume level of each channel.
b) improve the quality of a weak channel (picture or sound distortions) with
manual fine tuning.
c) preset the AV output for programme positions of those channels with
scrambled signals (e.g. from a Pay TV decoder). In this way a connected
Smartlink VCR records the unscrambled signal.
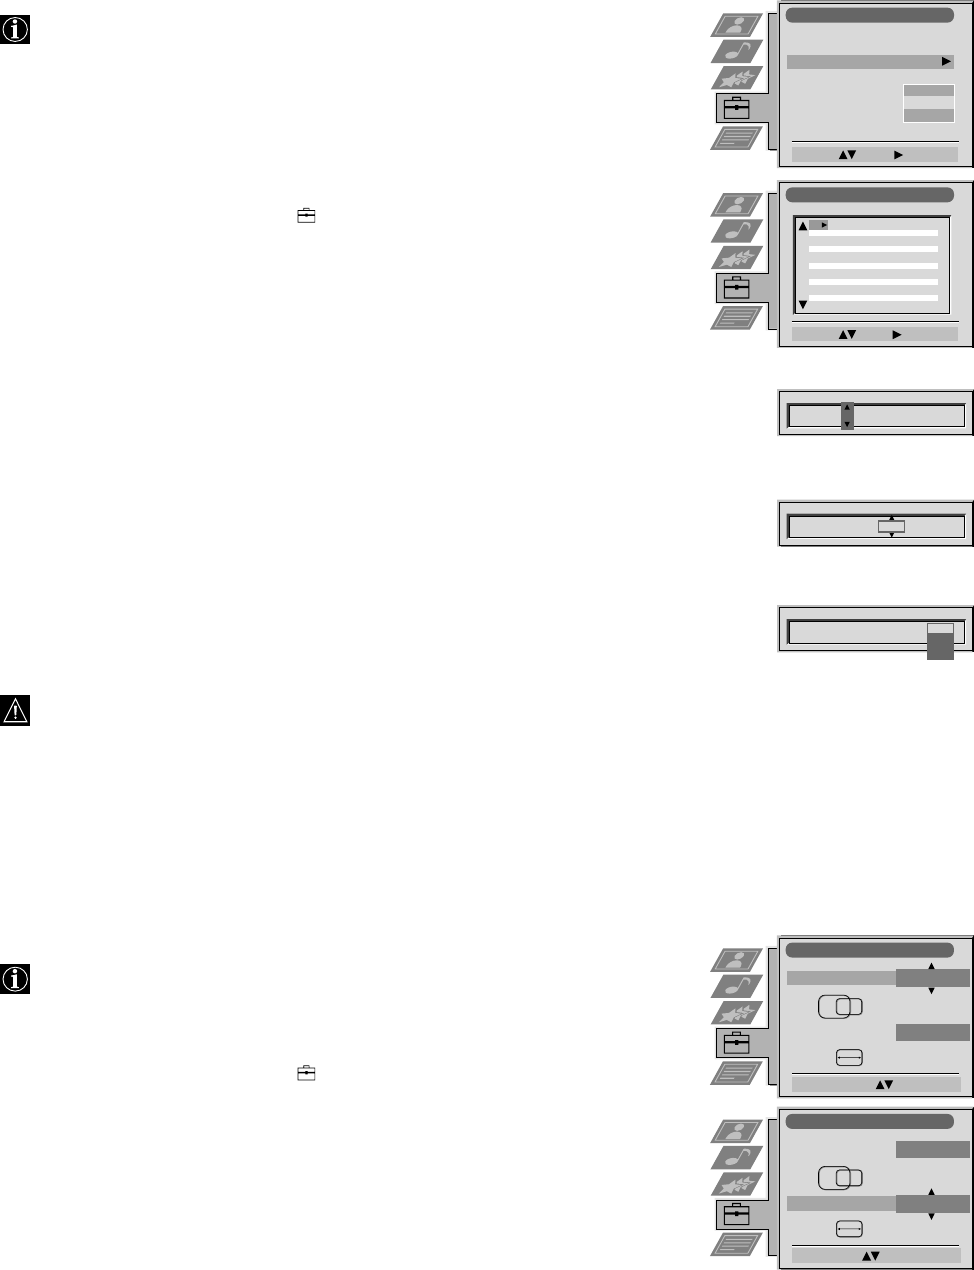
1 Press MENU. Select the symbol
using $. Push to ” to enter.
2 Select Installation using $. Push to ” to enter. Select Further Programme Preset
using $. Push to ” to enter.
3 Select the programme position of the desired channel by pushing to 4 or $.
Push repeatedly to ” to select:
VOL (Volume Offset), AFT (Automatic Fine Tuning) or DECODER.
The selected item changes colour.
4a VOL
Push to 4 or $ to adjust the volume level (range -7 to +7) of the channel.
Store by pressing OK.
Repeat steps 3 and 4a if you wish to adjust the volume level of other channels.
b AFT
Push to 4 or $ to fine tune the channel (range -15 to +15). Store by pressing OK.
Repeat steps 3 and 4b if you wish to fine tune other channels.
c DECODER
Push to 4 or $ to select AV1 (Euro AV socket 1) or AV2 (Euro AV socket 2) as
output for the video source on this programme position. Store by pressing OK.
Repeat steps 3 and 4c if you wish to preset the AV output of other video sources.
Should you use Auto Tuning afterwards, this setting will
be cancelled.
5 Press MENU to return to the normal TV screen.
Operation (TV menu system):
Installation
Select: Enter:
Language/Country
Manual Programme Preset
Further Programme Preset
RGB Set Up
Picture Rotation
Speaker Configuration
Personal ID
O
- - - - - - -
Further Programme Preset
Select: Enter:
PROG AFTVOL DECODER
On
On
On
Off
Off
Off
0
0
0
1
2
3
4
5
6
7
8
9
10
11
Internal
PROG AFTVOL DECODER
1
0
PROG AFTVOL DECODER
1 -5
On
PROG AFTVOL DECODER
1 -5 On
Off
AV1
AV2
Adjusting the picture geometry for an RGB source
When connecting an RGB source such as a Sony playstation you may need to
readjust the picture geometry.
1 Select the connected RGB source … 1 by pressing … repeatedly.
2 Press MENU. Select the symbol
using $. Push to ” to enter.
3 Select Installation using $. Push to ” to enter. Select RGB Set Up using $.
Push to ” to enter.
4 Select H Centre by pushing to ”. Adjust the centre of the picture
(range from -10 to +10) using 4 or $. Store by pressing OK.
5 Select H Size using $. Push to ” to enter. Adjust the horizontal coordinates
(range from -10 to +10) using 4 or $. Store by pressing OK.
6 Press MENU to return to the normal TV screen.
RGB Set Up
Adjust Size: Confirm: OK
H Centre
O
H Size
O
RGB Set Up
Adjust Position: Confirm: OK
H Centre
O
H Size
O
