Using the Remote Control
57
KDF-55/60XS955
2-059-372-11(1)
Using the Remote Control
qg
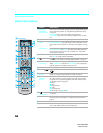
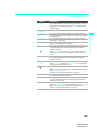
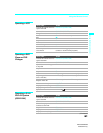
SLEEP Press repeatedly until the TV displays the time in minutes (15, 30, 45,
60 or 90) that you want the LCD projection TV to remain on before
shutting off. To cancel Sleep Timer, press SLEEP repeatedly until
Sleep Off appears.
qh
POWER
(GREEN)
Press to turn on/off the LCD projection TV.
qj
DISPLAY Press once to display channel number, label, current time and other
information. Press again to turn Display off. See page 111 for details
on setting the time.
qk
TV/VIDEO
Press to cycle through the video equipment connected to your
LCD
projection TV
’s video inputs.
ql
MENU Press to display the menu. Press again to exit from the menu. For
details, see “Using the Menus” on page 93.
w;
F1 Press to select the function of connected components. For details, see
“Using Other Equipment with Your LCD Projection TV Remote
Control” on page 60.
When FUNCTION is switched on TV, press to display the Memory
Stick menu. For details, see “Using the Memory Stick Viewer” on
page 75.
wa
F2 Press to select the function of connected components. For details, see
“Using Other Equipment with Your LCD Projection TV Remote
Control” on page 60.
ws
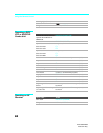
ANT Press to change between the VHF/UHF input and the CABLE input.
GUIDE When FUNCTION is switched on SAT/CABLE, press to display the
program guide of your satellite receiver.
wd
/TV/SAT TV/SAT: Press to select the TV or satellite receiver.
: Press repeatedly to step through the available audio effect modes:
TruSurround, Simulated, Off.
For details, see “Selecting Audio Options” on page 98.
wf
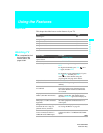
CH +/– Press to scan through channels. To scan quickly through channels,
press and hold down either CH button.
wg
JUMP Press to jump back and forth between two channels. The LCD
projection TV alternates between the current channel and the last
channel that was selected.
wh
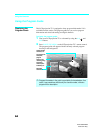
MTS/SAP Press repeatedly to cycle through the Multi-channel TV Sound (MTS)
options: Stereo, Auto SAP (Second Audio Program), and Mono. The
MTS setting can be also accessed in the Audio menu. For more
details, see “Selecting Audio Options” on page 98.
Button Description


