


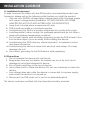
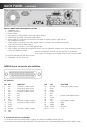


OPERATION INSTRUCTION
A. Menu Setup
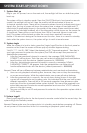
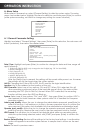
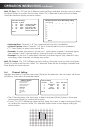
While system is powered up, select [General Setting] to alter the system setup. The setup
menu can be seen below, highlight the item for selection and then press [Enter] to confirm.
(while system recording, not allow to change any setting for current channel)
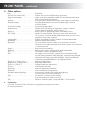
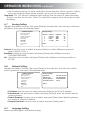
A-1 General Parameter Setting:
Highlight and select "General Settings", then press [Enter] for this selection, the sub-menu will
shown (as below), then select the desired area.
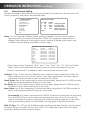
Date/ Time: Highlight and press [Enter] to confirm for change for date and time, range will
apply following:
• YEAR: from 2000 to 2099, only change the last 2 digits (eg. "03" for Year 2003);
• MONTH: Range 01 ~12;
• DAY: Range 01~31;
• HOUR: Range 00~23;
• MINUTE: Range 00~59;
• SECOND: Range 00~59;
After the [Return] key is pressed, the settings will be saved while power is on. However,
the settings will not be saved when the system restarts.
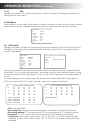
Unit ID: Changing the ID from 000 to 999, this ID used for the login identification.
Location: Key in the address for the location of the unit.
HDD Overwrite: Select one of two options: ON and OFF. When ON is selected, this will
allow recording continuously even if the hard disk space fulls up. The video will be
recording into FIFO (First-In-First-Out) format. When OFF is selected, the recording
function will stop once the HDD has filled up.
System: Select one of two options: "PAL" and "NTSC", then press [Enter] to confirm. NTSC is
the standard for North American video systems while PAL is standard for European
recording systems.
Admin_pwd_modify: Allows the you to change the administrator password, press[Enter] to
enter this function. It will require you to key-in the new password twice to confirm the
new password (this option only available with the administrator authorization level).
Operate_pwd_modify: Allows the you to change the operator password, press[Enter] to
enter this function. Require the user to key-in the new password twice to confirm.
HDD Format: This will allow you to format the hard disk drive while non-recording status,
while this option being selected, select with [START] and press [Enter] to confirm this
function.
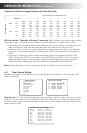
Restore Default Setting: Restore all the settings to the factory level settings. A confirmation
option will appear to reconfirm system restore. A sample chart is shown on the next
page.
Return: Go back to previous menu.
GENERAL SETTINGS
Record Settings
Timer Record
Motion Detection
Alarm Record
Channels
Housings
Network
Language
Exit
GENERAL SETTINGS
Date / Time: 2003-05-08-23:59:00 Saturday
Unit ID:
Location:
HDD Overwrite: Yes
System: PAL NTSC
Admin_pwd_modify Operate_pwd_modify
HDD Format
Restore Default Setting
Return