


29
ADJUSTMENT
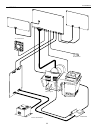
4. Multiple Screen Wall system (example)
Unit-3 Unit-4
Unit-2 Unit-1
Signal source
Remote controller
Digital Signal Link
System Bus Link
5. ID Assignment (example)
ID# should be assigned before connecting the RS232C control cables and ID# must be cleared
before they can be re-assigned.
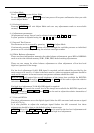
5-1. Clearing I.D.
Press ADJUST to enter Adjust Mode and then press ID.ALL to enter I.D. Mode, press ID.SEL 3
times and then press ID.CLR to erase the current I.D.
5-2. Setting I.D.
Press ID.ALL so that ‘INPUT ID NUMBER’ appears and enter the desired 2 digit I.D. using the
alpha-numeric keys. Press ID.SEL 3 times and then ID.SET , to assign the I.D. – the OSD will
disappear and the unit will return to Normal Mode.
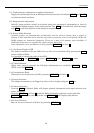
5-3 Selecting I.D.
If using Cube Commander software simply select the two digit I.D. for the cube you wish to
control.
If using remote control it is necessary to press ID.SEL to access the correct menu for I.D.
selection and control.
If ID.ALL is pressed instead of an alpha-numeric key ‘X’ will appear, pressing ID.ALL twice will
display ‘XX’ which will allow control of all units simultaneously.
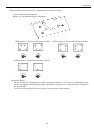
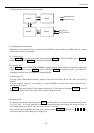
6. Magnification
To magnify the image repeatedly press MAG in Adjust Mode to change the magnification factor
1x1, 2x2, 3x3… It is also possible to select the magnification factor using the numeric keys so
that magnifications such as 1x2, 2x3, 4x3 etc can be selected.
Once the desired magnification has been selected press LAYOUT followed by ٨ ٧ < > to
select the portion of the image to be displayed.