Recording Mode
20
Recording modes:
• There are various external signal inputs in the unit, including S-Video, composite video, TV tuning, DV input and
stereo audio input. You can select any group of audio and video signals from these inputs for recording.
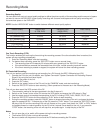
• There are six available recording modes of different qualities, including SLP (6 hours), EP (4 hours), LP (3 hours),
SP+ (2.5hours), SP (2 hours) and HQ (1 hour).
• The unit has a function of timer recording. You can set up a recording schedule in advance. The unit will record
the programs that you select automatically.
Entering the recoding mode and menu description:
To enter the recording mode:
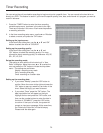
1. In the disc mode, press the “INPUT” button to enter the Monitoring Mode. The Monitoring Mode can be regarded
as a sub-mode of the Recording Mode.
2. The system will automatically enter the Recording Mode when the setup time is reached. For details about timer
recording, see “Timer Recording” for reference.
3. In the Recording Mode, press the “DISPLAY” button to show or hide the recording control bar menu.
Manual Recording:
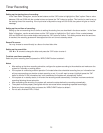
Recording Source: You can select which video input the unit should record from. The following options are available: Rear
Composite, Rear S-Video, Tuner, Front Composite, DV, and
YPbPr Input
• Press the “INPUT” button (repeatedly) to change the video source and select one of the above.
Note: If you are recording from a rear source, make sure your audio connections are connected to the rear audio inputs.
If you are recording from a front source, make sure your audio connections are connected to the front audio inputs.
Recording to DVD or HDD
Select to record to hard drive or optical disc:
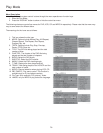
1. Press the “TIME SHIFT” button once to switch to manual recording mode.
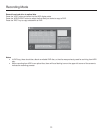
2. Press “REC TO” button to switch between the HDD or DVD Record sources. If you have a recordable media in
the tray, you can press “REC” and start recording (OTR) to DVD.
3. Press Stop to fi nish recording.
Notes:
• The product will continue to record until the disc is full.
• To set the product to record for 30 minutes only, press the “RECORD” button after recording has started. A
message will be displayed on the screen indicating that the unit will record for 30 minutes.
• Each time the “RECORD” button is pressed, an additional 30 minutes will be added to the record time.
• To pause the recording, press the “PAUSE” button on the remote control.
• Press the “PAUSE” button or the “REC” button to resume recording. Recording will continue until the “STOP”
button on the remote control or the product front panel is pressed.
• Press the remote control “TIME SHIFT” button once to turn on Time Shift mode. Press the button twice to switch
to manual recording mode.
• Press the “REC TO” button to switch between the HDD or DVD record sources.


