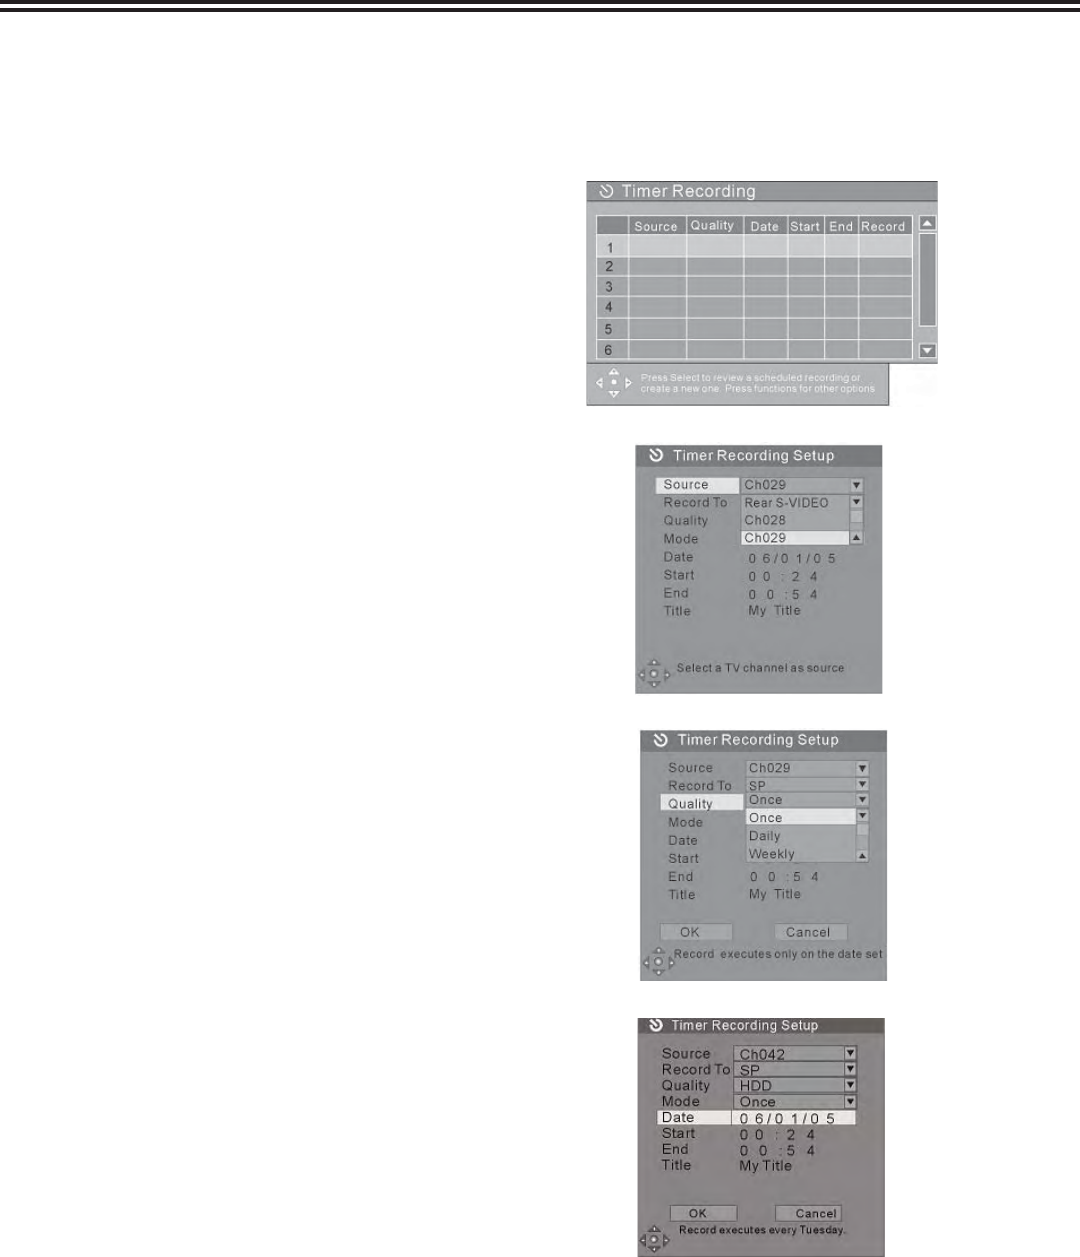
Timer Recording
24
You can set-up the unit to schedule recordings to begin and end at a specifi c time. You can record to the hard drive or
directly to a DVD. This feature is useful if you know the specifi c quality, time, date, and channel of a program you want to
record in advance.
1. Press the “TIMER” button to enter the timer recording
schedule setup menu, as shown in the chart to the right.
There are 8 records in this menu. Each record represents
a recording schedule.
2. In the timer recording setup menu, use the ▲ or ▼ button
to select a record, and press the “OK” button.
Setting up the input source:
In the Item Editor dialog box, use the ▲ or ▼ and “OK”
buttons to select the value of “SOURCE”
Setting up the recording quality:
In the Item Editor dialog box, use the ▲ or ▼ and
“OK” buttons to select the recording quality. For more
information about recording quality, for reference: HQ, SP,
SP+, EP, LP, SLP.
Set up the recording mode:
This setting is done with the third control unit in “Item
Editor” dialog box. Move the cursor ▲ or ▼ to select the
row, and press the “OK” button to initiate the drop-down
menu. The settings are as follows:
Weekly: recording every week.
Daily: recording everyday
Once: recording on a certain date
Setting up the recording date:
• If you select “Weekly” press the “OK” button to
confi rm. Move the cursor to the right and press the
“OK” button to pop up a week list, as shown in the
chart. Select the day(s) you want to record.
• If you select “Once” press the “OK” button. The
date input editor box will appear on the right.
Highlight the box and press the “OK” button, and
then use the number buttons to enter the date in
the form of “DD/MM/YY” press the “OK” button
to confi rm. If the input is invalid, the system will
prompt an input error message. At the same time,
the “Date Input Editor Box” will be left empty.
Please enter the date again.
