Milestone XProtect Smart Client 3.0; User’s Manual
www.milestonesys.com Page 64 Day-to-Day Use
Selecting a view in the Browse tab’s Views section
By selecting the required view from the Views list located in the upper part of the window.
Selecting a view in the Views list
Tip: If views have been assigned shortcut numbers (see Assigning Shortcut Numbers to Views
on page 25), you will also be able to select a view by using keyboard shortcuts (see Using
Standard Keyboard Shortcuts on page 88).
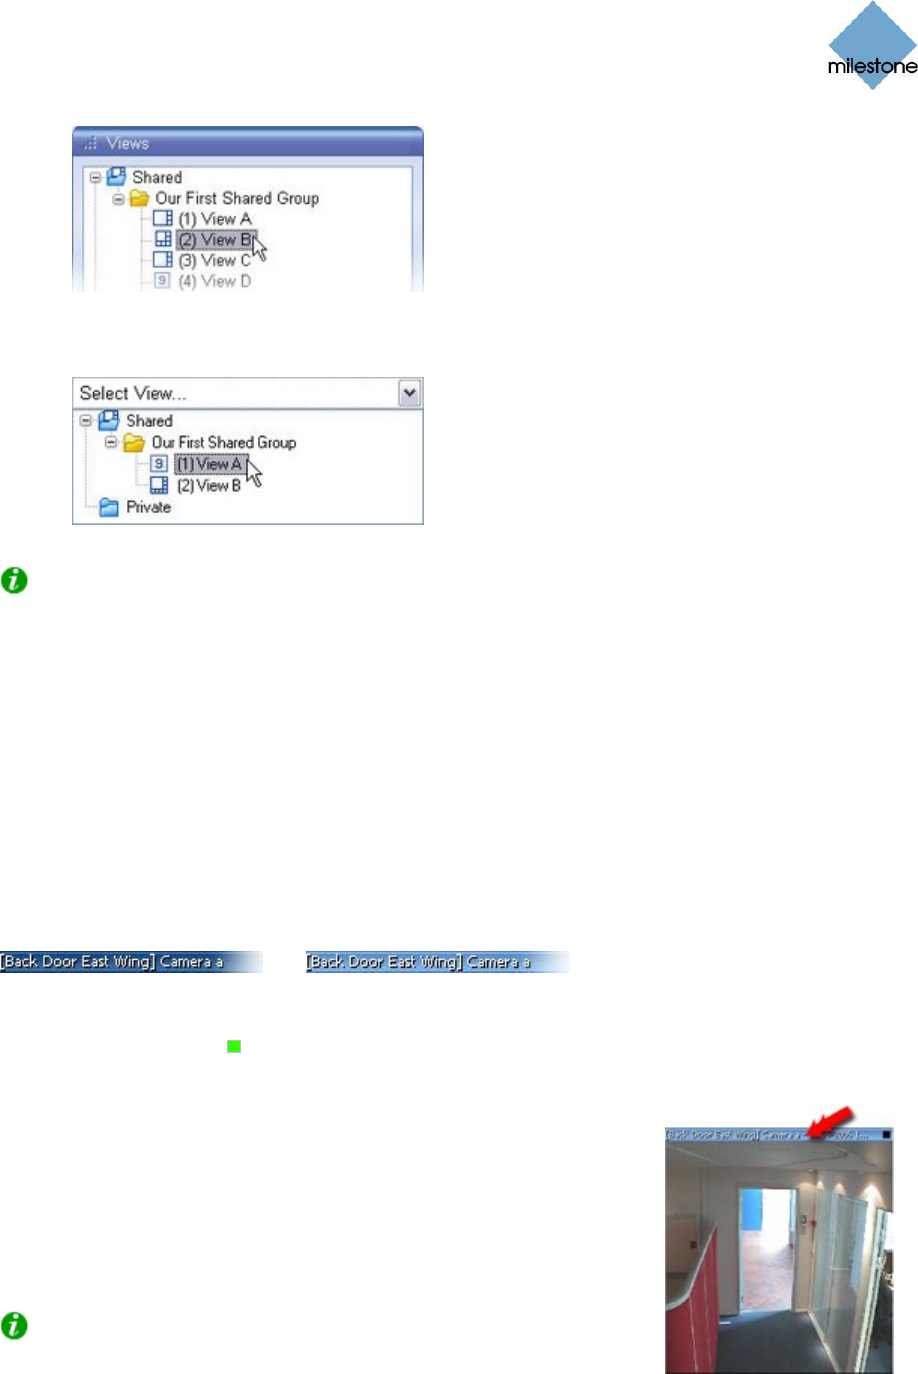
Image Bars and Green Indicators
Each camera in the view is identified by an image bar, located in the top of each camera image.
The image bar displays the name of the camera as well as the name of the device to which the
camera is connected. The device name is displayed first, in square brackets, followed by the
camera name. When images are displayed, the image bar furthermore shows the date and time of
the displayed image.
The image bar is dark blue. When you select a particular camera in the view, the image bar of the
selected camera position becomes a lighter blue.
Dark blue: camera is not selected Light blue: camera selected
Each image bar features a recordings indicator, which is useful when browsing recordings. The
indicator lights up green each time a new image is displayed.
Enlarging Images from Particular
Cameras in a View
To enlarge images from a particular camera in a view, double-click the
camera position’s blue image bar.
To return to normal view, simply double-click the blue image bar
again.
Tip: If you have selected reduced image quality for the camera (on
the Setup tab), images from the camera will be displayed in full quality
when enlarged.


