


31
AXIS 243Q Blade - Pan Tilt Zoom
The order of priority for taking control of the queue is as follows:
1. Ad
ministrators - An administrator takes over PTZ control regardless of who is
currently first in queue. The administrator will be removed from the queue 60
seconds after their last PTZ control command.
2. Event - The AXIS 243Q Blade can be set up to take control of the queue and
move to a specific position for 20 seconds when triggered by an alarm. The event
will immediately be placed first in the queue, except when an administrator is in
control. For more information, see Triggered Event, on page 33.
3. Operator - Same as administrator, but with lower priority.
4. Guard Tour - A guard tour has PTZ control for an indefinite period of time. It
may be overridden by; Operator, Event or administrator. Guard Tour will resume
when higher priority groups leave the queue. For more information see Guard
tour, on page 29.
5. Viewer - Multiple viewers must wait for their turn. The viewer has 60 seconds
PTZ control before control is passed to the next viewer in queue.
Note:
In order to identify different users in the viewer group, cookies must be enabled on the client.
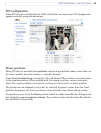
Using PTZ on video inputs 2-4
Although the AXIS 243Q Blade supports an RS-485 port on video input 1 only, it is still
possible to use PTZ devices on video inputs 2-4 by creating virtual connections to these
inputs from video 1 (See “RS-485 COM port” on page 52). To do this, follow these steps:
1. Configure PTZ on video input 1 an
d install the required PTZ driver. This step is
always required, whichever video input you intend to use for PTZ, and is
described in detail in Installing PTZ devices, on page 25. Refer also to RS-485
COM port, on page 52.
2. Repeat this procedure and install the same device driver on the other video
input(s) you wish to use PTZ on.
3. Enter the same Authentication key as configured for video input 1. This will
prevent unauthorized access to the RS-485 port.
PTZ devices on inputs 2-4 are configured in
the same way as a device on video input 1.
See page 26 for information on configuration.