


6. How to Operate
41
6-7.4. LIVE AUDIO
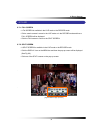
▫ The basic system (Model LCD22164) includes two indoor cameras built-in two way audio
and two outdoor cameras built-in one way audio and IR LEDs (Infrared) to view objects in
the darkness. Audio functions up to 8 cameras.
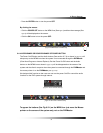
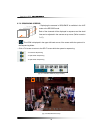
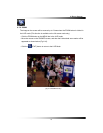
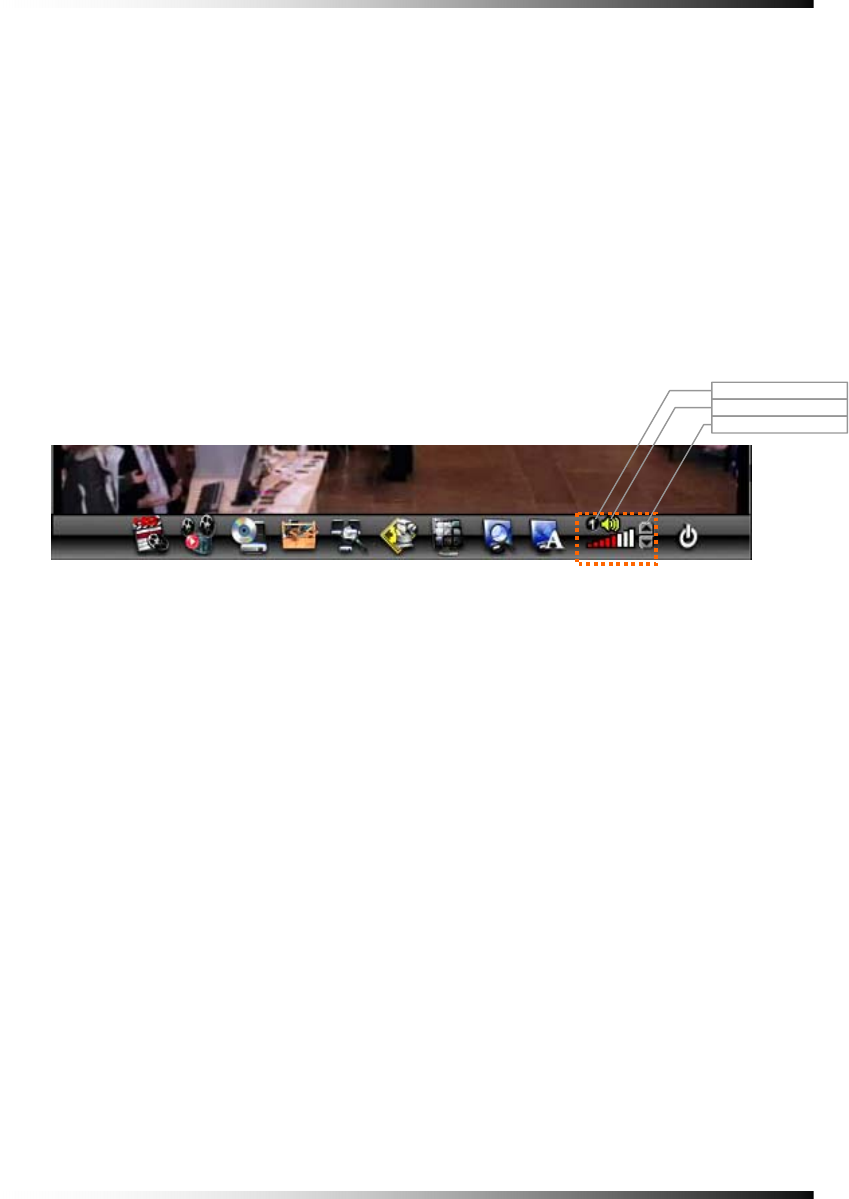
▫ Click the CHANNEL button you wish to listen on the MENU bar as shown below (See
Fig.6-9). The CHANNEL can be changed by clicking the mouse repeatedly.
▫ Turn the AUDIO (speaker) ON by clicking the SPEAKER icon as shown below (See Fig.6-
9). If the ICON turns in red by clicking, it represents that the AUDIO is turned OFF and if it
turns in yellow, it represents that the AUDIO is turned ON.
▫ Adjust the Audio Volume by Clicking the ▲ or the ▼ button when the AUDIO is turned ON.
6-7.4.1. COMMUNICATION BETWEEN MONITOR AND CLIENT COMPUTER VIA INTERNET
▫ This system is normally in listening mode between the LCD monitor and your computer
through the Internet (DvrMaster or Internet Explorer). In order to communicate between
the system and your computer, connect a head phone or a microphone and a speaker to
the computer. Adjust the Speaker and the Microphone volume on the DvrMaster or
Internet Explorer by clicking the amount of volume (See section 8-4.8 Speaker /
Microphone).
▫ Don’t forget to turn the AUDIO (speaker) ON by clicking the SPEAKER icon on the MENU
bar (See section 6-7.4 for more information) on the system.
6-7.4.2. COMMUNICATION BETWEEN MONITOR AND CAMERAS
▫ Turn the AUDIO (speaker) ON by clicking the SPEAKER icon on the MENU bar (See 6-
7.4 for more information).
▫ To communicate (two way Audio) with a camera, select one out of two Indoor cameras by
clicking the CHANNEL button on the MENU bar and press the TALK button on the bottom
of the system.
CHANNE
L
AUDIO ON / OFF
VOLUME Contro
l
[Fig. 6-9 Audio buttons]