


Stand-alone DVR Instruction Manual
54
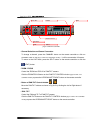
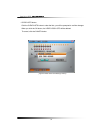
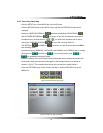
The MOTION ( ) or SENSOR ( ) as shown in Fig.6-24 should be turned ON in
this recording mode.
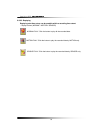
▫ Press the RECORD button on the remote controller or click the RECORD icon on the
MENU bar.
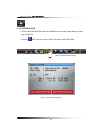
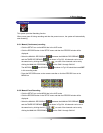
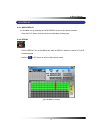
6-8.3. Timer Recording
▫ Click the SETUP icon on the MENU bar in the LIVE mode.
▫ Click the RECORD button in the SETUP menu and then the RECORD window will be
displayed.
▫ Select the TIMER RECORDING (
) between the MANUAL RECORDING ( )
and the TIMER RECORDING (
) as shown in Fig.6-25. All channels can be set at
the same time by clicking the ALL (
) or each of the channels can be set by
clicking the TIMER RECORDING (
) on the CAM 1 through CAM 16.
The MOTION (
) and SENSOR ( ) as shown in Fig.6-25 should be turned OFF
in this recording mode.
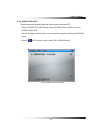
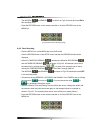
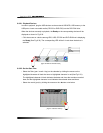
▫ Choose one among WEEKDAY, SATURDAY and SUNDAY in the TIMER menu by clicking
the mouse on (
) that turns to ( ). You can choose the value or
by repeatedly clicking the mouse.
▫ Select the Starting Time and Ending Time by clicking the mouse, change the values with
the mouse’s wheel and click the mouse again on the changed values to complete as
shown in Fig.6-27. The recording time can be set in military hour mode (24hour).
▫ Press the RECORD button on the remote controller or click the RECORD icon on the
MENU bar.
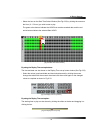
[Fig.6-24 Manual Event Recording setup]
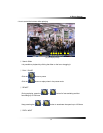
[Fig.6-25 Timer Recording setup]