


THE DVD RECORDER SETUP MENU
Audio Setup Options
36
Video Setup
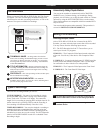
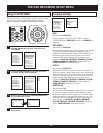
ASPECT RATIO
Default setting: 4:3 PanScan
You can setup your DVD Player to work with normal and wide
screen televisions. If you are using a wide screen TV, set this
option to 16:9 WIDE to match the aspect ratio of your TV.
When used with a normal TV (4:3 aspect ratio), the 4:3
PANSCAN setting results in the typical “Pan & Scan” display,
where a movie is clipped on the sides to fit into the TV screen.
The 4:3 LETTERBOX setting will enable the “Letterbox”
format, where the movie is presented in wide screen format
with black lines at the top and bottom of the screen. The 4:3
PANSCAN and 4:3 LETTERBOX settings usually will have
no effect, since very few movies support both options. DVDs
are generally recorded with either PS or LB and do not allow
switching between the two. So, viewing a widescreen DVD on
a standard TV will result in black bars on the top and bottom of
the screen.
VIDEO OUTPUT
Default setting: COMPOSITE
COMPOSITE: Composite Video is supported on the
majority of televisions. It is identified by a yellow-colored
phono-type jack.
S-VIDEO: A higher quality picture than standard
COMPOSITE VIDEO, S-VIDEO requires a special cable
(not included).
COMPONENT: This setting is used for TVs supporting
component video out and progressive scan. To activate the
component video outputs, you must first connect the unit
using the COMPOSITE VIDEO connector and cable in
order to enter SETUP and change this setting. Next,
connect the unit using the COMPONENT VIDEO cables
and unplug the COMPOSITE video cable. Adjust the TV’s
Video Input setting to correspond to the COMPONENT
Input.
OUTPUT FORMAT
Default setting: NTSC
Your DVD Player will work with TVs based on the NTSC and
PAL standards, as well as TVs designed to function with both
standards, or “Multi” models. NTSC is the standard TV system
used in the USA, Canada, Japan and many other countries. The
PAL TV system is used in Europe, Africa and the Middle East,
among other places. Refer to your TV’s documentation to make
sure which model you have.
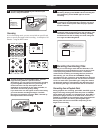
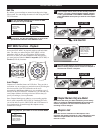
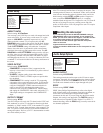
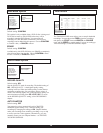
SETUP
Language
Video Setup
Audio Setup
System Setup
Disc Media
Record Mode
Timer Record
VIDEO SETUP
Aspect Ratio
Video Output
Output Format
Most TVs scan only half the lines of an image in one pass. This
scanning method is known as “interlaced” mode, as the odd and
even lines are interlaced together in alternate scans, and is the
default setting with the NTSC and PAL options. Progressive
scan, set with the PROGRESSIVE option, is a scanning
method offered on high-end TVs. Progressive scan TVs scan all
the lines of an image in one pass, creating a more film-like
quality to DVD movies. Note: All progressive scan TVs require
component video inputs.
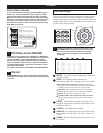
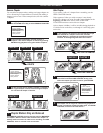
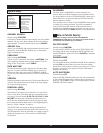
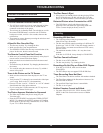
SETUP
Language
Video Setup
Audio Setup
System Setup
Disc Media
Record Mode
Timer Record
AUDIO SETUP
Audio Output
SPDIF
AUDIO OUTPUT
Default setting: LR STEREO
This setting controls the audio output to the L/R stereo output
connectors. Generally, this setting would not be changed, unless
you plan to use the unit with a MONO audio device, in which
case both stereo channels with be output through each jack.
SPDIF
Default setting: SPDIF / RAW
SPDIF (Sony/Philips Digital InterFace) refers to the digital
audio format used by most consumer electronics equipment, as
well as the Coaxial and Optical Digital Audio Output
connectors on this unit. If you are using only the Stereo Audio
Outputs, this setting is not applicable. The DIGITAL setting is
used with receivers capable of Dolby Digital 5.1 or DTS 5.1
channel decoding, while the PCM setting is usually reserved for
two channel equipment.
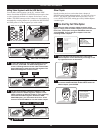
!
If you inadvertently switch the OUTPUT FORMAT setting to
PROGRESSIVE while using a standard TV not capable of P-
SCAN, you will loose video. If this happens, reset the recorder
to its default video settings by following these steps:
1) Power the unit Off, then On again with the main power
switch on the back.
2) Eject the disc and close the disc tray.
3) Press and hold the STOP button on the front panel for 3 full
seconds.
Resetting the video output