


27
ENGLISH
PC-CARD
The projector can play back an image by using the PC-
CARD.
Using the PC-CARD
Use only the flash memory card of PCMCIA•ATA com-
patible type II.
• Due to PC-CARD type, some images can not be prop-
erly recorded. Please contact your dealer.
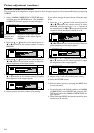
Setting up the PC-CARD
1. Set the projector into standby mode by pressing the
main power switch. The POWER indicator lights up
red.
2. Open PC-CARD cover on the left side of the projec-
tor.
3. Make sure the PC card is going to be inserted in
right side. The PC card
indicator of the PC card
which has been inserted
will illuminate.
4. Close the cover.
When the input source is set to
PC1 or PC2, or during recording to the PC card, do not
remove the PC card. The projector may not work cor-
rectly.
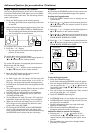
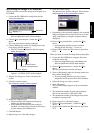
Release the PC-CARD
1. Press the RELEASE button on the remote control.
PC card eject icon will be displayed on the right
end of the screen.
The PC card indicator will turned off on the
projector.
2. Open PC-CARD cover on the left side of the projec-
tor.
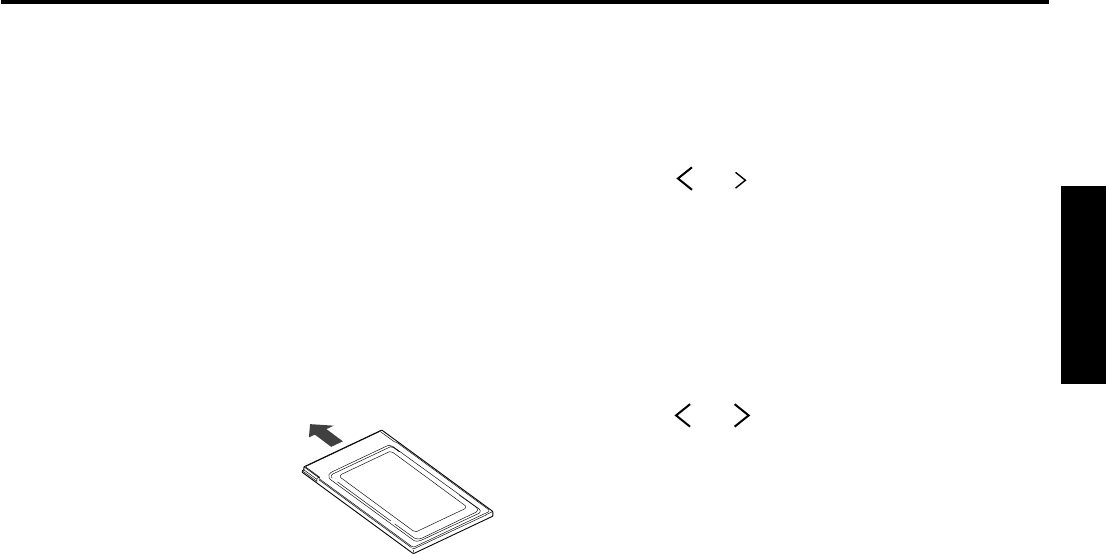
3. Press the eject button to take the card out.
4. Close the cover.
• Upon removing a PC card, wait at least 2 seconds
before inserting another.
• When the input source is set to PC1 or PC2, or
during recording to the PC card, do not remove
the PC card. The projector may not work correctly.
• When having an access of PC card, PC card eject
prohibit icon will be displayed on the right end of
the screen.
• If you do not wish this icon to be indicated, turn
ICON on PC CARD menu to OFF. In this case,
the icon appears when the RELEASE button is
pressed even the setting is OFF.
• PC card eject icon will be indicated till the card is
ejected. If you press the RELEASE button when
PC cards are inserted, you need to either take
both out or change one of the cards to the icon to
disappear.
• PC-CARD of the following manufacturers has been
confirmed of operation;
EPSON, TDK, Logitec, Panasonic, Verbatim, I-O
DATA.
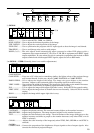
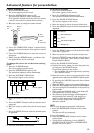
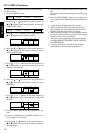
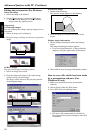
Play back
1. Insert the prerecorded PC-card.
2. Press the CARD button repeatedly until PC-1 (or
PC-2) appear on the screen.
The PC-CARD index display appears on the screen.
3. Press the or buttons on the control panel (or
$ or % buttons on the remote control) to select the
desired image.
• If the PC-CARD is recorded by using the per-
sonal computer, select the desired group by press-
ing the + or - button.
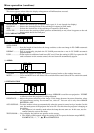
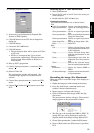
4. Press the ª or º button on the control panel (or
{ or } button on the remote control) to enter the
image display mode.
5. Press the or buttons on the control panel (or
$ or % buttons on the remote control) to display
another image.
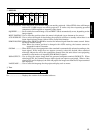
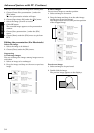
6.
Press the VIDEO or RGB buttons to quit the PC-
CARD playback function.
7. Press the RELEASE button on the remote
control.
8. Press the eject button to take the card out.
• During PC-CARD playback, the sound is switched
off.
• Noise may occur momentarily when images are
updated via PC card.
• The images recorded in BMP (not compressed)
will take a long time to playback.
• It takes about 10 seconds to playback JPEG
compressed data.
• When having an access of PC card as you want to
exchage images on PC card, there will be four red
line indicated at the edge of the screen.
• When the main and sub images are set to PC1 or
PC2, images can be selected only from the same
group of the same PC-CARD. Other group or other
card will not be able to indicate simultaneously.
• If the PC card is ejected when playing back PC
card, the image will be switched to Video 1 picture
automatically.
• During PC-CARD playback, if the incorrect
display appears, release and re-insert the PC-
CARD.
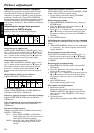
Playback picture taken by the digital camera
• The image which has been recorded in PCMCIA/
ATA card, smart media or compact flash can be
playback. The PC card adapter is required to
playback smart media and compact flash.
• Depending on the type of the digital camera,
picture will not appear correctly. Please contact
your dealer.
• PC card recorded by Digital Camera, the picture
will not be diaplayed on PC-CARD index display.